Your Water Main, Drainage & Trenchless Solution Specialists

News

Guide to Water Supply Diversions for UK Properties
Blog

Guide to Water Supply Diversions for UK Properties

A new extension, driveway, commercial unit or drainage run can quickly become complicated when a live water pipe sits in the way. This guide to water supply diversions explains what is involved in moving a supply pipe safely, who may need to approve the work, and how modern installation methods can keep disruption to a minimum.

For homeowners, landlords and property managers, the priority is usually straightforward: protect the water supply, avoid unnecessary excavation and leave the site clean and usable. The right solution depends on where the pipe runs, who owns it and what is being built around it.

What is a water supply diversion?

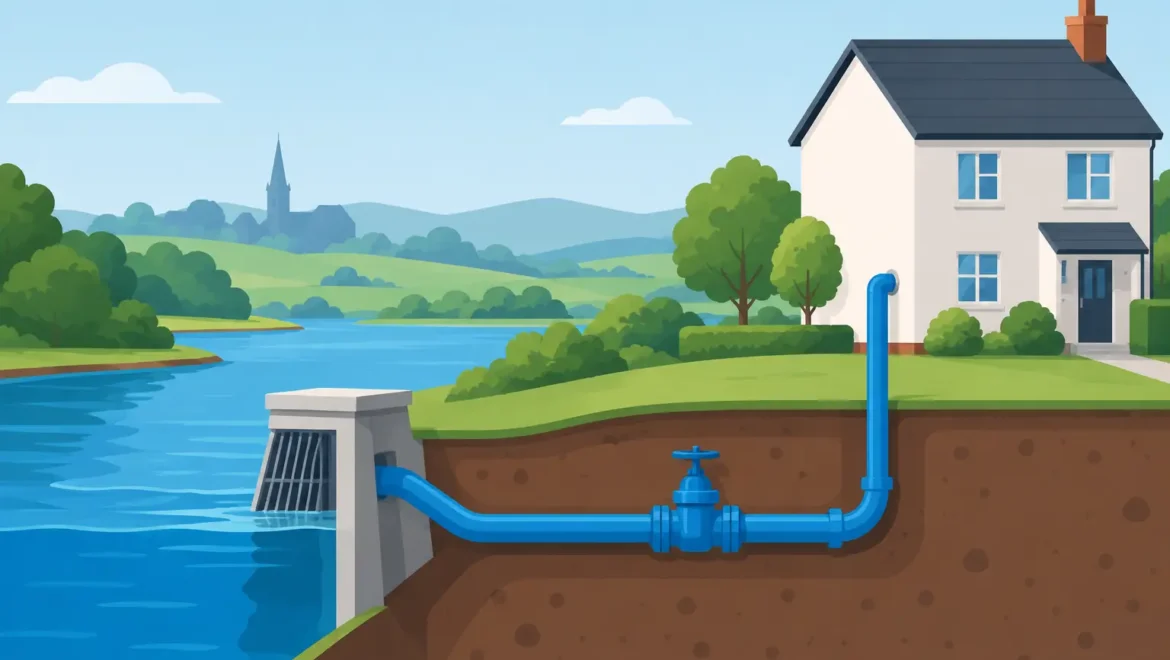
A water supply diversion is the planned relocation of an existing water pipe so that it no longer conflicts with construction work, access routes or a property boundary. The pipe may serve one house, several properties or a commercial building. It could be a private supply pipe within your land, or an asset connected to the local water company network.

Diversions are commonly needed before building an extension, constructing a garage, installing foundations, altering a driveway, creating new parking areas or redeveloping commercial land. They can also be necessary where an old supply route is leaking, too shallow, made from unsuitable material, or impossible to access for future repair.

A diversion is not always the same as a simple water pipe replacement. If the existing pipe can remain in place and a new private supply is installed on a better route, the work may be treated as a replacement or upgrade. Where a water company-owned main is affected, the process is usually more formal and requires the relevant approvals before work starts.

Why water pipes should not be built over

Building over or too close to a water pipe can create expensive problems later. If the pipe leaks, bursts or needs renewal, the repair team may have no practical way to reach it without disturbing the new structure. A pipe beneath foundations, a conservatory slab or a permanent paved finish can turn a manageable repair into major reinstatement work.

There is also a risk of damage during construction. Excavation, compaction, piling and foundation works can crack or displace a pipe, particularly older services and lead supply pipes. Even where water continues to run after the work is finished, a weakened joint may fail months later.

For commercial sites, the consequences can be wider. Loss of supply may affect tenants, staff welfare, kitchens, washrooms, production areas or fire-related systems. Planning the diversion before works begin helps avoid unplanned shutdowns and delays once contractors are already on site.

First establish what pipe you are dealing with

The most useful first step is a site assessment. Before choosing a route or method, a specialist needs to establish the pipe material, depth, size, direction of travel and the point where it connects to the public network or internal plumbing.

Ownership matters. In broad terms, the local water company is generally responsible for its public mains, while property owners are responsible for private pipework serving their premises. However, shared supplies, historic layouts and pipes crossing neighbouring land can make the position less obvious. A survey and records check can prevent assumptions that lead to aborted work or additional cost.

On older homes, especially where the incoming supply has never been upgraded, the diversion may reveal a lead pipe. In that situation, installing a new approved supply pipe can be the sensible long-term answer rather than moving ageing material to another location. It improves reliability while removing a known concern from the route of the proposed works.

Questions a survey should answer

A proper assessment should identify whether the pipe is live, where it serves, and whether there are valves or meters that will affect the work. It should also consider underground obstacles such as drains, electric cables, gas services and telecoms ducts.

The survey should then confirm whether there is enough space for a new route with suitable access for installation and future maintenance. On a tight urban plot, a route along a boundary or beneath a landscaped area may be preferable to one crossing the centre of a driveway.

Approvals and compliance for water supply diversions

If a proposed build affects a public water main or other water company apparatus, contact with the relevant water company is normally required. It may require a build-over agreement, a diversion agreement or a formally approved design. Do not assume that a pipe is private simply because it is within your boundary.

For private supply work, the new installation still needs to meet the applicable requirements for pipe material, depth, protection, connections and hygiene. Work on drinking water supplies should be completed by competent, approved contractors who understand the required standards and notification process.

A WIAPS or Watersafe-accredited contractor provides useful reassurance for property owners and facilities teams. These schemes demonstrate that the installer is assessed for work affecting wholesome water. For a managed site, it also helps when records, method statements and clear completion information are needed for compliance files.

Approval times vary. A straightforward private diversion can often be planned quickly once the route is agreed. Water company involvement, highway permits, traffic management or a diversion affecting multiple properties may take longer. Bringing in a specialist during the design stage is usually far less disruptive than finding the pipe after foundations have been marked out.

Choosing the right installation method

Traditional excavation remains the right choice in some situations. It gives direct access where a pipe is shallow, a connection needs to be exposed, or ground conditions make trenchless installation unsuitable. It can also be cost effective where the route runs through open soil with no valuable finishes to protect.

However, opening a long trench across block paving, tarmac, lawns or a finished commercial forecourt can add time and reinstatement cost. It may also restrict vehicle access and create avoidable mess around an occupied home or business.

Trenchless moling

Impact moling creates a narrow underground bore between small launch and reception holes. A new water pipe can then be installed beneath gardens, paths and driveways without excavating the whole route. For many domestic diversions, this is a fast, cost-effective option with far less surface disruption than open trenching.

Moling works best where there is a clear route and suitable ground. It may not be appropriate around congested underground services, large tree roots, difficult ground or where the exact route cannot be safely controlled. A site survey is the only sensible way to decide.

Horizontal directional drilling

Horizontal directional drilling, often called HDD, offers greater control for longer or more complex routes. It can be particularly useful for commercial sites, roads, access areas and locations where the new pipe needs to pass beneath an obstacle without disturbing the surface.

HDD is not automatically the best answer for every job. It involves specialist plant, planning and setup space, so a short, simple domestic route may be better suited to moling or a small excavation. The value lies in avoiding major reinstatement, access restrictions and downtime where the site conditions justify it.

The usual water diversion process

Once the route and approvals are clear, the work should follow an organised sequence. The existing service is located and the new route is marked. Any necessary excavations or launch pits are prepared, with care taken around known services.

The new pipe is then installed by trenchless or open-cut methods, connected using suitable fittings and pressure tested before being put into service. Where required, the pipe is flushed and disinfected. The old section can be disconnected or safely abandoned once the new supply is proven.

Good reinstatement matters as much as the pipework beneath it. A professional contractor should leave excavated areas tidy and reinstate surfaces to an agreed standard. On driveways, patios and landscaped areas, discussing the finish before work begins avoids confusion over materials, colours and joint lines.

For occupied properties, the contractor should also plan any interruption carefully. A short shutdown is often needed to make the final connection, but it should be scheduled, communicated clearly and kept as brief as possible. Businesses may prefer this work outside trading hours where practical.

What affects the cost of diverting a water supply?

There is no reliable one-price answer because the cost is driven by the site rather than pipe length alone. A short diversion beneath an open garden is very different from moving a service under a block-paved driveway beside several existing utilities.

The main cost factors are the route length, pipe depth and diameter, ground conditions, access for equipment, number of connections, surface reinstatement and whether water company approvals are required. Shared services, traffic management and restricted working hours can also affect the programme and quotation.

The cheapest quote is not always the most cost-effective route. A contractor who proposes extensive digging may appear less expensive at first, but the full cost can increase once paving, landscaping, access loss and repair time are considered. Equally, trenchless work should not be specified simply because it is less disruptive. It needs to be technically suitable for the ground and service layout.

Avoiding common diversion mistakes

The most common error is leaving the investigation until construction is ready to start. At that stage, changes to the foundation design, driveway layout or programme can be costly. Arrange a survey as soon as plans identify a possible conflict with a water pipe.

Another mistake is relying on visible stop taps or old property plans as proof of the pipe route. Underground services often differ from historic drawings, particularly on altered or extended properties. Detection, trial holes where necessary and experienced judgement provide a safer basis for decisions.

Finally, avoid treating a diversion as purely an excavation job. It is drinking-water work, often close to other buried services, and it needs correct materials, safe connection practices and proper testing. Watermains & Drains UK can assess the route, explain the practical options and provide a clear quotation for a diversion designed around your property.

If you are planning an extension, driveway or redevelopment, arrange the water supply assessment before the groundworks begin. A well-planned diversion protects the new build, keeps future repairs accessible and gives you the best chance of completing the project without unnecessary disruption.
Drain Relining Versus Pipe Replacement Explained
Blog

Drain Relining Versus Pipe Replacement Explained

A blocked drain beneath a driveway, patio or commercial entrance creates an immediate concern: will the repair mean digging up the surface you have paid to install? Drain relining versus pipe replacement is not simply a choice between a quick repair and a permanent one. Both can provide a long-lasting solution when they are specified for the right condition of pipe.

The deciding factor is the evidence inside the drain. A professional CCTV drain survey shows whether the pipe has local cracks, root ingress, open joints, collapse, poor alignment or a wider structural failure. From there, a specialist contractor can recommend the method that protects the property, controls cost and avoids unnecessary disruption.

Drain relining versus pipe replacement: the key difference

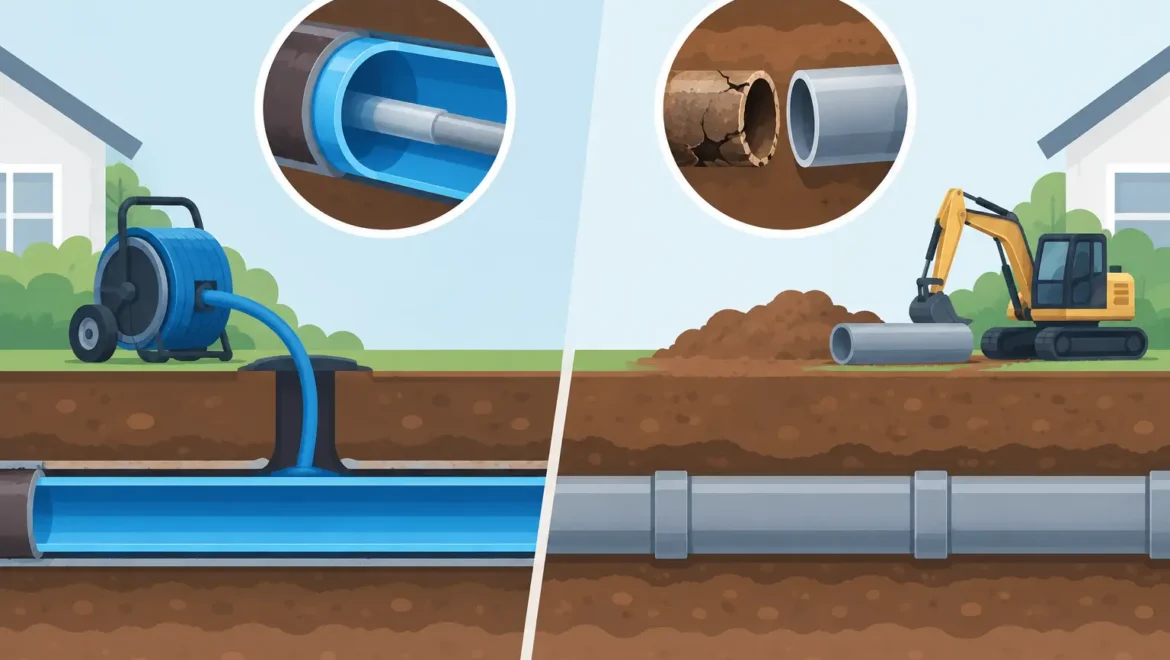
Drain relining repairs the existing pipe from within. A resin-impregnated liner is installed through access points such as manholes, then cured to form a new pipe within the damaged one. It seals cracks and joints, prevents roots entering through defects and restores the pipe without excavating its full length.

Pipe replacement involves removing and renewing the damaged drain, either through carefully planned excavation or, in suitable circumstances, trenchless installation methods. It is the stronger option where the existing pipe no longer provides a sound route for a liner, such as when it has collapsed, dropped out of line or has insufficient fall.

Neither approach is automatically better. Relining is often the least disruptive solution for a structurally sound pipe with defects. Replacement is usually the sensible investment when the drain has failed beyond what an internal repair can reliably correct.

When drain relining is the right repair

Relining is particularly effective for cracked, fractured or root-damaged drains where the pipe still holds its shape. It can also be a practical answer to leaking joints in older clay drainage, especially where the line runs below a driveway, landscaped garden, extension or finished internal floor.

The principal benefit is access. Rather than opening a long trench, the work can often be completed from existing manholes or rodding points. That means less spoil, fewer reinstatement works and less inconvenience for households, tenants, customers and staff. For landlords and facilities teams, this can reduce the time a shared entrance, car park or operational area is affected.

A full liner normally covers a continuous length of pipe. If a survey identifies one isolated defect, a patch liner may be enough. This localised repair is installed only at the damaged area and can be a cost-effective option where the rest of the drainage run is in good order.

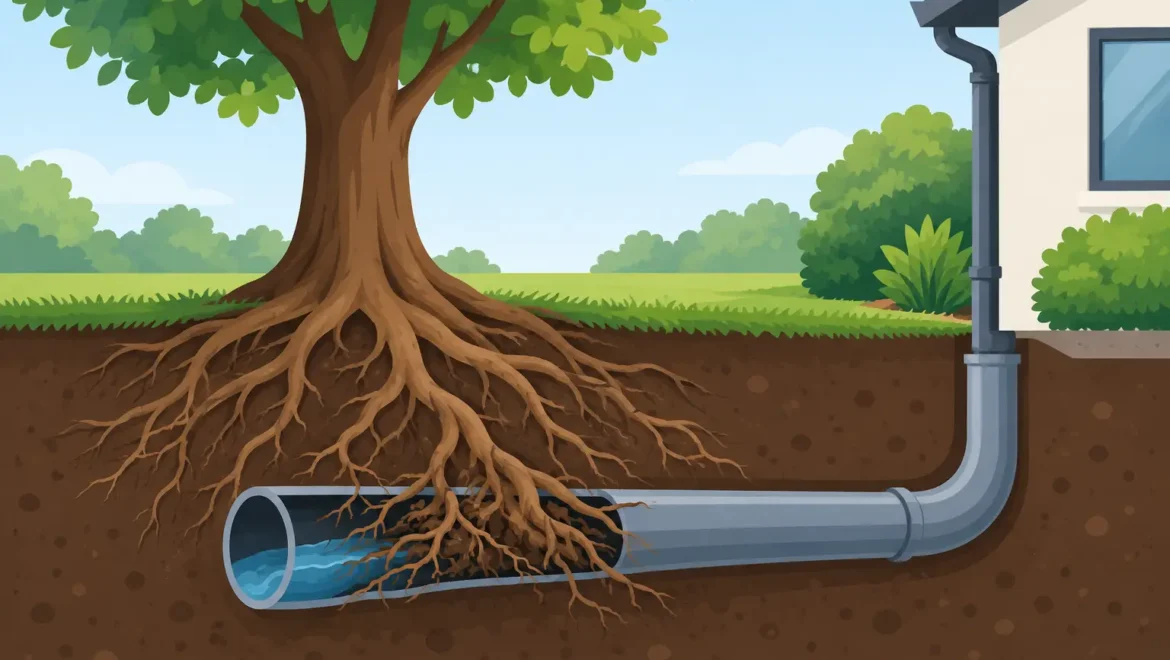
Relining also has a role in planned maintenance. A drain may still be flowing but repeatedly allow roots to enter at joints. Clearing the roots without sealing the entry point can lead to the same blockage returning. Lining addresses the underlying defect rather than only treating the symptom.

That said, relining does slightly reduce the internal diameter of the pipe. In a standard domestic drain, the reduction is usually small, but capacity must still be considered. A contractor should check the pipe size, use, existing flow performance and the type of waste passing through it before recommending a liner.

What relining cannot correct

A liner follows the route of the existing pipe. If the drain has major displacement, a severe belly, a collapse or an incorrect gradient, lining will not put it back into the proper position. It may bridge a small local issue in certain cases, but it is not a substitute for rebuilding a drain that has lost its structural integrity.

Access can also limit the method. Very tight bends, multiple connections, badly damaged chambers or a pipe blocked by hardened concrete or large debris may need excavation before a lasting repair can be completed.

When pipe replacement is the better choice

Replacement is normally recommended when a CCTV survey shows extensive collapse, displaced sections, broken pipework, significant ground movement or recurring failures along several parts of the run. These problems need the pipe to be exposed, re-levelled and renewed so that wastewater can flow correctly.

It is also the right choice when the drainage layout itself is unsuitable. For example, a property may have an old undersized line, poorly made connections, redundant pipe branches or a drain installed with too little fall. Installing a liner within that system could seal leaks, but it would not correct the design issue causing slow drainage or repeated blockages.

Traditional excavation remains necessary for some repairs, particularly where chambers need rebuilding or a collapsed section must be removed. Good planning makes a substantial difference. The affected area should be clearly identified before digging begins, with reinstatement agreed in advance for surfaces such as block paving, tarmac, concrete, turf and planted areas.

Where ground conditions and the pipe route allow, trenchless techniques can reduce the extent of excavation. This may involve creating only targeted access pits rather than opening the full length of a driveway or garden. The most suitable approach depends on utilities in the area, depth, ground type, available access and the condition of the failed pipe.

For commercial sites, replacement decisions should account for more than the pipe itself. Safe segregation, traffic management, tenant access, hygiene controls and working hours can all shape the method and programme. A competent contractor will explain these requirements before work starts rather than treating them as an afterthought.

Cost, disruption and lifespan: what really affects the decision

It is tempting to compare one quoted figure for lining with one for excavation, but the scope behind each price matters more. A drain repair quotation should account for the survey findings, access arrangements, pipe diameter and length, cleaning requirements, connections, depth, ground conditions and reinstatement.

Relining can cost less overall when it avoids lifting a driveway, patio or internal floor. The saving is not just in the repair itself but in the reduced need to remove and replace finished surfaces. It is often quicker too, which is valuable where a business needs to keep trading or a landlord needs to minimise disruption to occupants.

Replacement can be better value where defects are widespread. Repeated patch repairs on a failing drainage system can become more expensive than renewing the affected run properly. The right decision is the one that resolves the reason for the failure, not simply the option with the lowest initial cost.

Lifespan depends on correct diagnosis, materials, installation quality and how the drain is used. A professionally installed liner can provide a durable structural repair. Equally, a correctly installed replacement pipe gives the opportunity to improve falls, connections and access points for future maintenance. Ask what workmanship guarantee applies, what it covers and whether the completed drain will be tested and recorded.

Start with a CCTV drain survey, not an assumption

Drain symptoms do not always reveal the cause. Slow flow could be caused by a simple blockage, while recurring backups may point to roots, fractured clay pipes, scale build-up or a damaged connection. Guesswork risks paying for drain cleaning when the pipe needs repair, or arranging excavation where lining would have solved the issue with far less disruption.

A detailed CCTV survey provides footage and a condition report that identifies the location and nature of faults. This gives homeowners a clear basis for deciding what work is needed. For property managers, it also provides useful evidence for maintenance records, insurers, landlords and planned repair budgets.

The survey should lead to a practical recommendation. Where lining is suitable, the contractor should explain whether a full liner or patch repair is proposed and how access will be achieved. Where replacement is necessary, they should identify the excavation area, likely reinstatement and any measures needed to protect services and occupants.

Choosing a contractor for drainage repairs

Drain repair work affects hidden infrastructure, finished surfaces and, often, the day-to-day use of a property. Look for a specialist contractor that can investigate, clear, repair and reinstate rather than passing responsibility between separate trades. Relevant insurance, recognised approvals, clear method statements for commercial work and a written workmanship guarantee all reduce risk.

Watermains & Drains UK combines CCTV investigation, drain repair and no-dig methods where conditions permit, helping property owners reach a solution with the least practical disruption. A clear survey-led quotation should always set out what is included, what may affect the final scope and how the area will be left on completion.

If your drain is repeatedly blocking, showing signs of root ingress or causing damp patches and unpleasant odours, arrange an inspection before the damage becomes more disruptive. The best repair is the one that leaves you with a sound drain and no uncertainty about what is happening beneath the surface.

How to Select Drain Lining That Fits the Repair
Blog

How to Select Drain Lining That Fits the Repair

A drain can be leaking beneath a driveway, kitchen floor or landscaped garden long before there is a visible problem above ground. That is why knowing how to select drain lining starts with evidence, not a guess based on a slow-draining sink or a single blockage. The right lining repair can seal a damaged pipe without excavation. The wrong approach can leave the underlying issue unresolved.

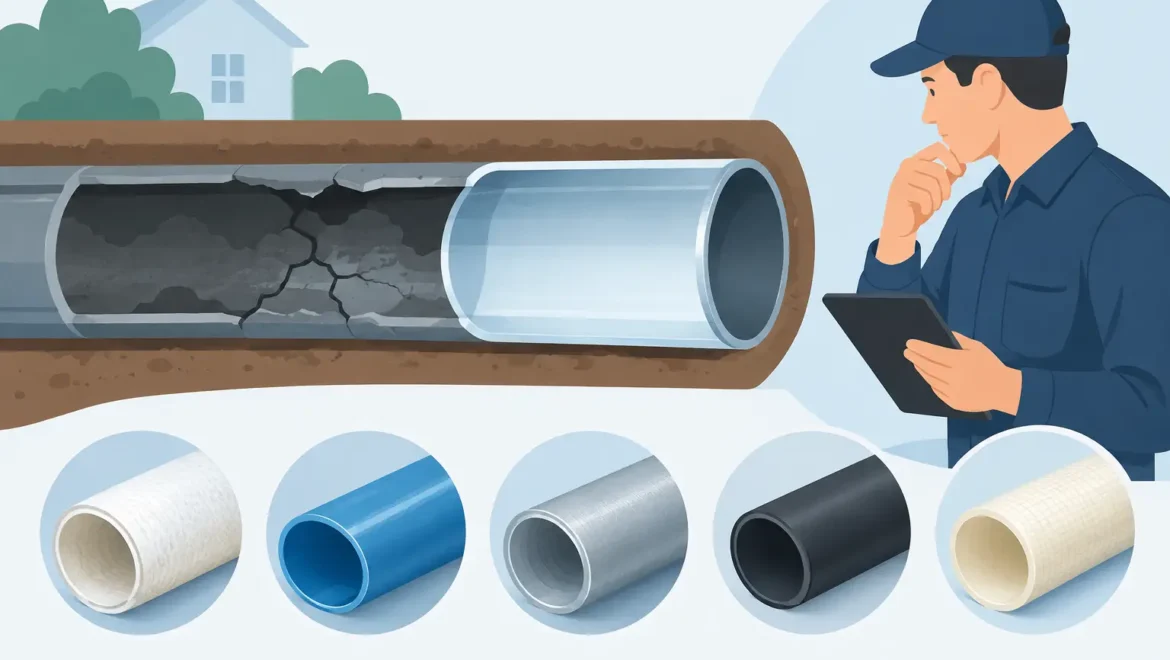
Drain lining is a no-dig repair method that creates a new pipe within the existing one. It is often a fast, cost-effective option for damaged private drains, but it is not suitable for every defect. A professional CCTV drain survey establishes whether the pipe can be lined, which method is appropriate, and whether excavation is the safer long-term solution.

Start with a CCTV drain survey

A CCTV survey is the basis of any properly specified drain lining job. A camera is fed through the drainage system to record the pipe’s condition, diameter, route, joints and connections. It should identify the exact location and extent of cracking, root ingress, displaced joints, holes, scaling, deformation and standing water.

This matters because similar symptoms can have very different causes. Repeated blockages may be caused by roots entering through an open joint, but they can also result from a collapsed section, a poorly installed connection or a pipe that has lost its fall. Lining can seal cracks and joints. It cannot correct every structural or design problem.

Before lining is considered, the drain should usually be cleaned with high-pressure water jetting. Removing fat, scale, silt and root mass gives the camera a clear view and allows the liner to bond correctly to the host pipe. If the report simply recommends lining without confirming the pipe condition, size and accessibility, ask for more detail.

How to select drain lining by the type of damage

The repair should match the defect, rather than using a full-length liner for a problem that is limited to one short section. In many cases, the choice comes down to patch lining or full drain lining.

Choose patch lining for isolated faults

A patch liner is a short section of resin-impregnated liner installed over a specific defect. It is commonly used for a cracked pipe, failed joint, small hole or localised root ingress. Once positioned and cured, it forms a watertight structural seal across the damaged area.

Patch lining is often the sensible choice where the rest of the drain is in good condition. It keeps costs proportionate, avoids unnecessary work and can usually be installed through existing access points. For landlords and commercial property managers, it can also reduce downtime where a single defective joint is affecting part of the system.

A patch is not a shortcut for a pipe that has multiple defects along its length. If the camera survey shows cracks, open joints and root entry at several locations, repeated patches can become less economical than lining the whole affected run.

Choose full drain lining for widespread deterioration

Full drain lining is used when a longer section has recurring damage or deterioration. A resin liner is pulled or inverted through the pipe, inflated against the internal wall and cured to create a continuous new lining. The result is a jointless pipe within the old pipe.

This approach is particularly useful beneath driveways, patios, extension floors and mature gardens, where excavation would involve substantial reinstatement. It can seal numerous minor fractures and defective joints in one operation while improving resistance to root ingress.

The trade-off is that full lining costs more than a local repair and requires a suitable route through the pipe. It also slightly reduces the internal diameter. In a correctly assessed domestic drain, this reduction is usually manageable, but the contractor must confirm that the finished pipe will still provide adequate flow.

Check pipe size, material and route

Drain lining is not a one-size-fits-all product. The liner, resin system and installation method must suit the pipe diameter, length and condition. Domestic foul and surface-water drains are often 100mm or 150mm, although older properties and commercial sites may have different arrangements.

The original pipe material also affects preparation. Clay drains may have open joints, fractures or displaced sections. Cast iron can suffer corrosion and internal scaling. Plastic pipework may be cracked or distorted through ground movement. Each can potentially be lined, but only if the remaining pipe provides a stable enough shape for the liner to form correctly.

The route matters just as much. Bends, changes in diameter, branch connections and limited access can influence what is possible. A liner may be installed from a manhole, rodding eye or other access point, but the contractor needs sufficient entry and exit access to work safely and accurately.

A good specification should also account for laterals. These are the smaller branch pipes connecting toilets, showers, kitchens and gullies to the main drain run. Where a full liner passes a live connection, the connection may need to be reopened from inside the pipe after curing. This is specialist work and should be planned before installation, not treated as an afterthought.

Rule out problems that lining cannot fix

Drain lining is designed to repair the inside of a pipe. It is not a cure for a drain that has fully collapsed, badly displaced or lost the correct gradient. If wastewater is pooling because the pipe has sunk, lining may preserve the poor fall rather than restore drainage performance.

Excavation may be the better answer where there is a major collapse, extensive deformation, missing pipework, severe offset joints or an inaccessible section that cannot be cleaned and prepared. Although digging is more disruptive, a targeted excavation can be the most dependable and cost-effective repair when the pipe’s structure has failed.

This is where an honest contractor adds value. The least disruptive method is not always the right method. The goal is a repair that lasts, protects the property and prevents repeat call-outs.

Consider the water flow and future use

A lining decision should take account of what the drain serves. A short patch on a lightly used garden gully drain is different from a full liner on a shared foul-water run serving several flats, a restaurant kitchen or a busy commercial unit.

Higher-use drains may need closer consideration of flow capacity, grease build-up and maintenance access. Commercial premises may also require work to be scheduled around trading hours, tenant access and health and safety requirements. For homes, the priorities are often protecting the driveway or flooring, keeping disruption low and getting toilets, showers and appliances back in use quickly.

If the pipe has a history of roots, ask why they entered in the first place. Lining can provide an excellent barrier against future ingress, but roots should be removed before the liner is installed. Any nearby trees should be considered too, particularly where roots are likely to continue exerting pressure on already weakened pipework.

Compare quotations on scope, not just price

Two drain lining quotations can look similar while covering very different work. The lower price may only allow for the liner itself, while another quotation includes jetting, root cutting, CCTV inspection, connection reinstatement and a post-repair survey.

Ask what length is being lined, whether the price is for a patch or full run, how access will be gained, and whether cleaning is included. Confirm how branches will be dealt with and whether the finished repair will be camera-checked. The post-installation survey is useful evidence that the liner is continuous, properly cured and free from obstruction.

For a managed property or insurance-related repair, clear reporting is especially valuable. It creates a record of the initial defect, the work completed and the condition of the drain afterwards. This can help with maintenance planning and demonstrate that a professionally specified repair has been carried out.

Choose a specialist contractor for no-dig repairs

Drain lining relies on accurate surveying, correct preparation and careful installation. It is not simply a matter of pushing material through a pipe. The contractor should be able to explain why lining is suitable, identify any limitations, provide a clear scope of work and leave the site clean once the job is complete.

Look for appropriate insurance, relevant drainage experience and a workmanship guarantee that is clearly set out. For homeowners, that provides reassurance that the repair is not a temporary response to the latest blockage. For facilities teams and landlords, it supports predictable scheduling, documentation and reduced disruption to occupiers.

Watermains & Drains UK assesses drainage faults with CCTV surveys and practical no-dig repair options, including local patch lining and longer drain lining installations. Where lining is not appropriate, the recommendation should be based on the pipe condition and the most reliable route to repair.

The best drain lining choice is usually the one that fixes the confirmed defect with the least unnecessary disruption – while still giving the drain a dependable working life. A clear survey and a properly explained proposal make that decision much simpler.

Commercial Drain Maintenance for UK Properties
Blog

Commercial Drain Maintenance for UK Properties

A blocked toilet in a busy office, wastewater backing up in a restaurant kitchen or foul odours in a communal corridor can quickly become more than a maintenance issue. It can interrupt trading, inconvenience tenants and create a hygiene concern. Planned commercial drain maintenance gives property managers and business owners a practical way to find issues early, keep drainage moving and avoid the cost and disruption of an emergency repair.

For commercial premises, the right approach is not simply arranging a drain clearance when there is a blockage. It is understanding how the site is used, identifying the sections of drainage most likely to fail and putting an inspection and cleaning programme in place that suits the building.

Why commercial drains need a planned approach

Commercial drainage often works harder than domestic systems. A small blockage can build quickly where many people use the same facilities, where food preparation creates grease deposits, or where older pipework serves several units. Shops, offices, warehouses, schools, care settings, restaurants, industrial sites and rental properties all have different risks, but the outcome is similar when drainage fails: lost time, complaints and potential damage to the premises.

Reactive drain unblocking has its place. If a toilet is overflowing or a gully is backing up, the immediate priority is to make the area safe and restore flow. However, repeated call-outs to the same drain usually indicate an underlying cause. That could be fat and food waste, wipes and sanitary products, tree root ingress, a displaced joint, scale build-up or a damaged section of pipe.

A planned programme helps separate a one-off blockage from a recurring defect. It also allows work to be scheduled around trading hours, tenant access and site safety requirements, rather than being carried out at the least convenient time.

What a commercial drain maintenance programme should cover

The right frequency depends on the property and its use. A restaurant or food premises may need more regular cleaning than a small office, while a property with mature trees or known drainage defects may benefit from seasonal checks. There is no benefit in paying for visits that do not address the risks on site, so the programme should follow a proper initial assessment.

Drain cleaning and clearance

High-pressure water jetting removes debris, silt, grease, scale and loose root growth from pipework. It is often the most effective way to restore capacity before a complete blockage develops. For commercial sites, cleaning may include internal waste pipes, external gullies, rainwater runs, soil stacks and connection points, depending on the drainage layout.

The work should be completed with care around customers, staff, vehicles and landscaped areas. A contractor should manage access, contain wastewater where necessary and leave the working area clean and tidy. For many sites, early morning, evening or agreed low-occupancy visits are the least disruptive option.

CCTV drain surveys

A CCTV drain survey is one of the most useful tools in commercial drainage maintenance. A camera inspection shows what is happening below ground without unnecessary excavation. It can identify root ingress, cracks, displaced joints, collapsed pipework, defective connections and persistent build-up.

For facilities teams and landlords, the survey footage and report provide a clear record of the drain condition. This is helpful when planning budgets, reporting to owners, supporting an insurance matter or demonstrating that a known issue has been investigated properly.

A survey is particularly worthwhile after repeat blockages, before acquiring or leasing a commercial property, and before resurfacing works that could make future repairs more disruptive. It is also sensible where a drain has been damaged by heavy vehicle movements or building work.

Gully, interceptor and surface-water checks

External drainage needs attention too. Blocked gullies can leave standing water around entrances, loading areas and car parks. Besides creating an unpleasant first impression, this can increase slip risks and allow water to collect against the building.

Sites with car parks, workshops or vehicle yards may have interceptors or specialist drainage arrangements that need a separate maintenance plan. These systems should not be treated as ordinary gullies. Their inspection and emptying requirements depend on the site activity and environmental obligations, so the contractor must understand what the system serves before work begins.

Warning signs worth acting on early

Drainage problems are usually easier and less expensive to deal with before wastewater escapes into the building. Staff and cleaners are often the first to notice a change, so it is useful to give them a simple reporting route.

The most common early warnings include:

  • slow-draining sinks, toilets or floor drains;
  • recurring odours from bathrooms, kitchens or external gullies;
  • gurgling noises when appliances or toilets are used;
  • water pooling around gullies, manholes or entrances; and
  • repeated blockages in the same area of the property.

These signs do not always mean the drain is collapsed. In some cases, a targeted clean will solve the problem. Where symptoms keep returning, a CCTV survey is normally the sensible next step because it avoids guessing and helps target the repair accurately.

When cleaning is not enough

Drain jetting clears an obstruction, but it cannot permanently correct damaged pipework. If the camera inspection shows cracks, open joints or local root entry, a repair may be needed to prevent the issue returning.

Patch lining can be a cost-effective option for a localised defect. A liner is installed inside the existing pipe to create a new sealed section, avoiding the need to excavate the full drain run. This is often particularly valuable beneath paved areas, access roads, landscaped grounds or busy premises where digging would cause disruption.

Full excavation remains necessary where there is a significant collapse, extensive pipe deformation or a drainage route that needs changing. Even then, careful planning matters. The best solution balances the condition of the pipe, the access available, the expected lifespan of the repair and the impact on daily operations. The cheapest immediate option is not always the most cost-effective if it leaves the site facing further call-outs a few months later.

Building a practical maintenance schedule

A dependable schedule begins with a baseline survey or site review. This should establish the location of manholes and gullies, the known drainage routes, previous problem areas and the type of waste entering the system. A kitchen producing fatty wastewater needs different controls from an office block where wipes are causing blockages.

From there, maintenance can be planned around risk. High-use food premises may require regular preventive cleaning, while a managed office or light industrial unit may only need periodic inspections and prompt action when warning signs appear. Properties with tree-lined boundaries are often best checked before and after periods of strong root growth.

Keep records of visits, survey findings, jetting work and repairs. A simple history makes it easier to spot patterns, justify planned expenditure and avoid repeatedly treating the same symptom. It also gives a new facilities manager or managing agent a clearer picture of the site.

Choosing the right drainage contractor

Commercial work needs more than a van and drain rods. The contractor should be able to respond quickly when a problem is urgent, while also providing clear reports and quoted repair options when a longer-term solution is needed. Ask how access will be managed, whether CCTV evidence is supplied, what reinstatement is included and whether work can be scheduled to reduce disruption to staff, tenants and customers.

For water supply and drainage work, recognised approvals, suitable insurance and a clear workmanship guarantee offer useful reassurance. They show that the contractor understands the standards expected on occupied properties and can take responsibility for the work completed.

Watermains & Drains UK provides reactive and planned drainage services for commercial properties across the North West, including drain unblocking, CCTV surveys, drain repairs and patch lining. The focus is on finding the cause, recommending the most practical repair and completing work with the least disruption possible.

A well-maintained drain is rarely noticed, which is exactly the point. By arranging inspections before recurring issues become emergencies, property managers can protect their premises, keep occupants comfortable and deal with drainage work on their own timetable rather than a blocked drain’s.

Lead Plumbing: When to Replace Your Water Pipe
Blog

Lead Plumbing: When to Replace Your Water Pipe

A lead water pipe is easy to overlook because most of it sits underground or behind internal fittings. Yet lead plumbing can affect drinking water quality, restrict flow and create an avoidable concern when you come to sell, let or renovate a property. For many homes across the North West, particularly those built before the 1970s, replacing the private lead supply pipe is a practical, long-term improvement rather than a cosmetic upgrade.

The right solution is not always a major excavation project. Modern trenchless installation methods can often install a new water supply with far less disturbance to driveways, paths, gardens and paved areas. The first step is understanding where lead may be present, what responsibility sits with the property owner and how a replacement should be planned.

What is lead plumbing?

Lead plumbing usually refers to the old lead pipework used to bring water from the public water main into a property. In most cases, the relevant section is the private supply pipe running from the boundary stop tap, or communication pipe connection, to the internal stop tap inside the building.

Lead was widely used because it was flexible and durable underground. It is no longer used for new drinking water supplies. Over time, water chemistry can cause small amounts of lead to dissolve into the water, particularly where water has been standing in the pipe for several hours.

A property may have a mixture of materials. For example, an internal stop tap could be connected to a short length of lead pipe, while a previous owner has replaced part of the external run with plastic. A proper inspection matters because replacing only one section may not resolve low flow or remove all lead pipework from the private supply.

How to tell if you have a lead water supply pipe

The most useful place to look is around the internal stop tap, commonly found beneath the kitchen sink, in a utility room or close to where the water supply enters the property. Do not confuse the water supply with gas pipework, and do not disturb any pipe if you are unsure what it serves.

Lead pipe tends to be dull grey, soft-looking and slightly uneven in shape. It does not attract a magnet. If carefully scratched on an exposed section, it often reveals a brighter silver-coloured surface beneath. Older lead pipes may also have swollen or wiped joints rather than modern compression fittings.

Age is another clue. Homes built before 1970 are more likely to have had lead supply pipes, although later replacement work cannot be assumed. Victorian and early twentieth-century properties in Manchester, Stockport, Warrington and Cheshire frequently retain original or partially replaced services.

Water pressure can offer a further indication, but it is not proof. Lead pipes were often installed with a smaller internal diameter than modern polyethylene pipes. Mineral build-up, old stop taps and shared supply arrangements can all reduce the available flow. If taps slow noticeably when another appliance is running, the supply pipe may be part of the issue.

Why replacing lead plumbing is worth considering

The main reason is drinking water quality. Water companies monitor their networks and take measures to reduce lead exposure, but replacing private lead pipework removes a potential source within your own property. This is especially relevant for homes with young children or pregnant residents, where avoiding unnecessary lead exposure is sensible.

There are also practical property benefits. A new water supply pipe can improve flow to taps, showers and combination boilers where an undersized or restricted old pipe is holding the system back. It can reduce the likelihood of pinhole leaks and recurring repairs on ageing pipework. For landlords and property managers, it is a clear improvement to record within planned maintenance and asset information.

Replacement can also make future projects simpler. If you are extending a kitchen, converting a property, adding bathrooms or upgrading heating equipment, dealing with the incoming supply first can prevent disruption later. The best time to renew a buried pipe is often before a new driveway, patio or landscaped garden is installed.

That said, a lead pipe does not automatically mean there is an emergency. The priority depends on the pipe condition, household circumstances, water test results where available, planned building work and whether pressure or leaks are already causing problems. A site survey allows the work to be scoped properly rather than relying on guesswork.

Who is responsible for the pipe?

Responsibility is usually divided between the water company and the property owner. The water company generally maintains the public main and its section of pipe up to the boundary point. The property owner is normally responsible for the private supply pipe from that point into the building.

The exact arrangement varies by property. Some older terraces and converted buildings may have shared supply pipes, where more than one home is served by the same connection. Flats, commercial units and mixed-use sites can be more complex again. Before work begins, a specialist contractor should establish the route, identify the likely connection point and consider whether approvals or coordination with the local water company are required.

Using an approved contractor provides reassurance that the installation is designed for potable water use and notified correctly where necessary. Water Regulations approval is not a detail to overlook. It helps protect the water supply and ensures the new connection, fittings and backflow protection are suitable for the work.

Replacing a lead water pipe with minimal disruption

Traditional replacement involves opening a continuous trench from the house to the boundary. This can be appropriate where access is straightforward, the route is short or other excavation work is already planned. It gives direct visibility of the ground, but it can mean lifting paving, disturbing lawns and allowing time for reinstatement.

For many properties, trenchless moling provides a cleaner alternative. A pneumatic mole creates a narrow bore underground between small launch and reception pits. The old lead supply can then be replaced with a modern polyethylene pipe, avoiding the need to excavate the full length of the route.

This method is particularly useful beneath driveways, garden paths and landscaped areas. It is not suitable for every site. Ground conditions, underground services, access, pipe route and depth must be assessed first. Tree roots, large obstructions, very shallow existing services or complex crossings may mean that a combination of moling and carefully planned excavation is the safer option.

For longer runs or more demanding commercial work, horizontal directional drilling may be considered. This method offers controlled installation beneath roads, car parks and other sensitive surfaces, subject to the site survey and required permissions.

A professional installation is about more than pulling in a new pipe. The route must be planned around existing gas, electric and drainage services. The new supply needs suitable depth and protection, a compliant connection, pressure testing and careful reinstatement of the small excavation points. Inside the property, the incoming pipe and stop tap should be connected neatly and left accessible for future isolation.

What happens during a lead pipe replacement?

A clear survey should come before any quote. The contractor will assess the visible pipework, locate the internal stop tap, discuss the likely route and inspect external surfaces that need protecting. For difficult sites, service plans, trial holes or additional investigation may be needed before confirming the method.

On the day, water is normally isolated for the final connection period rather than throughout the entire job. The team will protect working areas, create any required access pits and install the new pipe using the agreed method. Once connected, the pipe is tested and flushed before the water supply is restored.

Most straightforward domestic replacements can be completed quickly, often within a day, though timescales depend on length, access, connection arrangements and unexpected ground conditions. A good contractor will explain what is included in the quotation, including reinstatement, notification, testing and any exclusions such as specialist paving or landscaping finishes.

Choosing the right contractor

Lead pipe replacement involves drinking water regulations, buried services and reinstatement. It should be treated as specialist infrastructure work, not simply as a plumbing alteration. Look for clear evidence of water-industry approval, appropriate public liability insurance and experience with trenchless methods.

Ask how the route will be checked for buried services, whether the price includes the final connection and reinstatement, and what guarantee applies to the workmanship. For landlords, commercial sites and managed properties, request the documentation needed for your records, including method statements where appropriate.

Watermains & Drains UK provides lead pipe replacement and new water supply installation with modern no-dig methods where site conditions allow. WIAPS and Watersafe approval, £10m public liability insurance and a 25-year workmanship guarantee give property owners and facilities teams practical assurance that the work is being handled correctly.

If your property may still have lead plumbing, arranging a professional survey is a sensible way to replace uncertainty with a clear plan. A new supply pipe can be installed with far less disruption than many homeowners expect, leaving you with cleaner water infrastructure and one less hidden issue beneath the ground.

How to Test Household Water Pressure Safely
Blog

How to Test Household Water Pressure Safely

A shower that drops to a trickle when someone opens a kitchen tap is more than an everyday annoyance. It can point to restricted pipework, a failing pressure-reducing valve, a leak, or an old incoming supply that cannot meet the property’s demand. Learning how to test household water pressure gives you useful evidence before arranging repairs, replacing a lead service pipe or upgrading a water supply.

Pressure is only one part of the picture. A good pressure reading does not always mean you have enough water available at busy times, while a poor reading may be caused by an issue inside the property rather than the water main in the road. The aim is to test carefully, compare the results and identify when a specialist investigation is the sensible next step.

What water pressure tells you

Water pressure is the force that pushes water through your pipes. It is normally measured in bar. Flow rate is different: this is the volume of water delivered over a set time, usually litres per minute. Both matter.

For example, a pressure gauge may show a healthy static reading when every outlet is off. But if the pressure falls sharply when a tap, shower or washing machine runs, there may be a restriction in the incoming pipe, a partly closed stop tap, undersized pipework or insufficient available flow from the supply.

Many homes operate comfortably at around 1 to 3 bar, but there is no single reading that proves every property is fault-free. The number can vary with the local network, the height of your property, demand in the area and whether your home has equipment such as a combi boiler, pumped shower or unvented hot water cylinder. What matters most is whether the pressure and flow are suitable for your fixtures and remain reasonably stable.

How to test household water pressure with a gauge

The most reliable simple check uses a pressure gauge that screws onto an outside tap, washing-machine connection or suitable threaded tap outlet. A gauge is inexpensive, but it must be fitted correctly to avoid leaks and inaccurate readings.

Before starting, choose a time when the property is quiet. Avoid using water during the test and ask anyone else in the home not to flush toilets, run appliances or turn on taps. If you live in a flat or a busy shared building, repeat the test at different times of day because demand can change the result.

First, make sure the external stop tap is fully open. Then attach the gauge to a cold-water outlet, ensuring the washer is in place and the connection is hand-tight. Open the tap fully and let the reading settle. This is your static pressure, meaning the pressure at the outlet with no other water being used.

Write down the result, then leave the gauge in place and ask someone to run a cold tap elsewhere in the property. Note how far the gauge drops. Repeat while the shower is running or a toilet is filling. A small reduction is normal. A significant, sustained fall suggests the system may struggle when demand increases.

For a clearer picture, repeat the test at morning and evening peak periods. Keep a note of the location, time, static reading and reading under demand. This information helps a water supply contractor diagnose the problem without relying on guesswork.

Check flow rate as well as pressure

A bucket-and-timer test is a useful companion to the gauge test. Use a container with known volume markings, place it under a cold tap and time how long it takes to fill. Multiply the result to calculate litres per minute. For instance, 10 litres collected in 30 seconds equals 20 litres per minute.

Test the kitchen cold tap, the outside tap and any outlet that appears weak. Do not use a bath tap fitted with a mixer if you are trying to isolate the cold supply, as the result may be affected by the hot-water system.

Good flow at the kitchen tap but poor flow at one shower often means the fault is local to that shower – perhaps a blocked head, cartridge, hose or pipe run. Weak flow throughout the house is more likely to involve the incoming service pipe, stop tap, meter, filter, pressure-control equipment or wider supply.

Signs your test points to a supply problem

One low reading on its own is not a diagnosis. However, certain patterns warrant professional investigation, particularly where the problem is new or getting worse.

  • Water flow is weak at several cold taps, not just one fixture.
  • Pressure drops dramatically whenever another outlet is opened.
  • The property has an old lead or galvanised incoming water pipe.
  • Water is discoloured, air-filled, noisy or intermittently unavailable.
  • Your water bill has risen unexpectedly, or there are signs of damp ground near the incoming supply route.

Older lead pipes can become restricted internally over time and are often smaller than modern replacement pipes. Replacing them with a correctly sized new water supply can improve flow and remove the health concern associated with lead pipework. A new supply must be designed around the property’s demand and installed in line with the relevant water regulations – simply fitting a larger pipe does not automatically solve every pressure issue.

Common causes of low household water pressure

Start with the straightforward checks. Confirm that the internal stop tap, usually found beneath the kitchen sink or close to where the supply enters the property, is fully open. A stop tap may look open while its internal mechanism is corroded or restricted, especially in older homes. Do not force a stiff valve, as this can cause it to leak or fail.

Check any visible filters, water softeners or pressure-reducing valves. These can restrict flow when blocked, incorrectly set or faulty. If your property has a combi boiler, compare hot and cold performance. Strong cold water with weak hot water usually indicates a boiler, cylinder or hot-side issue rather than an incoming mains problem.

Leaks are another possibility. A leak on the private supply pipe between the boundary and your home may reduce available pressure and flow, sometimes without obvious surface water. Specialist leak detection can locate the issue with minimal excavation, allowing a targeted repair or a replacement supply where that is the more cost-effective long-term solution.

What if the pressure is too high?

Low pressure receives most attention, but excessive pressure can also damage appliances, hoses, filling valves and taps. Warning signs include banging pipes, dripping pressure-relief outlets, repeatedly failing toilet valves or leaks appearing around appliance connections.

If a gauge shows a consistently high reading, do not attempt to adjust unfamiliar valves or interfere with an unvented cylinder. These systems contain safety controls and should only be assessed by appropriately qualified professionals. A failed or incorrectly set pressure-reducing valve may need repair or replacement, but the correct solution depends on where it sits in the system and what equipment it protects.

When a professional survey saves time

A specialist survey is worthwhile when simple checks do not explain the problem, when an old service pipe is suspected, or when you are planning an extension, additional bathroom or commercial fit-out. The contractor can assess pressure and flow, inspect the incoming pipe route, consider pipe diameter and identify restrictions before recommending work.

For homes with driveways, landscaped gardens or paved frontages, trenchless moling can often install a new water supply beneath the surface with far less excavation than traditional open trenching. It is not suitable for every ground condition or route, but where appropriate it can reduce mess, shorten the programme and limit reinstatement costs.

Watermains & Drains UK carries out water supply investigations and replacement installations with a focus on clear findings, compliant work and minimum disruption. For landlords and facilities teams, recorded test results and a defined scope of work also make it easier to plan repairs around tenants, trading hours and access requirements.

If your readings are inconsistent, keep the notes from your tests and resist the temptation to treat a pressure number as the whole answer. The most useful next step is to match the evidence to how your property actually performs, then have any persistent supply issue assessed before it causes further disruption.

Property Manager Leak Response Guide in 7 Steps
Blog

Property Manager Leak Response Guide in 7 Steps

A leak reported at 7am can become a flooded flat, damaged ceiling and tenant complaint before lunchtime. This property manager leak response guide sets out the practical decisions that protect people, limit property damage and keep the repair process moving – whether the issue is a dripping supply pipe, an external water main leak or wastewater backing up through a drain.

The first aim is not to diagnose every technical detail from a telephone call. It is to make the property safe, stop the flow where possible and get the right specialist on site without creating unnecessary disruption for tenants, neighbours or your wider operation.

1. Establish whether there is an immediate risk

Ask the occupier where water is visible, whether it is clean or contaminated, and whether the flow is active. A steady drip beneath a kitchen sink needs attention, but water coming through a light fitting, pooling near electrical equipment, or sewage escaping from a drain needs an urgent response.

Instruct the tenant or site contact not to touch electrical fittings, sockets or appliances affected by water. If water is close to electrics, isolate the supply only if it can be done safely and arrange a qualified electrician where required. For significant flooding, make sure people avoid the affected area and protect any vulnerable residents.

A simple distinction helps when triaging the call. Clean water from a burst or leaking supply pipe is still damaging, but foul water from a blocked or damaged drain presents a hygiene risk and should be treated as such. Do not ask occupants to clear sewage or lift drain covers themselves.

2. Stop or contain the water safely

If the leak is inside the property and the stop tap is accessible, ask the occupier to turn it clockwise. They should not force a seized valve. In blocks, commercial premises and older houses, the relevant isolation point may be in a communal cupboard, plant room or external boundary box, so keep its location recorded in your property file.

Where it is safe to do so, tenants can move small valuables away from the area and use towels or containers to contain a minor leak. They should not remove ceiling sections, disturb swollen finishes or attempt a temporary repair on pressurised pipework. Those actions can worsen the damage or conceal the route of the leak.

For an external leak, look for unexplained wet patches, a constantly damp driveway, a drop in water pressure, soil movement or water running from the ground when no appliance is in use. If the property is on a metered supply, an unusually high reading with all internal outlets turned off can also point to a concealed leak.

3. Record the incident before repairs begin

Good records support insurance claims, show that you acted promptly and help contractors arrive prepared. Ask the tenant, caretaker or site manager for clear photographs and short videos showing the affected area, the source if visible, and the extent of damage. Record the time the issue was reported, who attended, the advice given and when the water was isolated.

It is also useful to note whether the leak has affected another flat, a neighbouring property, communal areas or business operations. In leasehold and commercial buildings, responsibility may sit with the landlord, managing agent, freeholder or tenant depending on the location of the pipework and the terms of the lease. You do not need to resolve liability before making the site safe, but you do need a clear audit trail.

Avoid authorising cosmetic reinstatement too quickly. Plasterboard, flooring and joinery may retain moisture after the visible leak has stopped. A proper assessment can prevent mould, staining and repeat work later.

4. Choose the right contractor for the fault

A general maintenance contractor may be appropriate for a visible tap connection or minor internal plumbing defect. However, recurring low pressure, unexplained water loss, a leak beneath a driveway or a suspected issue on the incoming supply calls for leak detection and water supply specialists.

The same principle applies to drainage. A blocked toilet may be a local obstruction, but repeated backing-up, foul smells, external flooding or multiple affected outlets can indicate a damaged, displaced or root-intruded drain. CCTV drain surveying provides evidence of what is happening underground and avoids guessing at the repair method.

For property managers, the best appointment is not always the cheapest first call-out. A contractor who can investigate, repair and reinstate may reduce tenant visits, delays and handovers between different trades. Ask whether they can provide photographs, a clear scope of works, method statements where needed, and a written record of the completed repair.

Check approvals and site standards

Where work involves the water supply pipe, use a contractor with the relevant water-industry approvals. WIAPS and Watersafe registration provide useful assurance that work is carried out to the expected standard. For managed portfolios, public liability cover and workmanship guarantees also matter, particularly where access routes, communal areas or neighbouring land are involved.

The practical standard on site matters just as much. Contractors should explain what they have found, protect the working area, keep tenants informed and leave the site tidy. A fast repair is valuable, but a poorly managed repair can create a second complaint.

5. Reduce disruption when pipework is underground

Traditional excavation is sometimes necessary, particularly where pipework is severely damaged or access is restricted. But it is not the only option. Trenchless moling can install or replace a water supply pipe beneath gardens, paths and driveways with small entry and exit pits, rather than opening a continuous trench.

This can be particularly useful for occupied homes, rented properties and commercial sites where a long excavation would affect access, landscaping or paving. Horizontal directional drilling may be suitable for more complex routes and larger installations. The right method depends on ground conditions, pipe route, existing services and the condition of the affected supply.

Do not promise tenants that there will be no disruption at all. There may still be a planned water shut-off, noise, access requirements and local excavation. The advantage is that disruption can often be shorter, cleaner and easier to reinstate than a conventional dig.

6. Keep tenants and stakeholders properly informed

Silence is often what turns a manageable repair into an escalation. Give residents a named contact, a realistic attendance window and practical instructions, such as keeping pets away from the work area or clearing access to a stop tap. If water needs to be turned off, state when it will happen, how long it is expected to last and whether toilets or kitchen facilities will be affected.

For commercial properties, consider the operational impact early. A leak near a reception area, kitchen, server room or customer space may require temporary protection, out-of-hours work or a phased repair. The most cost-effective solution depends on the severity of the fault and the cost of interruption, not just the contractor’s initial quote.

Once work is complete, confirm what was repaired, whether further drying or reinstatement is required, and who owns the next action. If the issue was a shared drain or supply, notify affected parties in writing so that responsibilities do not become unclear later.

7. Prevent the next emergency

The strongest property manager leak response guide is one that reduces the number of emergency calls. Review each incident for the underlying cause. Recurrent leaks at the same property may point to ageing supply pipes, high pressure, poor previous repairs or an unaddressed underground fault. Recurring drainage problems may justify a CCTV survey rather than another temporary unblock.

Keep an accessible record for every building covering stop tap locations, utility isolation points, drainage plans where available, previous surveys, contractor reports and photographs. For vacant properties, arrange regular checks during cold weather and ensure tenants know how to report a leak out of hours.

A planned replacement of old lead or deteriorating water supply pipework can also remove a persistent risk rather than repeatedly funding reactive repairs. Watermains & Drains UK can investigate concealed leaks, install replacement water supplies and carry out drainage repairs using no-dig methods where suitable, helping to keep occupied properties cleaner and easier to manage.

When the next call comes in, focus first on safety, water control and clear evidence. A calm response, the right specialist and honest communication will usually protect the property far better than a rushed repair based on assumptions.

Burst Drain Repair Guide for Homes and Sites
Blog

Burst Drain Repair Guide for Homes and Sites

Water appearing across a patio, sewage backing up into a gully, or a suddenly sinking section of driveway needs prompt attention. This burst drain repair guide explains what to do first, how professionals identify the fault, and why the right repair method can save a great deal of disruption later.

A drain does not normally “burst” in the way a pressurised water pipe does. More often, the pipe has cracked, separated at a joint, collapsed, or been damaged by tree roots or ground movement. The result can still be urgent: wastewater may escape into the ground, blockages can develop, and foundations, paving or internal floors may be affected.

Burst drain repair guide: make the area safe first

Keep people, pets and vehicles away from pooling water, soft ground and sunken paving. If the water is foul-smelling, discoloured or contains toilet waste, treat it as contaminated. Avoid touching it, keep children away, and do not attempt to remove a drain cover if it is under pressure or surrounded by unstable ground.

Stop using appliances and fittings that discharge into the affected drain. That may include toilets, showers, washing machines, dishwashers and sinks. Reducing the flow into the system prevents the overflow becoming worse while the fault is investigated.

If water is pouring out rapidly and looks clean, the issue may be a burst water supply pipe rather than a drainage defect. Turn off your internal stopcock if it is safe to do so. If the leak is outside the property boundary or you cannot isolate it, contact your water supplier as well as a specialist contractor. Clean water and foul water faults need different responses, and diagnosing that distinction early avoids wasted time.

Take clear photographs from a safe distance before any clean-up begins. Record where water is emerging, whether drains are backing up, and any visible damage to paths, lawns or walls. This information can help a contractor assess urgency and may also be useful for an insurance claim.

Signs the drain has failed below ground

Some drainage failures are obvious. Others start as a recurring blockage that returns shortly after clearance. A drain that repeatedly blocks at the same point is rarely solved by rodding alone, particularly where the pipework is old, brittle or affected by root ingress.

Look out for unpleasant smells around external gullies, damp or unusually lush patches of lawn, water collecting where it never has before, and cracks or depressions in paving. Inside a property, slow-draining fittings, gurgling noises and wastewater rising in a toilet or shower can point to a restriction or damaged pipe downstream.

For landlords and facilities teams, a sudden increase in drainage call-outs at one building should be treated as a pattern, not a series of isolated incidents. A survey can identify the underlying defect and provide a clear record of the repair scope, which is useful for planned maintenance, tenants and insurers.

Do not rely on chemical drain cleaners

Chemical products may do little or nothing where a pipe is cracked, displaced or collapsed. They can also create a risk for anyone who later has to clear or survey the drain. Avoid pouring more chemicals into a system that is backing up. Mechanical clearance and CCTV inspection are safer, more informative routes to the correct repair.

How a professional diagnosis works

The first priority is often to clear any immediate blockage and restore safe drainage where possible. High-pressure water jetting or specialist mechanical equipment can remove debris, scale and root mass, allowing the pipe to be inspected properly.

A CCTV drain survey then sends a camera through the pipework. It can show cracked sections, displaced joints, root ingress, holes, fractures, poor gradients and collapse. It also establishes the pipe diameter, depth and location of the defect. This matters because a visible puddle is not always directly above the damaged section.

A good survey-led diagnosis prevents guesswork and unnecessary excavation. It also allows the contractor to explain whether a localised repair is sensible or whether the pipe has deteriorated over a longer run. The least disruptive option is not always the cheapest initial option, but it is often the better value where access, reinstatement and future reliability are considered.

Choosing the right burst drain repair

The best method depends on the condition of the pipe, the length of damage, access and what sits above it. A cracked pipe under a driveway requires a different approach from a collapsed clay drain in an open garden.

Patch lining for localised damage

Patch lining is a no-dig repair for a specific defective section. A resin liner is positioned inside the existing pipe and cured to form a new, watertight section. It is particularly effective for isolated cracks, leaking joints and limited root ingress where the host pipe remains structurally sound.

This method avoids digging up much of the surface above the drain. For homeowners, that can mean keeping a driveway, patio or landscaped garden largely intact. For commercial premises, it can reduce closure time and disruption around entrances, car parks and service areas.

Patch lining is not suitable for every fault. If the pipe has fully collapsed, has severe deformation, or has widespread defects along its length, a more substantial repair may be required.

Full lining for longer defective runs

Where several sections are cracked or the pipe is deteriorating along a longer length, full-length drain lining can provide a continuous new pipe within the old one. This is another trenchless option and can be an efficient solution when access chambers are available and the existing pipe retains enough shape to accept a liner.

There can be limitations around badly displaced pipes, sharp bends and connections. A CCTV survey and site assessment are needed before committing to this approach.

Excavation and replacement

Excavation remains the correct answer when a drain has collapsed, has lost its line or level, or cannot be repaired internally. A competent drainage contractor will locate the defect accurately first, excavate only the required area where possible, replace the damaged pipework and test the new installation before reinstatement.

The quality of reinstatement matters as much as the pipe repair. Paths, driveways and landscaped areas should be left safe, tidy and properly finished. Where a trenchless method is unsuitable, careful excavation planning still keeps the disturbance to a minimum.

Responsibility, insurance and timing

Responsibility for drains can depend on where the pipe runs and whether it serves only your property or several properties. In many cases, pipework within your boundary serving your home is private drainage, while shared sewers and public sewers may be the responsibility of the water company. Older sites, converted buildings and shared access arrangements can be less straightforward.

Do not delay urgent mitigation while ownership is being clarified. Stop using affected drainage where necessary, document the issue and arrange an inspection. If there is damage to buildings, contents or hard landscaping, contact your insurer early and keep copies of reports, photographs and invoices.

For a landlord or business, keep records of the survey, repair method, materials and testing. Clear documentation helps demonstrate that the issue was addressed professionally and supports future maintenance planning.

What to expect from a specialist drainage contractor

You should receive a clear explanation of the fault, the recommended repair and any realistic alternatives. For non-emergency work, a written quotation should set out the scope, access requirements, excavation or lining method, and reinstatement arrangements. If the repair affects a busy home or operational site, ask how the contractor will manage access, cleanliness and service interruption.

Watermains & Drains UK uses CCTV investigation and no-dig repair methods where they are appropriate, helping property owners avoid unnecessary excavation. As WIAPS and Watersafe approved specialists, with £10m public liability insurance and long-term workmanship guarantees, the focus is on a repair that is practical, properly evidenced and built to last.

A burst or failed drain is rarely a problem to watch and wait on. Acting early protects the property, reduces the risk of contamination and gives you more repair options. The right first step is a safe inspection and an accurate diagnosis, followed by the least disruptive repair that genuinely suits the condition of the pipe.

How to Locate an External Stop Tap Safely
Blog

How to Locate an External Stop Tap Safely

A burst pipe does not wait for a convenient time. If water is running across a driveway, coming up through a path, or flooding an empty property, being able to locate an external stop tap can limit damage while the right repair is arranged. It is also useful before planned work on a water supply pipe, a new extension, or a suspected underground leak.

An external stop tap, often called a boundary stop tap or stop valve, controls the water supply entering your property from the public water main. It is different from the internal stopcock, which is normally found inside the building. Knowing which valve you are looking for – and when not to touch it – can save time, water and unnecessary disruption.

What is an external stop tap?

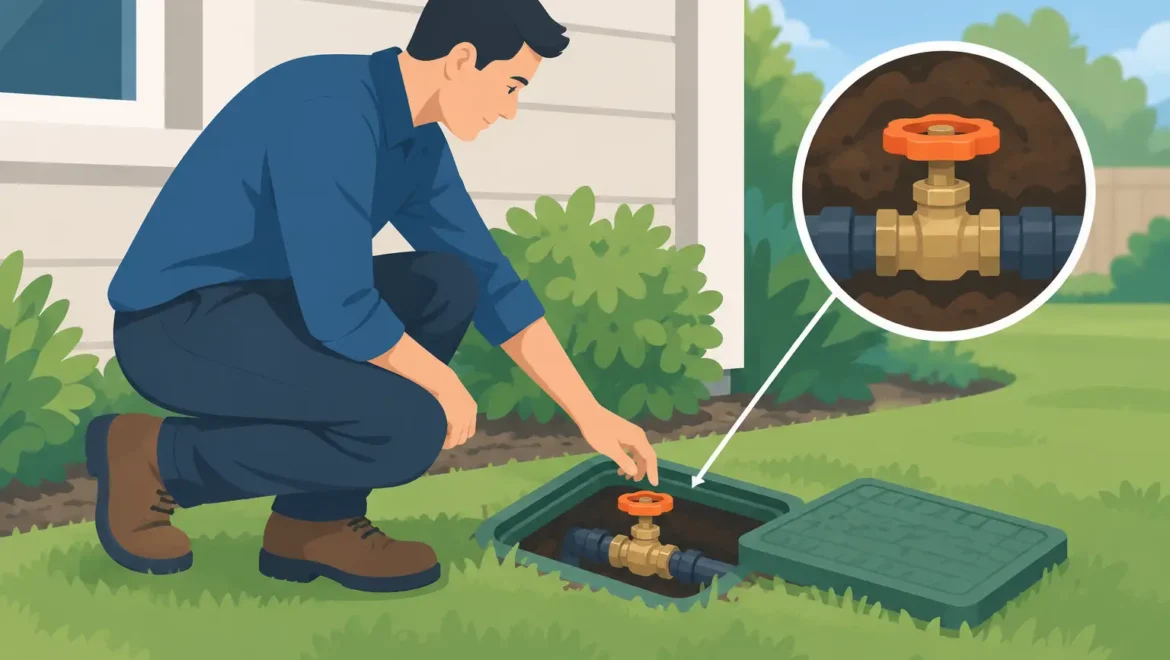
The external stop tap is usually housed below ground in a small access chamber, often near the boundary of a property. It provides a way to isolate the incoming supply before it reaches the internal plumbing. Depending on the age and layout of the property, it may serve one home, several properties, or a commercial unit.

Most chambers have a removable lid at ground level. Underneath, there may be a valve with a square-headed spindle or a small handle. Some are clearly marked “water”; many are not. Older chambers can be hidden by soil, overgrown grass, decorative stone, tarmac repairs or a driveway that has been resurfaced over the years.

The precise ownership and responsibility for the pipework can vary, particularly with shared supplies and older properties. That is one reason to treat an unknown external valve carefully. If you are unsure whether it serves your property alone, a neighbouring property or the water company’s network, professional advice is the sensible option.

Where to locate an external stop tap

Start by looking between the pavement or road and the front of the property. The stop tap is commonly installed close to the property boundary, where the incoming service pipe crosses from the public main towards the building. On many homes, this means the front garden, verge, driveway edge or footpath.

Look for a small square, rectangular or round cover set into the ground. It may be plastic, metal or concrete, and is usually much smaller than a drainage manhole cover. Covers can sit flush with paving or be tucked beside a wall, fence, gatepost or utility meter box.

At properties without a front garden, check the pavement immediately outside the boundary. Do not lift utility covers in the public highway or attempt work where you could obstruct pedestrians or traffic. The relevant water company may need to confirm the location of its equipment.

For properties with a side entrance, long driveway or rural setting, the valve may be closer to the point where the supply pipe enters the land rather than directly in front of the house. Newer developments can have water meters and stop valves grouped in purpose-made boundary boxes. Older terraces sometimes have valves in less obvious shared positions.

Useful clues from the property layout

The route of your internal stopcock can provide a clue. It is often located where the mains water first enters the house, such as under the kitchen sink, in a utility cupboard or near the front of the building. The external supply will normally approach from the same general direction, although pipe alterations over decades can make this less straightforward.

Water meters may also be installed beside or inside the external chamber. If you have a meter and it continues to register usage when every tap and appliance is off, this can indicate a leak on the supply pipe. Do not assume the meter itself identifies the correct valve, particularly where properties share a supply.

If you are a landlord, keep the location recorded in your property file once confirmed. For commercial premises, facilities teams should include the valve location in emergency procedures and make sure access is not blocked by parked vehicles, storage or landscaping.

How to check the external stop tap safely

Before opening a chamber, make sure the surrounding ground is stable and dry where possible. Wear gloves, as lids and chambers can contain dirt, insects and standing water. A purpose-made stop tap key is normally required to operate a recessed valve. Avoid improvising with grips, screwdrivers or excessive force, as this can damage a worn spindle or pipe connection.

Lift the cover carefully. If it is heavy, cracked, jammed or located in the pavement, leave it in place and seek assistance. Once open, clear loose debris only from the top of the valve. Do not reach into deep chambers or disturb pipework that appears corroded, loose or under strain.

If you are certain the valve serves your property and it needs to be isolated, turn it slowly in the direction indicated by the fitting. Older valves may need several turns. Check inside the property by running a cold tap after a short wait. If the water does not stop, the valve may not be yours, may be faulty, or the property may have an alternative or shared supply arrangement.

Never force a stop tap that will not turn. A seized valve can snap, leak or fail to close properly, creating a more urgent problem underground. This is particularly relevant where a lead supply pipe or ageing iron fittings are present. A specialist can isolate the supply using the appropriate equipment and repair or replace damaged pipework with far less risk.

When the stop tap is difficult to find

Not every missing stop tap is simply hidden under leaves. Ground levels change, driveways are relaid, and previous building work can cover access chambers. At some properties, the original valve may have been abandoned after a supply alteration. Shared service pipes can also mean that the expected boundary valve is located outside another property.

Signs that professional investigation is worthwhile include persistently wet ground, an unexplained increase in water bills, low water pressure, the sound of running water when nothing is in use, or water appearing at the edge of a driveway. These can point to a leak on the underground supply pipe rather than an issue inside the home.

A water supply contractor can trace the route of the incoming pipe, identify likely valve positions and investigate leaks without automatically excavating large areas. Acoustic leak detection and other specialist methods can narrow down the problem before work begins. Where replacement is required, trenchless moling is often suitable for installing a new water supply pipe beneath gardens, paths and driveways with minimal excavation.

That approach is not appropriate for every site. Ground conditions, access, pipe route, buried services and the connection point all affect the method. A proper site survey is the best way to establish whether a no-dig installation will reduce cost and reinstatement work compared with conventional excavation.

External stop taps and shared water supplies

Many older homes, converted buildings and some terraces have shared water supplies. One external stop tap may isolate more than one household, while separate internal stopcocks control individual properties. Turning the wrong valve could leave neighbours without water, which is especially problematic in flats, rented homes and business premises.

If you suspect a shared supply, speak to affected occupiers before any planned isolation. For an emergency leak, contact the water company if the problem appears to be on its network or outside your property boundary. If the leak is on private pipework, use a qualified water supply specialist who can assess the arrangement, explain the options and provide a clear quotation for repair or replacement.

For landlords and property managers, replacing an ageing shared lead supply with individual modern connections can improve reliability and make future maintenance much simpler. It does involve coordination, permissions and careful planning, but it can prevent repeated disruption caused by a single failing pipe.

Get help before a small problem becomes major damage

An external stop tap is a valuable emergency control, but it is not something to force, dig around or guess at. If the chamber is inaccessible, the valve is seized, or you have signs of an underground leak, a specialist investigation is faster and safer than repeated trial and error.

Watermains & Drains UK provides water supply investigations, lead pipe replacement and new pipe installation using modern methods designed to keep disruption to driveways, gardens and paved areas to a minimum. The most useful step you can take now is to confirm and record your valve location while everything is dry, accessible and working properly.

Can Tree Roots Block Drains? Signs and Solutions
Blog

Can Tree Roots Block Drains? Signs and Solutions

A drain can appear to block without warning: the toilet starts rising, the kitchen sink drains slowly, or a manhole outside is full after a period of wet weather. If there are mature trees near the property, it is sensible to ask: can tree roots block drains? They can, particularly where an older pipe has a loose joint, crack or defective connection. The roots are usually finding their way into an existing weakness, rather than forcing their way through a sound modern pipe.

For homeowners, landlords and facilities managers, the priority is not simply getting the water moving again. It is finding out why the blockage occurred and whether the pipe needs a lasting repair. Repeated clearance alone can become expensive, disruptive and unpleasant.

Can tree roots block drains?

Yes. Tree roots naturally grow towards moisture, oxygen and nutrients. A drain with a small defect can provide all three. Fine roots can enter through displaced joints, redundant connections, cracks or poor-quality repairs. Once inside, they expand and form a fibrous mass that catches toilet paper, fats, wipes and other debris moving through the pipe.

This process is often gradual. At first, the drain may only run slowly from time to time. As roots develop, they reduce the usable diameter of the pipe and create a more frequent obstruction. In severe cases, root growth can contribute to a collapsed or displaced section of drainage, although the underlying condition of the pipe is normally a significant factor.

Clay drainage is particularly vulnerable because it is commonly made up of short pipe lengths with joints between them. Many older homes across Greater Manchester, Stockport, Warrington and Cheshire still have clay drains. Plastic pipes are generally more resistant, but they are not immune if a joint has separated or the pipe has been damaged by ground movement, building work or vehicle loading.

Signs that roots may be affecting your drain

Tree roots are not the only reason for a blocked drain. Grease build-up, unsuitable items flushed down the toilet, scale, damaged pipes and poor gradients can all cause similar symptoms. However, root ingress becomes more likely where blockages keep returning in the same part of the property and there are established trees or large shrubs nearby.

Look out for slow drainage affecting more than one fitting, recurring toilet or gully blockages, unpleasant smells from external drains, and water backing up after heavy use. You may also notice that a blockage returns relatively quickly after it has been cleared. A drain that has been rodded or jetted several times but still causes trouble needs proper investigation rather than another temporary fix.

Outside, unusually lush patches of grass near the drain run can occasionally point to a leak, but this is not proof of root damage on its own. Equally, a nearby tree does not automatically mean roots are the cause. The only reliable way to identify the condition inside an underground pipe is with a professional CCTV drain survey.

Why a CCTV drain survey matters

A CCTV survey puts a camera through the drainage system and records what is actually happening below ground. It can show root ingress, fractures, displaced joints, standing water, scale build-up and collapsed sections. It also helps establish the location and depth of the defect, which is essential before recommending a repair method.

This avoids unnecessary excavation and gives property owners a clear basis for deciding what to do next. For landlords and commercial property managers, a written report and footage can also support maintenance records, planned works and discussions with insurers or tenants.

Clearing roots is not always the same as repairing the drain

Specialist jetting equipment can often remove roots and restore flow, particularly when the blockage is caught early. Mechanical root cutting may also be used where appropriate. This is useful reactive work, but it does not close the gap or crack that allowed the roots into the drain in the first place.

If the pipe remains defective, roots can return. How quickly this happens depends on the tree species, soil conditions, the size of the opening and the level of moisture available. It may be months or it may be much sooner. That is why a good drainage contractor will distinguish between clearing the immediate blockage and repairing the underlying defect.

There are several possible repair routes, and the right one depends on the survey findings.

Patch lining for localised defects

Where root entry is limited to one joint or short damaged section, a patch liner can often provide a cost-effective repair. A resin-impregnated liner is positioned inside the existing pipe and cured in place to create a new watertight section. The work is completed from access points such as manholes, so there is often no need to dig up a patio, driveway or lawn.

Patch lining is not suitable for every drain. If there is a major collapse, extensive deformation, severe changes in level or a long length of damage, a more substantial repair may be needed. A survey should always lead the decision, rather than choosing a repair simply because it sounds less disruptive.

Full drain lining or excavation

For longer runs with multiple defects, full-length drain lining can rehabilitate the pipe internally. It creates a continuous lining within the existing drain and can be a practical option where excavation would affect paving, landscaping or business operations.

Excavation remains the correct solution when a pipe has collapsed badly, has insufficient fall, or cannot be lined successfully. Although digging is more disruptive, it allows the damaged section to be replaced and the line to be corrected where necessary. A professional contractor should explain the trade-off clearly, including access requirements, reinstatement and likely programme.

Should you remove the tree?

Removing or heavily pruning a tree is rarely the first drainage solution. Roots may remain active for some time, and cutting back a mature tree does not repair the defective pipe. There may also be legal, environmental or safety considerations, particularly if the tree is protected or located on neighbouring land.

The practical first step is to repair the drain so it is sealed and structurally sound. If the tree is very close to the building or has caused wider concerns about foundations, seek appropriate arboricultural and structural advice. Drainage work and tree management should be considered separately but coordinated where needed.

What not to do when roots are suspected

Avoid pouring strong chemical drain cleaners into a drain that is already backing up. They are unlikely to resolve a root obstruction and can create a hazard for anyone working on the system afterwards. Do not keep forcing rods through a blocked pipe without knowing its condition either. Old clay drains can crack further if they are already weakened or displaced.

It is also best not to assume that an accessible manhole is the source of the problem. A blockage may sit further along the private drain or in the section connecting towards the public sewer. If several properties are affected, the responsibility may differ from a blockage serving one home or building. A survey helps identify the drain route and the extent of the issue before repair work begins.

Preventing repeat root-related blockages

There is no need to remove every tree near a drain. Prevention is mainly about keeping the drainage system in good condition and dealing with early warning signs. If your property has older drainage, a CCTV survey before a planned driveway, extension or landscaping project can be worthwhile. It identifies vulnerable pipework while access is easier and before new surfaces are laid above it.

For commercial sites, blocks of flats and rented properties, planned inspections can reduce the risk of emergency call-outs and disruption to occupants. This is especially useful where there is a known history of roots, shared drainage or mature landscaping. Clearing leaves from gullies and avoiding wipes, fats and food waste down drains will not stop roots entering a cracked pipe, but it reduces the debris that turns root ingress into a complete blockage.

Watermains & Drains UK can investigate recurring blockages with CCTV drainage surveys, clear root-affected drains and recommend repairs designed to minimise disruption to your property. Where a no-dig solution is suitable, patch lining or drain lining can often avoid unnecessary excavation and reduce reinstatement work.

If a drain has blocked more than once, treat it as useful information rather than bad luck. A timely survey and targeted repair can protect the pipe, the property and the people who rely on it every day.