Replacing a Lead Water Pipe: What to Expect
A lot of people only discover they’ve got a lead water pipe when the water company flags it, a plumber mentions it during a kitchen refit, or a neighbour replaces theirs and you start asking questions. The worry is usually the same: health, compliance, and whether you’re about to have your drive dug up.
Replacing a lead supply pipe does not have to be a messy, weeks-long job. Done properly, it’s a controlled piece of work with a clear start and finish – and in many cases it can be installed using trenchless moling so you keep your paving, garden and routine intact.
First: what you’re actually replacing
When people say “lead pipe”, they usually mean the underground water supply pipe that runs from the boundary of your property to where it enters the house (often under the front path, driveway, or garden). In UK terms, that supply is typically split into two parts.
The communication pipe normally runs from the water main in the street to the boundary stop tap (often in the pavement). This section is usually the water company’s responsibility. The supply pipe then runs from that boundary point into your home and is typically the homeowner or landlord’s responsibility.
That split matters because it affects permissions, who is allowed to work on what, and sometimes the quote you’ll receive. A good contractor will explain exactly where the responsibility line sits on your street and how they’ll connect into the existing infrastructure.
How to tell if you have a lead water pipe
There are a few practical clues, and you do not need to be an expert to spot them.
Inside the property, look at the pipework where the supply enters near the stop tap (often under the kitchen sink, in a cupboard, or by the front of the house). Lead is a dull grey and, unlike copper, it will not have a bright metallic shine. If you very gently scratch the surface with a key or coin, lead will often reveal a silvery colour beneath. Lead also tends to feel slightly “softer” than copper.
Age is another clue. Properties built before the 1970s are more likely to have lead service pipes, though there are plenty of exceptions – especially where only part of the run has been replaced over time.
If you’re unsure, the sensible next step is an on-site check. Contractors can trace the route, inspect entry points, and advise whether it’s fully lead or a mix of old and newer sections. That matters because a partial replacement can still leave you with the same concern – and it can complicate water quality and future maintenance.
The safest, most cost-effective approach: replace, don’t patch
With lead, the temptation is to “make do” – add a short new section at the kitchen end, move the stop tap, or only replace what’s visible. The problem is that the risk and the restriction sit underground, not in the cupboard.
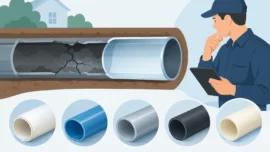
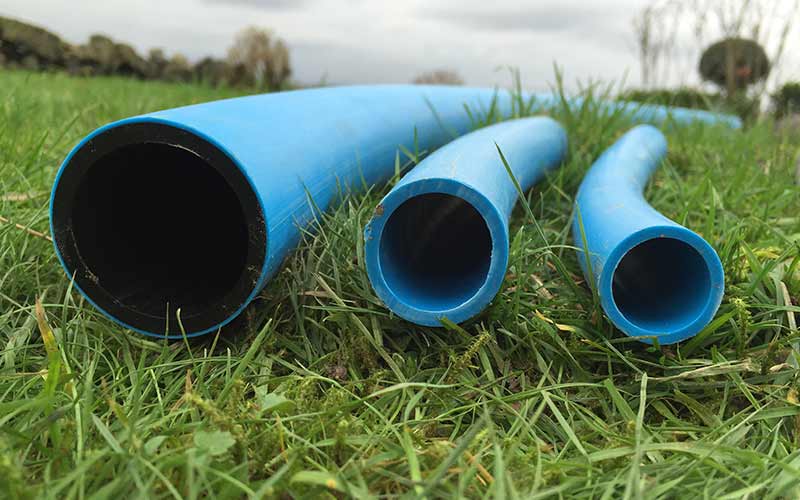
A full replacement with modern pipe (commonly MDPE) gives you a clean run from boundary to internal entry point, a reliable connection, and a known asset for future buyers, tenants, insurers, and facilities teams. It’s also the moment to correct other issues that often come with old supplies – poor flow, repeated leaks, or an awkward route that runs under extensions or outbuildings.
How to replace lead water pipe: the real-world process
The exact method depends on access, distance, ground conditions, and the type of surface you’re crossing. But the professional workflow is generally consistent.
1) Survey and route planning
A proper survey identifies where the new pipe will start and finish, how it will be connected, and where any excavations need to be. This is also where you decide whether trenchless moling is suitable.
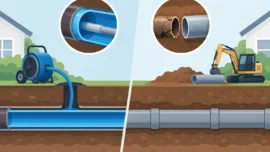
Moling works very well when you have a straightforward run and enough depth to install the new pipe safely. If your driveway is block paved, patterned concrete, resin, or has recently been reinstated, trenchless is often the preferred option because it avoids lifting large areas and reduces the risk of visual patching.
2) Permissions, compliance and materials
Water supply work needs to be compliant. For domestic properties, you typically want a contractor who is accredited to self-certify compliant plumbing and water supply connections. It reduces delays and gives you clearer assurance that the installation meets the expected standard.
The pipe itself is usually MDPE, sized appropriately for flow and distance (commonly 25mm, but it depends). The route and depth need to protect against frost and accidental damage. You also need proper fittings, a suitable internal stop tap arrangement, and in some cases a pressure reducing valve if local mains pressure is high.
3) Excavations at the ends (kept tight and tidy)
Even with trenchless work, you still need small excavations – typically one at the boundary where the connection will be made, and one where the pipe enters the building. The difference is you avoid trenching the entire length.
A professional crew will protect nearby surfaces, keep spoil contained, and reinstate properly. For homeowners, this is usually where the anxiety sits: “Will my drive be left a mess?” With the right method, the footprint is small and predictable.
4) Installing the new pipe (mole or trench)
If moling is viable, a pneumatic mole drives a bore underground from one excavation to the other, pulling the new pipe through behind it. The end result is a new pipe installed under the ground with minimal disturbance above.
If the site is not suitable for moling – for example, you have very shallow services, the route is complex, the ground is heavily obstructed, or there’s no practical launch pit – then open trenching may be necessary. The key is that it’s planned, not guesswork: you choose the method that reduces risk, avoids service strikes, and provides a reliable installation.
5) Connection, testing and commissioning
Once the pipe is in, it’s connected at the boundary and into the property. The system should be pressure tested, checked for leaks, and flushed.
Do not underestimate flushing. After any pipework change, you want to clear the line and ensure the water runs clean. You should also be shown where the new stop tap arrangement is and how to isolate the supply.
What it costs – and what actually drives the price
There isn’t a single fixed figure because the job is heavily influenced by site conditions. The biggest cost drivers are length of run, surface type (tarmac, flags, block paving), access for machinery, and whether trenchless installation is possible.
Another factor is reinstatement expectations. A neat reinstatement is not an optional extra – but some surfaces are harder to make “invisible” than others. If aesthetics matter (and for most drives they do), talk about this early so the quote reflects the correct approach.
If you’re comparing prices, look beyond the headline number. Ask what’s included: excavation size, connection type, testing, reinstatement standard, and whether the work is carried out by accredited installers with appropriate insurance cover.
Common complications – and how a good contractor handles them
Older properties often throw up surprises. A few examples:
A shared supply is one of the big ones, especially in terraces. Two houses may feed from one supply before splitting. In that case, you need a planned approach to avoid cutting off a neighbour and to ensure each property ends up with its own compliant supply.
Extensions and converted layouts can also mean the original pipe route runs under a slab or a room that used to be a coal store. The solution is usually a new route to a more accessible entry point, which may improve future maintainability.
Finally, don’t ignore the possibility of other buried services. Petrol, electric, telecoms and drainage all compete for space. This is another reason trenchless work is not “one size fits all” – you want someone who will survey properly, choose safe depths, and keep excavations controlled.
DIY vs using a specialist contractor
Replacing a lead water supply pipe is not a typical DIY task. You’re dealing with connections that must be watertight, correctly sized, properly buried, and compliant. If it goes wrong, the best-case scenario is a leak and a second excavation. Worst case, you damage another service or end up with a non-compliant connection that becomes a problem during a sale, a tenancy change, or an insurance claim.
A specialist contractor brings two things that matter in real life: the right installation method (including no-dig options) and the process discipline to deliver a clean, tested, reinstated job with the right paperwork.
If you’re in the North West and want a low-disruption replacement, Watermains & Drains UK carries out lead pipe replacements using trenchless moling where suitable, backed by industry accreditations, £10m public liability insurance, and long workmanship guarantees.
What to do before engineers arrive
You can make the day run smoother with a bit of preparation. Clear access to the internal stop tap and the area where the pipe enters the property, and make sure any fragile items in nearby cupboards are moved. Outside, move cars off the drive if the route crosses it, and point out anything you already know about drains, cables, or previous repairs.
If you’re a landlord or facilities manager, plan for brief water downtime and notify occupants. Most replacements are straightforward, but it’s best to assume there will be a period where the supply is isolated for the final connections and testing.
Aftercare: the small things that protect the job
Once the new pipe is in, take five minutes to understand your new isolation points and keep a note of where the line runs. If you’re planning future landscaping, fencing, or building work, that knowledge prevents accidental damage.
And if you’re improving water quality for health reasons, consider asking for guidance on flushing and using the water after switchover, particularly if the old system had been in place for decades. The goal is not just a new pipe underground – it’s confidence every time you turn the tap on.
Replacing a lead supply is one of those upgrades you rarely regret: it’s out of sight, but it removes uncertainty, reduces leak risk, and makes the property easier to live in, rent out, or manage.