Your Water Main, Drainage & Trenchless Solution Specialists

News

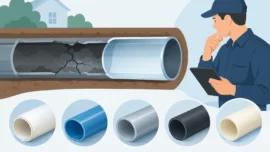
New Water Supply Pipe Installation: What to Expect
Blog

New Water Supply Pipe Installation: What to Expect

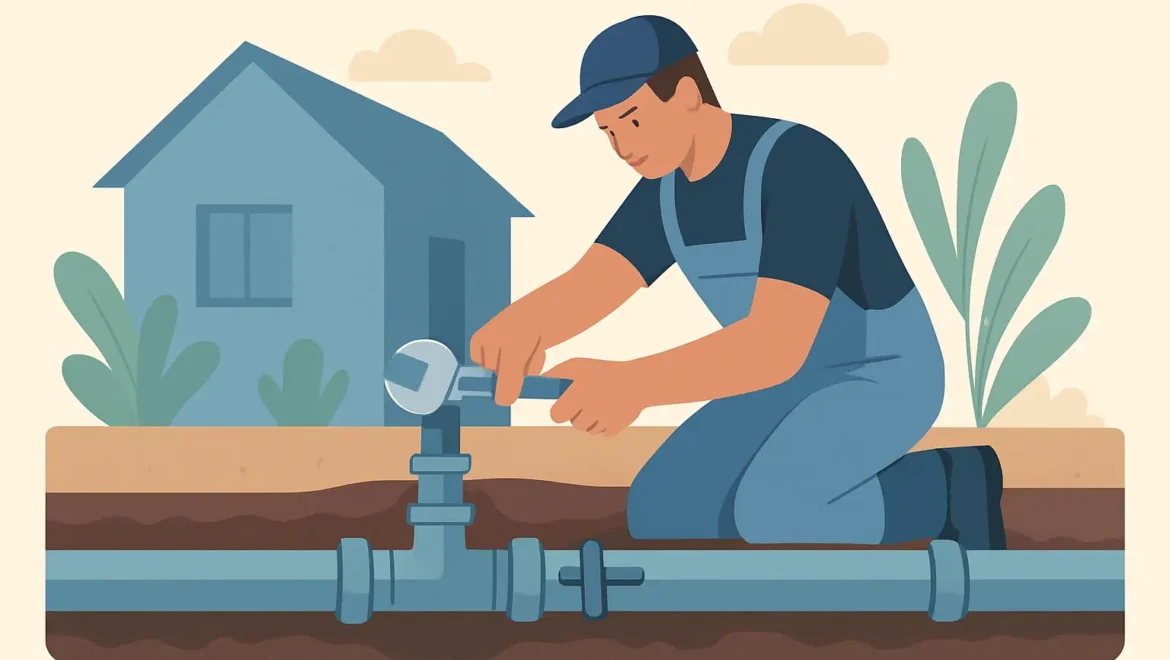
A stop tap that barely turns, a kitchen tap that coughs and splutters, or a supply that drops to a trickle whenever the shower goes on – these are the moments people realise the incoming water supply is the weak link. For many UK homes and small commercial buildings, the fix is not another internal plumbing tweak. It is a new water supply pipe from the boundary into the property, installed properly, pressure-tested, and signed off.

New water supply pipe installation is one of those jobs that sounds simple until you factor in driveways, shared service strips, older lead or galvanised pipework, and the need to meet water industry requirements. Done well, it is a once-in-decades upgrade that improves flow, reduces leak risk, and removes the uncertainty that comes with ageing supplies.

When a new supply pipe is the right answer

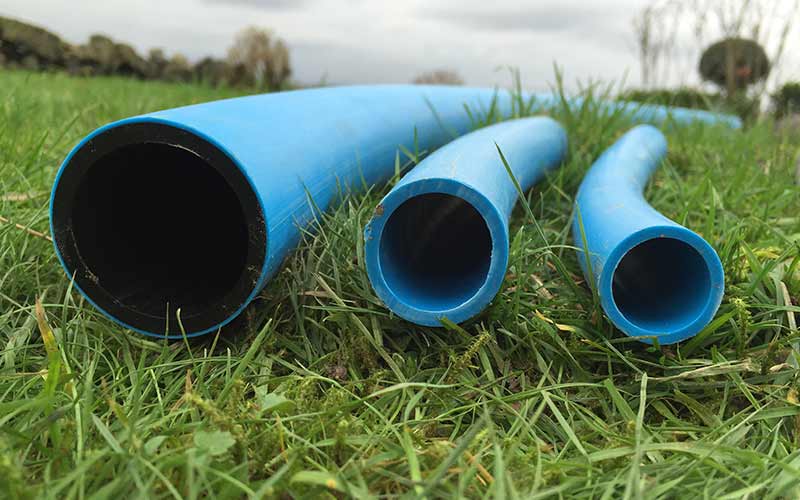
Sometimes a repair is sensible. If a modern MDPE (blue plastic) supply has a single, accessible leak, targeted repair may be quicker and cheaper. But there are plenty of situations where a full replacement or new line is the cleaner solution.

Low pressure that has gradually worsened often points to an undersized or corroded pipe, particularly if the supply is an older lead or iron line. Recurring leaks are another red flag. Every leak repair involves disturbance and reinstatement, and repeated call-outs can quickly overtake the cost of replacing the run.

Property changes also drive new installations. If you are converting a house into flats, adding bathrooms, or creating a separate commercial unit, you may need a new, correctly sized supply. And if you are removing a lead supply pipe, replacement is usually the right long-term decision, not just for performance but for peace of mind.

It also depends where the problem sits. If the issue is on the incoming service pipe between the stop tap at the boundary and your internal stop tap, that is the area where new water supply pipe installation typically delivers the biggest improvement.

The two main approaches: open trench vs trenchless moling

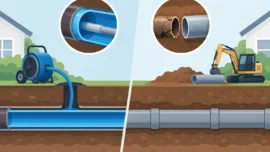
Most people imagine a long trench from the pavement to the kitchen. Traditional open-cut installation still has its place. If the route is short, clear, and you are already lifting surfaces as part of other works, digging can be straightforward.

But in real homes the route often crosses block paving, tarmac, concrete paths, landscaped gardens, or tight side passages. That is where trenchless installation changes the job.

Open trench installation

With open trenching, the contractor excavates along the route, lays the new pipe at the correct depth and with suitable bedding, then backfills and reinstates. The advantage is direct visibility: you can see the ground conditions, navigate around obstacles, and make connections with full access.

The trade-off is disruption. Even with tidy working, trenching can mean more spoil, more making-good, and more time spent reinstating finishes that you would rather keep intact.

Trenchless moling (no-dig)

Trenchless moling uses a pneumatic soil displacement tool to create a bore underground between small access pits, typically at the boundary and near the property entry point. A new MDPE pipe is then pulled through.

For many driveways and front gardens, moling is the least disruptive option. You avoid a full-length trench, which usually means faster completion and a cleaner site. It is not suitable for every ground condition – very stony ground, certain made-up areas, or complex routes can make moling harder – but where it is viable it is often the method that homeowners and facilities teams prefer.

For longer runs, complex sites, or commercial work, horizontal directional drilling (HDD) can also be used. The principle is similar: install the pipe with minimal surface disturbance, but with more control over longer distances.

How the job is planned: route, depth, and sizing

A reliable installation starts with a sensible route. Contractors will look for the most direct line from the boundary stop tap to where the pipe enters the building, while avoiding obvious risks such as mature tree roots, retaining walls, and areas packed with other services.

Depth matters because the pipe needs protection from frost and future disturbance. The correct depth can vary depending on site conditions and local requirements, but the key point for property owners is this: a proper contractor will not run it shallow to save time.

Pipe sizing is another area where “it depends” is genuine. Many domestic supplies are installed in 25mm MDPE, but higher demand properties, longer runs, or buildings with multiple units can benefit from larger diameters to maintain flow. Sizing should reflect the property’s expected demand, not just what fits the easiest through a tight entry point.

What happens on the day (and how long it takes)

Most domestic new water supply pipe installation projects are completed within a day, especially when trenchless methods are used. More complex jobs – long runs, tricky access, commercial sites, or multiple supplies – can take longer.

You should expect:

First, the team locates the boundary stop tap and confirms the intended connection point. If access is poor or the stop tap is buried, that gets dealt with early because it affects everything that follows.

Next comes the excavation of small pits (for moling) or the trench (for open cut). A professional crew will keep spoil controlled and protect surfaces where practical.

Then the new pipe is installed and connected. Connections are made using approved fittings and correct techniques. This is not a place for improvised plumbing parts.

Finally, the supply is pressure-tested and checked for leaks. Once everything is proven, the excavations are backfilled and surfaces reinstated.

The best indicator of a well-run job is not just that the water comes back on. It is that you are left with a tidy finish, a clear explanation of what was done, and confidence that the pipework is correctly installed for the long term.

Water regulations, approvals, and why they matter

A new incoming supply has to meet water industry standards. That includes the right materials, correct installation practices, and compliance with water regulations.

This is where using an approved contractor reduces risk. Accreditations such as WIAPS and Watersafe show the contractor is recognised for water supply work and understands the requirements. For landlords and facilities managers, that assurance is often as important as the physical installation because it supports compliance and helps avoid disputes later.

Insurance and guarantees matter too. If you are paying for a new supply, you want to know the contractor has meaningful public liability cover and will stand behind workmanship.

Costs: what drives the price up or down

People understandably want a figure straight away. The reality is that pricing depends on site specifics, and any contractor giving a firm price without asking questions is guessing.

Length of run is a major factor. A short, straight run from the footpath to a front wall is very different to a long route around an extension.

Surface type also changes the cost. A lawn is simpler to reinstate than patterned block paving. Likewise, tight access down a narrow alley can add labour time.

Method selection affects cost in both directions. Trenchless moling can reduce reinstatement costs and time, but it still requires specialist equipment and experienced operators. On balance, many customers find it offers better value because it avoids the biggest disruption costs.

Finally, the complexity of connections can add time. Working around existing services, bringing the pipe into a specific plant room, or coordinating with other trades are all manageable, but they need planning.

If you want a price that holds, a site visit or clear photos and measurements are the quickest way to get an accurate quote.

Signs you have a lead supply (and what to do)

Lead is still present in older housing stock, particularly on the private side between the boundary and the internal stop tap. Clues include a dull grey pipe that marks easily when scratched, or a supply line that looks metallic rather than plastic.

If you suspect lead, the practical next step is to have the incoming supply assessed and quoted for replacement. Many replacements are done trenchlessly, which is often the deciding factor for households that have put the job off because they do not want their driveway dug up.

Choosing a contractor: what “good” looks like

A dependable contractor will be clear about the method, the route, and what reinstatement is included. They will explain where access pits or trenches will be, and they will be upfront if moling is not suitable for your ground.

They should also be able to show relevant approvals and insurance, and provide workmanship guarantees in writing. For commercial sites and managed properties, the ability to work to schedule, keep the site orderly, and communicate with tenants or staff is not a bonus – it is the job.

If you are in the North West and want a minimal-disruption approach, Watermains & Drains UK installs new supplies using trenchless moling and HDD where suitable, with accredited, fully insured teams and long-term guarantees.

A final thought before you book

If your water supply is already causing hassle, waiting rarely makes it easier. The most cost-effective time to replace an ageing or problematic incoming pipe is before it fails completely, when you can choose the method, book it in, and keep control of the disruption rather than reacting to an emergency.

Shared Water Supply Pipe Replacement: Who Pays?
Blog

Shared Water Supply Pipe Replacement: Who Pays?

If your neighbour’s tap turns on and your pressure drops, you probably share more than a fence line.

Across the North West, plenty of older terraces, semis and converted properties are still fed by a single incoming water supply that splits to serve two or more homes. It can work for decades without anyone thinking about it – right up until a leak appears under a driveway, the water company flags lead on the line, or one property suddenly loses pressure.

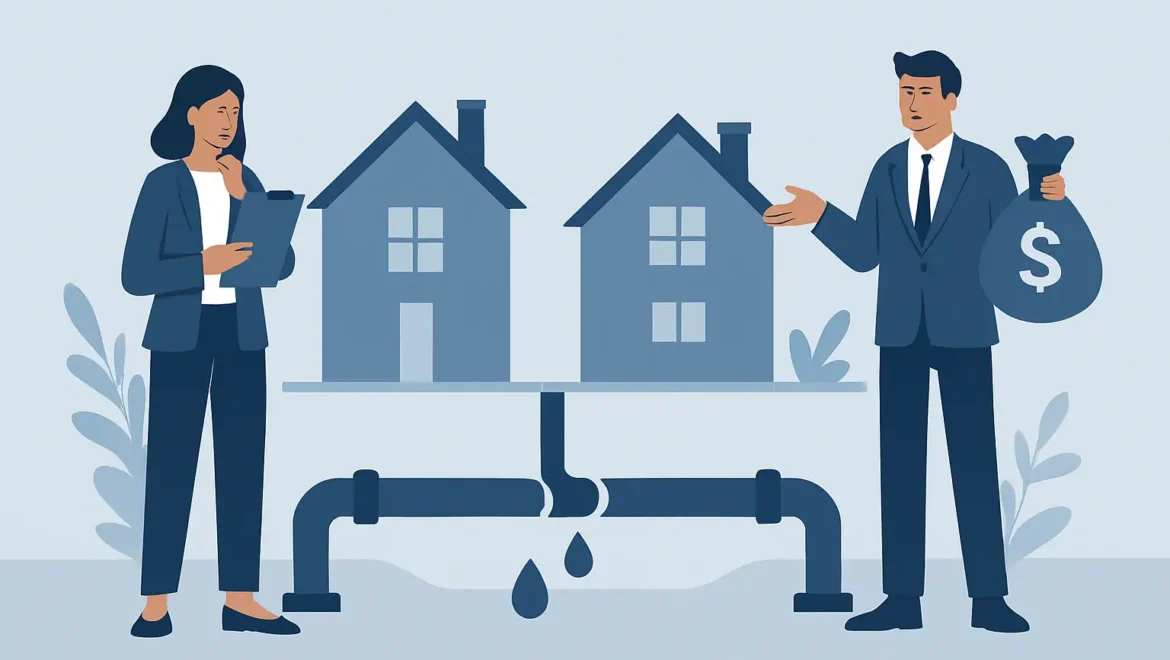
Shared water supply pipe replacement is rarely complicated from an engineering point of view. The tricky bit is responsibility: who owns which section, who pays, and how you get the work done without turning it into a neighbour dispute or a weeks-long excavation.

What a “shared supply” actually means

A shared supply typically describes one communication pipe (the pipe from the water main in the street to the boundary) feeding more than one property, or a single supply that then branches off to multiple stop taps.

In practical terms you might see:

  • One stop tap in the pavement serving two houses
  • A single supply entering one home, then a branch running out to the neighbour
  • A supply running under a shared access path, with both properties connected along the run

It is most common on older housing stock where a single lead pipe once served multiple properties. Over time, kitchens and bathrooms move, extensions go on, and nobody is quite sure where the pipe runs until it fails.

When shared water supply pipe replacement becomes the sensible option

A shared supply can be left alone if it is sound, gives adequate flow, and meets current expectations. Replacement is usually triggered by a problem that will keep coming back if you only patch it.

Lead pipe and water quality concerns

Lead is still present on some shared supplies, especially where the original feed was never upgraded. Even if your internal plumbing has been modernised, any remaining lead on the incoming supply is a concern and can be flagged during water company communications or property transactions.

Replacing a shared lead supply often makes more sense than repairing it. Lead is soft, old joints can fail, and locating a “good enough” repair point can be hit and miss.

Leaks under hardstanding

Leaks on a shared supply are notorious for showing up in the worst places: under block paving, tarmac drives, steps, or a path that multiple households rely on. If the line is ageing and has already failed once, piecemeal repairs can quickly cost more than a clean replacement with a long-term guarantee.

Low pressure and poor flow

Sharing a line can reduce available flow, but a sudden change often points to a partially collapsed pipe, internal restriction, or a leak that is not surfacing. A replacement gives you a new, correctly sized pipe and a chance to give each property its own independent feed.

You need an independent supply for a practical reason

Landlords and property managers often want separate supplies to reduce disputes and improve resilience. If one property is shut off for works, the other stays live. It is also useful when refurbishing, converting, or formally separating services.

Who is responsible, and who pays?

This is the part that causes delays.

Responsibility is usually split between:

  • The water company’s main in the road
  • The communication pipe to the boundary (often water company responsibility, but it varies)
  • The supply pipe from the boundary into the property (normally the homeowner’s responsibility)

On a shared arrangement, the private section may be jointly used. In many cases, the shared part is considered jointly owned, which means costs are typically shared too. But it depends on where the pipe runs and how it branches.

If the supply enters one property first and then feeds the neighbour, that doesn’t automatically mean the first property is responsible for the whole run. What matters is ownership, easements, and where the pipework sits in relation to boundaries.

A practical way to approach it is:

  1. Confirm the supply layout and where the leak or restriction sits.
  2. Establish which section is private and which is water company.
  3. Agree in writing with the other party how you will proceed and split costs, before any digging starts.

For landlords or commercial property managers, it is also worth checking lease responsibilities and whether the building has a single incoming supply feeding multiple units.

The fastest way to reduce neighbour disputes

Most disputes start because nobody has the same information. One household hears “leak on your side”, the other hears “it’s shared so you’ll pay half”, and both assume the contractor is guessing.

A straightforward site assessment usually clears the air. Once the route is mapped and the likely solution is explained in plain terms, it becomes a practical decision rather than a blame exercise.

If you are proposing shared water supply pipe replacement, the most helpful thing you can do is present a clear plan: where the new pipe will run, how reinstatement will be handled, and what each property gains – better pressure, fewer shut-offs, and a compliant modern supply.

Repair vs replacement: the trade-off

A repair can be the right call when the leak is localised, the pipe material is modern, and access is reasonable. It keeps initial cost down and can be completed quickly.

Replacement becomes the better value when the pipe is lead, the run is long, the route is under expensive surfaces, or the supply has a history of problems. If you are going to disturb paving once, most homeowners would rather do it once properly.

There is also the “hidden cost” trade-off. A cheap repair that fails again in six months costs more in emergency call-outs, water damage risk, and disruption than a planned replacement done with minimal excavation.

How modern replacement is done with less disruption

Traditional replacement often meant open trenching the full route. That is still sometimes necessary, but it is no longer the default.

For many properties, trenchless installation (often called moling) allows a new pipe to be installed under gardens, paths and driveways with only small entry and exit pits. Horizontal directional drilling (HDD) can be used where ground conditions, depth control, or longer runs require more precision.

This matters on shared supplies because the pipe route often crosses areas that are hard to reinstate neatly – shared paths, front drives, or landscaped gardens. Trenchless methods reduce the risk of arguments about who damaged what, because there is far less surface disruption in the first place.

Can you switch to separate supplies instead of keeping it shared?

Often, yes – and it is worth discussing early.

A separate supply gives each property:

  • Its own stop tap and isolation
  • Better clarity on responsibility
  • Less risk that one property’s issue affects the other

However, it depends on what the water main can accommodate, where the new connection point can be made, and whether the route to each property is feasible without excessive disruption. In some streets, separate supplies are the best long-term solution. In others, a shared communication pipe with separate private supplies may be the practical compromise.

What a good contractor should confirm before starting

Shared water supply work is not the place for assumptions. Before works begin, you want clarity on the route, the method, and what happens if the pipe is not where you expect.

A competent contractor will normally:

  • Locate the existing line as far as possible and identify likely branch points
  • Confirm pipe size and propose an appropriate modern replacement
  • Explain shutdown arrangements so both properties know when water will be off
  • Agree reinstatement expectations for drives, flags, and landscaping
  • Provide evidence of relevant approvals and insurance

For many homeowners, reassurance matters as much as the technical method. Accreditations, clear paperwork, and a workmanship guarantee reduce the risk of paying twice.

How long does it take and what disruption should you expect?

It depends on access, distance from the main, and whether you are creating separate supplies.

A straightforward replacement using trenchless moling can often be completed within a day, with water off only for the connection stages. If you need multiple connections, additional excavation at the boundary, or complex reinstatement, it can extend.

The key is planning: agree where pits will be, how spoil is managed, and how the site will be left at the end of each day. On shared access routes, a tidy site is not just nice to have – it prevents friction between neighbours and reduces trip hazards.

Costs: why quotes vary so much

Two homes on the same street can get very different prices for what sounds like the same job.

Cost is driven by the length of run, ground conditions, the number of excavations required, and how much reinstatement is needed. A shared supply under a garden is a different proposition to one under patterned block paving with steps and walls.

Also consider whether you are paying for a like-for-like replacement or upgrading to separate supplies. The upfront figure may be higher for separation, but the ongoing benefit is fewer shared liabilities.

Choosing a specialist for shared water supply pipe replacement

Because this sits at the boundary between property plumbing and external civil work, you want a contractor who does water supply installations day in, day out – not someone learning on your drive.

If you are in the North West and want a no-nonsense plan with minimal disruption, Watermains & Drains UK can assess shared supply layouts, advise on replacement versus separation, and install new pipes using trenchless methods where suitable – with recognised approvals and long-term guarantees. Details are at https://www.watermainsanddrains.co.uk.

A simple way to move forward if you share a supply

Start by treating it as a practical infrastructure upgrade, not a neighbour problem to “win”. Get the route and responsibility clear, agree how you will handle costs, and choose a method that protects the surfaces you both rely on.

The best outcome is the one you stop thinking about: turn the tap on, get steady pressure, and get on with your day.

Lead Water Pipes: Who’s Responsible in the UK?
Blog

Lead Water Pipes: Who’s Responsible in the UK?

If you have an older property in Greater Manchester, Cheshire or anywhere across the North West, the lead pipe question often comes up the same way: a water test shows lead, a neighbour mentions “shared supply”, or you spot a dull grey pipe near the stop tap. Then the real worry lands – who is paying for this?

Responsibility for lead water pipes in the UK is usually split. Part of the pipe is the water company’s, and part is yours. The frustrating bit is that the split is not based on what feels fair – it’s based on where the pipe sits and what it serves.

Who is responsible for lead water pipes?

In most cases, the property owner is responsible for the water supply pipe that runs from the boundary of their property to the internal stop tap (or to where the pipe enters the building). The water company is typically responsible for the communication pipe from the water main in the road to the boundary point.

That boundary point is often the property line, but on some sites it can be defined by the location of the external stop tap or the meter chamber. It’s not unusual for the “handover point” to be on the pavement, in the front garden, or in a shared footpath.

The key principle is simple: if the pipe is supplying only your property beyond the water company’s connection point, it’s normally yours to maintain and replace – including if it’s lead.

The pipework split: communication vs supply pipe

The water company side (communication pipe)

The communication pipe runs from the water main to the boundary point. If this section is lead, many water companies will replace it when you replace your side, or they may do it as part of their lead reduction programme. Policies vary by region, so it is worth asking directly.

If there is a leak on this section, it is usually the water company’s job to repair it.

The customer side (supply pipe)

Your supply pipe continues from the boundary point into your property. If it is lead, it’s your responsibility to replace it.

If there is a leak on this section, it is also typically your responsibility. That includes the knock-on issues that often make leaks expensive: water damage, disrupted driveways, and reinstatement.

What if the lead pipe is shared with a neighbour?

Shared supplies are common on terraces and some semis, particularly where properties were originally built with one incoming connection that splits.

If you share a supply pipe, responsibility can become a joint issue. You might each be responsible for the section serving your own property after the split, but any shared section before the split may involve shared decision-making, shared access, and shared cost.

This is where people get stuck. Even if you are ready to replace your lead supply, you may not want to leave a short shared lead section in place, because it can still contribute to lead at the tap and it can still be the weak point for leaks.

Practically, the best route is usually to arrange separate supplies where feasible, so each property has its own independent connection. It can reduce future disruption and removes the “who’s paying?” problem when the shared section fails.

Does the landlord or tenant pay for lead pipe replacement?

If you’re renting out a property, the water supply pipe is part of the building infrastructure. Replacement of lead pipework is normally a landlord responsibility, not a tenant’s.

Tenants might report discoloured water, low pressure, or a suspected leak, but the repair or renewal of the supply pipe is part of maintaining the property in a safe, serviceable condition.

For HMOs and managed blocks, it’s also worth thinking beyond responsibility and into risk management. A clear plan for replacing any known lead supplies helps avoid repeated complaints, reactive call-outs, and delays if the water company becomes involved.

What about flats and commercial buildings?

For flats, responsibility depends on the layout. The building may have a shared incoming supply, then individual internal pipework to each unit. The freeholder or managing agent is often responsible for the incoming supply and communal sections, while leaseholders may be responsible for internal pipework serving their own flat.

Commercial sites are similar: the owner is usually responsible beyond the boundary point, and responsibility inside the curtilage is often managed by facilities teams. Where lead is suspected, the bigger concern is usually compliance and reputational risk, especially if the building has multiple occupants or provides drinking water to staff and visitors.

How to tell if you have lead water pipes

A lot of people only discover lead when they start a kitchen renovation or get a water quality test. If you’re checking yourself, lead pipe is usually:

  • Dull grey in colour, often with a slightly “soft” look
  • More likely in homes built before the 1970s (but age alone is not proof)
  • Found near the internal stop tap, under the kitchen sink, or at the point the pipe enters the property

A quick field check some engineers use is a gentle scrape: lead will show a shiny silver surface underneath. Do not go at it aggressively and do not create dust. If you suspect lead, treat it as a replacement job rather than a DIY investigation.

Health, compliance and why partial replacements can be a problem

Lead in drinking water is a health issue, especially for babies, young children and pregnant women. Even when lead is present, the level at the tap can vary depending on water chemistry, how long water has been sitting in the pipe, and how much of the pipework is still lead.

One common “it depends” scenario is partial replacement. If only the external section is renewed and some lead remains, you may still see lead at the tap. In some cases, disturbing old pipework can also temporarily change how much lead is picked up, which is why proper planning matters.

The practical goal is usually straightforward: remove the lead section fully and upgrade to a modern, approved supply pipe sized correctly for your property’s demand.

Who pays when the water company wants it replaced?

Water companies can require action if there is a leak on your side, or if a lead supply is being replaced as part of a broader programme. But “required” does not always mean “funded”.

Typically:

  • If the issue is on your supply pipe, you pay.
  • If the issue is on the communication pipe, the water company pays.
  • If both sides are lead and you replace yours, the water company may replace theirs at the same time – but you should confirm, because policies differ.

If you’re not sure where the responsibility line sits, ask the water company to clarify the boundary point for your address. It saves arguments later.

The disruption question: digging up a driveway vs no-dig replacement

Cost is only part of the decision for homeowners and facilities teams. Disruption is the other half.

Traditional replacement often means excavation across front gardens, paths, or driveways to lay a new supply. That can be perfectly valid, but it is not always the least disruptive option.

Trenchless moling or horizontal directional drilling (HDD) can often install a new water supply pipe with minimal surface disruption, keeping reinstatement smaller and project timelines shorter. It is particularly useful where:

  • The route crosses block paving or patterned concrete you do not want patched
  • Access is tight, such as terraced streets
  • You need a new supply to avoid a shared lead line

No-dig is not suitable for every site. Ground conditions, buried services, and the available route all matter. A proper survey and a realistic method statement are what separate a clean job from an awkward one.

What to do next if you suspect lead or need clarity on responsibility

Start by locating the internal stop tap and any visible incoming pipework. If you suspect lead, avoid disturbing it and move straight to getting it assessed.

Next, speak to your water company to confirm where their responsibility ends for your property. If you’re planning a replacement, ask whether they will renew the communication pipe at the same time.

Then get a quote from a specialist contractor who regularly replaces lead supplies and can advise on the least disruptive installation method. For homeowners, that usually means someone who can manage the full job – excavation or trenchless installation, correct pipe sizing, tidy reinstatement, and the paperwork expected for water supply work.

If you’re in the North West and want a clean, low-disruption solution, Watermains & Drains UK can survey and replace lead water supply pipes using modern trenchless methods where suitable, backed by industry accreditations and long workmanship guarantees.

A final thought: once you know where responsibility sits, the decision becomes much simpler – you are no longer guessing who should act, you are just choosing the quickest, least disruptive way to get safe, reliable water into the property.

Lead Pipe Replacement Cost in the UK
Blog

Lead Pipe Replacement Cost in the UK

If your kitchen tap runs fine but the supply pipe is still lead, the real problem is often outside the house – under the path, driveway, or front garden where you cannot see it. That is why the first question most homeowners and landlords ask is not “can you do it?”, it is “what is the lead water pipe replacement cost, and what will it do to my driveway?”

Typical lead water pipe replacement cost (UK ranges)

In the UK, replacing a lead supply pipe is usually priced as a small civil job rather than a simple plumbing visit. You are paying for locating services, safe excavation or trenchless installation, new pipework, connection work, and making good.

As a realistic guide, many straightforward domestic replacements land in the low thousands. If access is clear and the run is short, costs can be closer to the lower end. If the pipe run is long, crosses hardstanding, or needs traffic management, it can push higher. The biggest swings come from what is in the ground and how much reinstatement is needed afterwards.

Because every property is different, reputable contractors will normally quote after a quick site survey. That is not a sales tactic – it is the only reliable way to confirm the route, depths, entry points, and whether trenchless methods are suitable.

What actually drives the price?

Homeowners often assume the cost is mainly the pipe itself. In reality, the pipe is the easy part. The cost is driven by labour, method, and reinstatement.

1) Length of run and route complexity

A short run from the boundary stop tap to an internal stop tap is naturally cheaper than a long run that has to travel around extensions, retaining walls, or neighbouring services. Older terraces can have awkward routes and shared service corridors that take time to investigate.

2) Ground conditions and depth

Hard clay, made ground, shallow rock, or very deep services can slow progress. If the existing pipe is deeper than expected, excavation and safe working practices increase the time on site.

3) Surface type – and what needs reinstating

This is where quotes can vary sharply. Digging across soil is one thing. Digging across block paving, patterned concrete, resin-bound, or a tarmac drive is another. Even when the installation itself is quick, the cost of lifting, storing, cutting, and reinstating surfaces can rival the installation cost.

This is also why “no-dig” is not a gimmick. If you can install a new pipe with minimal excavation pits rather than an open trench, you are usually reducing reinstatement risk and cost, not just inconvenience.

4) Connection points and internal works

Some properties need a simple external replacement up to the internal stop tap. Others need additional internal pipework alterations, rerouting, or a new internal stop valve position. If your internal plumbing is older or has been modified over the years, the connection can take longer.

5) Locating existing services and avoiding surprises

Petrol, electric, comms, drains, and older unknown services all affect how the work is planned. A contractor who takes time to locate and plan properly can often prevent delays and reduce the chance of damage – which is always cost-effective compared to fixing a strike.

6) Permits, highways work, and traffic management (when required)

If the supply route or connection involves the pavement or a public highway, permits and traffic management may be required. That can add cost, but it is sometimes unavoidable, particularly on busy roads or where the stop tap is located in the footway.

Trenchless vs open-cut: the cost trade-off

A key decision is whether your job is best done with open excavation or a trenchless technique such as impact moling or horizontal directional drilling.

Open-cut excavation can be the most straightforward option where the route is short, surfaces are soft, and reinstatement is simple. It also gives full visibility, which can help when there are many unknowns in the ground.

Trenchless installation is often a better fit where the route crosses a driveway, patio, or landscaped frontage. It can reduce the number of excavations to small entry and exit pits, which typically means less mess and fewer reinstatement headaches. The equipment and planning can mean trenchless is not always the cheapest line item on paper, but it frequently becomes better value when you factor in what you are not paying for – extensive breaking out and making good.

The right approach depends on your property. A contractor who offers both methods can choose what suits the site rather than forcing every job into the same process.

What a good quote should include (and what to watch for)

When comparing quotes for lead replacement, you want clarity more than a headline price. Two quotes can look similar but include very different levels of finish.

A proper quotation should make clear the route assumptions, the installation method, what is being connected to, and what reinstatement is included. It should also confirm whether testing and commissioning are part of the job, and whether the contractor will provide the relevant paperwork for the installation.

Be cautious if a price is offered without anyone visiting site, especially for properties with block paving or a long frontage. The most common cause of cost overruns is not contractor greed – it is uncertainty. A site survey turns unknowns into a plan.

How to keep lead water pipe replacement cost under control

You cannot change the length of your front garden, but you can control how smoothly the job runs.

If you can, clear access to likely entry points before the visit. If you have old photos of previous works, or you know where services run, share that information. Knowing where your internal stop tap is, and ensuring it is accessible, can save time.

It also helps to talk openly about surfaces. If your driveway has a particular pattern or you have spare blocks, mention it. Reinstatement is often where people feel most anxious, and a practical conversation upfront avoids disappointment.

Finally, choose a contractor who is set up for this work. Lead replacement sits between plumbing and civils. You want someone who routinely installs underground services, understands reinstatement, and works to recognised standards.

Landlords and commercial sites: budgeting and compliance considerations

For landlords, the cost question often sits alongside tenant disruption and compliance. Planning the work around occupancy, keeping water downtime short, and leaving a tidy site matters as much as the pipe itself.

For commercial property managers and facilities teams, the key is predictability. You need a contractor who can produce clear RAMS when required, work within site rules, and coordinate with other trades if the water supply feeds multiple areas. A slightly higher quote can be justified if it reduces programme risk and aftercare issues.

Should you replace the whole supply pipe or just the lead section?

Sometimes only part of the supply is lead. Partial replacement can look cheaper, but it is not always the best long-term call.

If you replace only a short lead section, you may still have lead upstream, and you may still face disruption later. Full replacement from the boundary to the internal stop tap is often the cleanest solution, particularly if you are already opening up an area or arranging access.

That said, there are genuine “it depends” scenarios. If a section runs under a structural slab or a protected surface where disturbance is not acceptable, a targeted approach may be practical. The best outcome is usually achieved by surveying properly and agreeing a scope that balances cost, disruption, and future risk.

Timescales and what to expect on the day

Most domestic lead supply replacements are completed within a day, sometimes two, depending on complexity and reinstatement. Trenchless installs can be quicker on site, but they still require careful setup, locating, and safe digging for pits.

You should expect some water downtime while the final connection is made and the system is tested. A professional crew will keep this as short as possible and communicate clearly, especially if you have tenants, a business premises, or vulnerable occupants.

Getting an accurate price in the North West

If you are in Greater Manchester, Cheshire, Warrington, Stockport or nearby and want a clear, disruption-conscious quote, a quick site visit is usually the fastest route to certainty. At Watermains & Drains UK, lead pipe replacements and new water supply installations are quoted based on the route, surface types, and the least disruptive method that suits the property, backed by recognised approvals and long-term workmanship guarantees.

The best next step is simple: treat the cost as a project, not a guess. Once you know the route, method, and reinstatement plan, the price stops being a worry and starts being a decision – one that protects your water supply, your property, and your peace of mind.

Blog

Replacing a Lead Water Pipe: What to Expect

A lot of people only discover they’ve got a lead water pipe when the water company flags it, a plumber mentions it during a kitchen refit, or a neighbour replaces theirs and you start asking questions. The worry is usually the same: health, compliance, and whether you’re about to have your drive dug up.

Replacing a lead supply pipe does not have to be a messy, weeks-long job. Done properly, it’s a controlled piece of work with a clear start and finish – and in many cases it can be installed using trenchless moling so you keep your paving, garden and routine intact.

First: what you’re actually replacing

When people say “lead pipe”, they usually mean the underground water supply pipe that runs from the boundary of your property to where it enters the house (often under the front path, driveway, or garden). In UK terms, that supply is typically split into two parts.

The communication pipe normally runs from the water main in the street to the boundary stop tap (often in the pavement). This section is usually the water company’s responsibility. The supply pipe then runs from that boundary point into your home and is typically the homeowner or landlord’s responsibility.

That split matters because it affects permissions, who is allowed to work on what, and sometimes the quote you’ll receive. A good contractor will explain exactly where the responsibility line sits on your street and how they’ll connect into the existing infrastructure.

How to tell if you have a lead water pipe

There are a few practical clues, and you do not need to be an expert to spot them.

Inside the property, look at the pipework where the supply enters near the stop tap (often under the kitchen sink, in a cupboard, or by the front of the house). Lead is a dull grey and, unlike copper, it will not have a bright metallic shine. If you very gently scratch the surface with a key or coin, lead will often reveal a silvery colour beneath. Lead also tends to feel slightly “softer” than copper.

Age is another clue. Properties built before the 1970s are more likely to have lead service pipes, though there are plenty of exceptions – especially where only part of the run has been replaced over time.

If you’re unsure, the sensible next step is an on-site check. Contractors can trace the route, inspect entry points, and advise whether it’s fully lead or a mix of old and newer sections. That matters because a partial replacement can still leave you with the same concern – and it can complicate water quality and future maintenance.

The safest, most cost-effective approach: replace, don’t patch

With lead, the temptation is to “make do” – add a short new section at the kitchen end, move the stop tap, or only replace what’s visible. The problem is that the risk and the restriction sit underground, not in the cupboard.

A full replacement with modern pipe (commonly MDPE) gives you a clean run from boundary to internal entry point, a reliable connection, and a known asset for future buyers, tenants, insurers, and facilities teams. It’s also the moment to correct other issues that often come with old supplies – poor flow, repeated leaks, or an awkward route that runs under extensions or outbuildings.

How to replace lead water pipe: the real-world process

The exact method depends on access, distance, ground conditions, and the type of surface you’re crossing. But the professional workflow is generally consistent.

1) Survey and route planning

A proper survey identifies where the new pipe will start and finish, how it will be connected, and where any excavations need to be. This is also where you decide whether trenchless moling is suitable.

Moling works very well when you have a straightforward run and enough depth to install the new pipe safely. If your driveway is block paved, patterned concrete, resin, or has recently been reinstated, trenchless is often the preferred option because it avoids lifting large areas and reduces the risk of visual patching.

2) Permissions, compliance and materials

Water supply work needs to be compliant. For domestic properties, you typically want a contractor who is accredited to self-certify compliant plumbing and water supply connections. It reduces delays and gives you clearer assurance that the installation meets the expected standard.

The pipe itself is usually MDPE, sized appropriately for flow and distance (commonly 25mm, but it depends). The route and depth need to protect against frost and accidental damage. You also need proper fittings, a suitable internal stop tap arrangement, and in some cases a pressure reducing valve if local mains pressure is high.

3) Excavations at the ends (kept tight and tidy)

Even with trenchless work, you still need small excavations – typically one at the boundary where the connection will be made, and one where the pipe enters the building. The difference is you avoid trenching the entire length.

A professional crew will protect nearby surfaces, keep spoil contained, and reinstate properly. For homeowners, this is usually where the anxiety sits: “Will my drive be left a mess?” With the right method, the footprint is small and predictable.

4) Installing the new pipe (mole or trench)

If moling is viable, a pneumatic mole drives a bore underground from one excavation to the other, pulling the new pipe through behind it. The end result is a new pipe installed under the ground with minimal disturbance above.

If the site is not suitable for moling – for example, you have very shallow services, the route is complex, the ground is heavily obstructed, or there’s no practical launch pit – then open trenching may be necessary. The key is that it’s planned, not guesswork: you choose the method that reduces risk, avoids service strikes, and provides a reliable installation.

5) Connection, testing and commissioning

Once the pipe is in, it’s connected at the boundary and into the property. The system should be pressure tested, checked for leaks, and flushed.

Do not underestimate flushing. After any pipework change, you want to clear the line and ensure the water runs clean. You should also be shown where the new stop tap arrangement is and how to isolate the supply.

What it costs – and what actually drives the price

There isn’t a single fixed figure because the job is heavily influenced by site conditions. The biggest cost drivers are length of run, surface type (tarmac, flags, block paving), access for machinery, and whether trenchless installation is possible.

Another factor is reinstatement expectations. A neat reinstatement is not an optional extra – but some surfaces are harder to make “invisible” than others. If aesthetics matter (and for most drives they do), talk about this early so the quote reflects the correct approach.

If you’re comparing prices, look beyond the headline number. Ask what’s included: excavation size, connection type, testing, reinstatement standard, and whether the work is carried out by accredited installers with appropriate insurance cover.

Common complications – and how a good contractor handles them

Older properties often throw up surprises. A few examples:

A shared supply is one of the big ones, especially in terraces. Two houses may feed from one supply before splitting. In that case, you need a planned approach to avoid cutting off a neighbour and to ensure each property ends up with its own compliant supply.

Extensions and converted layouts can also mean the original pipe route runs under a slab or a room that used to be a coal store. The solution is usually a new route to a more accessible entry point, which may improve future maintainability.

Finally, don’t ignore the possibility of other buried services. Petrol, electric, telecoms and drainage all compete for space. This is another reason trenchless work is not “one size fits all” – you want someone who will survey properly, choose safe depths, and keep excavations controlled.

DIY vs using a specialist contractor

Replacing a lead water supply pipe is not a typical DIY task. You’re dealing with connections that must be watertight, correctly sized, properly buried, and compliant. If it goes wrong, the best-case scenario is a leak and a second excavation. Worst case, you damage another service or end up with a non-compliant connection that becomes a problem during a sale, a tenancy change, or an insurance claim.

A specialist contractor brings two things that matter in real life: the right installation method (including no-dig options) and the process discipline to deliver a clean, tested, reinstated job with the right paperwork.

If you’re in the North West and want a low-disruption replacement, Watermains & Drains UK carries out lead pipe replacements using trenchless moling where suitable, backed by industry accreditations, £10m public liability insurance, and long workmanship guarantees.

What to do before engineers arrive

You can make the day run smoother with a bit of preparation. Clear access to the internal stop tap and the area where the pipe enters the property, and make sure any fragile items in nearby cupboards are moved. Outside, move cars off the drive if the route crosses it, and point out anything you already know about drains, cables, or previous repairs.

If you’re a landlord or facilities manager, plan for brief water downtime and notify occupants. Most replacements are straightforward, but it’s best to assume there will be a period where the supply is isolated for the final connections and testing.

Aftercare: the small things that protect the job

Once the new pipe is in, take five minutes to understand your new isolation points and keep a note of where the line runs. If you’re planning future landscaping, fencing, or building work, that knowledge prevents accidental damage.

And if you’re improving water quality for health reasons, consider asking for guidance on flushing and using the water after switchover, particularly if the old system had been in place for decades. The goal is not just a new pipe underground – it’s confidence every time you turn the tap on.

Replacing a lead supply is one of those upgrades you rarely regret: it’s out of sight, but it removes uncertainty, reduces leak risk, and makes the property easier to live in, rent out, or manage.

Why Is My Outside Kitchen Drain Overflowing?
Blog

Why Is My Outside Kitchen Drain Overflowing?

Having a clean and well-functioning home inside and out can be a source of pride and satisfaction. Sadly, that all changes when we start noticing unpleasant odours or water laying where it shouldn’t. If you are wondering why is my outside kitchen drain overflowing, you are in the right place. Some simple answers including blockages caused by garden debris and other build up, and some more complex issues such as damaged pipes or infrastructure. Read on as the experts at Watermains & Drains UK explain how to unblock outside kitchen drains.

Common Causes of an Overflowing Outdoor Kitchen Drain

Firstly, let’s address the most common causes of an overflowing outdoor kitchen drain.

  • A build-up of leaf litter, soil, or other garden debris over time.
  • An influx of silt and debris during heavy rains.
  • Tree roots making their way into pipes.
  • Other infrastructure damage such as heavy machinery driving over outside kitchen drains.
  • Problems further down the sewer line stopping your home water waste flowing away from the property in a timely manner.

Signs Your Drain May Be Clogged or Damaged

While the issue may be the outside drain, unfortunately some of the signs your drain may be clogged are first noticed in the interior of your home. It may be a foul odour coming from your indoor drains, gurgling sounds, or your toilet, shower, or sink backing up and not letting water flow down the drain easily.

Assessing the outside of your home for how to unblock outside kitchen drain you may also notice water pooled outside and a foul odour likely caused from trapped organic matter starting to break down.

How Weather and Debris Impact Outdoor Drainage

Just as your internal pipes can become blocked over time by kitchen and shower products, the outdoor drainage system can become blocked by the elements acting upon it. In times of intense rains, silt and debris can build up and become lodged in the drain or pipes. Seasonal impacts include deciduous trees losing their leaves in autumn and potentially becoming compacted within the outside kitchen drain, causing it to overflow.

When to Call a Plumber or Drainage Expert

Knowing how to unblock outside kitchen drain yourself can be of benefit, but more importantly, is knowing when to call a plumber or drainage expert to assess the situation. Simple fixes such as bicarb soda and vinegar or manual clearing devices have their place, but they may also temporarily mask the odour or put a hole through a blockage without addressing the whole problem.

Get Professional Help Now!

Unfortunately, skimping on professional advice can lead to serious plumbing and infrastructure damage going undiagnosed. This can not only become unhygienic with bacteria build up, but also cause costly internal damage to floors, walls, and fittings. Similarly, damage to the outside pipes, drains, and other infrastructure can lead to expensive repairs.

If you have tried your hand at resolving the issue and are still unsure how to unblock outside kitchen drain safely and effectively, or if you simply want it done right by the professionals straight off the bat, contact Watermains & Drains UK for peace of mind that your home is in safe hands. If you find yourself with an emergency, it’s good to know your team is available 24/7 for a fast response when you need it the most.

The professional team at Watermains & Drains UK is skilled at assessing the root cause of plumbing and drainage issues. We are experts on how to unblock outside kitchen drain, with highly effective tools to get the job done thoroughly, leaving you to the calm enjoyment of your home once more.

Preventing Future Drain Overflows

Not only can drainage experts take the headache out of how to unblock outside kitchen drain, but they can also give practical advice on preventing future drain overflows. Some simple steps you can take include:

  • Keeping the area around your outside kitchen drain swept clean.
  • Keeping gutters clean can also help leaf litter from and entering the drain and compacting.
  • Keeping the contact details of your professional plumbing and drainage experts on hand for fast response when you need it the most.
  • A more rigorous maintenance schedule by your plumber or drainage expert is also a great way of ensuring small problems don’t become big problems. An experienced eye can spot telltale signs of blockages or damage that most homeowners may not recognise until more significant damage is done.

How Watermains & Drains UK can Help Unblock Outside Kitchen Drain

If you are noticing signs of an overflowing drain and wondering how to unblock outside kitchen drain, contact  Watermains & Drains UK. Our professional team can assess and resolve the issue effectively giving you peace of mind. Contact Watermains & Drains UK today.

How to Unblock a Sewage Drain
Blog

How to Unblock a Sewage Drain

Few things are more disruptive to a household than a blocked sewage drain. Whether it’s a clogged sink, shower or toilet, a blocked drain is not only frustrating to have, but also time consuming to fix. If you’re faced with a blocked sewage drain, you’ll be interested to know what caused it, and more importantly how to unblock a sewage drain​.

Warning Signs of a Blocked Sewer Drain

Before you can explore how to unblock a sewage drain, you have to figure out whether you have a blocked sewage drain in the first place. There are a few signs to look for to determine whether or not your drain is clogged:

  • Slow drainage: One of the most obvious signs of a blocked sewage drain is water draining slower than usual. Eventually, not at all.
  • Low water pressure: In addition to slow drainage, water pressure can be affected if the pipes are blocked enough to hinder water flow. Low water pressure can also be an indicator of other problems with the plumbing system.
  • Pungent smell: Another telltale sign of a blocked drain is a strong, unpleasant smell coming from the site of the blockage. Whether it’s food or leaves causing the obstruction, as it starts to break down and grow bacteria, a foul smell is likely to develop.
  • Bubbling sounds: When drains become blocked, they tend to trap pockets of air, which produce bubbling or gurgling sounds whenever you run water or flush the toilet.
  • Water backup: Blocked drains can also cause water to back up through another drain – for instance, running the tap might result in water coming up through the shower drain.


Get Professional Help Now!

What Causes a Sewage Drain to Block?

Many of the things we use in our daily lives can cause a blocked sewage drain.

In the kitchen, food products such as oil and grease, coffee grounds, rice and breadcrumbs, which go down the drain easily and appear harmless, can cause big problems later. Food products that are trapped inside drains can build up, decompose and cause an unpleasant smell. Oil and grease are especially harmful because they cool down and solidify inside the pipe and cause more serious blockages.

Likewise, the bathroom is at risk of clogging from everyday items. Items such as wipes, feminine products, paper towels and some products marketed as flushable can block sewage drains. Even small things such as hair and soap can clump together and cause serious blockages. Both the kitchen and bathroom are also at risk of small objects accidentally falling down the drain, such as toys or jewellery, which can affect both the plumbing and the object itself.

Outside of the home, sewage drains are commonly blocked by tree roots, leaves and dirt that haven’t been cleared away.

How To Unblock a Sewage Drain

Once you start to recognise the signs of a blocked drain and understand the possible root cause, you can start to address how to unblock a sewage drain​. Before attempting to unclog your own drain, be sure to wear protective clothing, gloves and a mask. From there, you can work on how to unblock a sewage drain using one or several of the following methods:

  • Pour boiling water down the drain over the course of several minutes to break down grease or soap build-up.
  • Pour baking soda and vinegar in equal parts down the drain, leaving it to sit for approximately thirty minutes before flushing with boiling water.
  • Use a plunger to create a suction around the drain or toilet to improve water flow.
  • Insert a drain snake or wire coat hanger down the drain to break down any build-up or remove foreign objects from the drain.
  • Pour chemical drain cleaner down the drain and follow its instructions for use.

Tips to Prevent Future Sewage Blockages

Given how much of a hassle it can be having to learn how to unblock a sewage drain​, it’s best to learn how to prevent future blockages. Luckily, preventing blockages is simply a matter of a few lifestyle changes. Be vigilant about what flows down your drains. Avoid pouring oil, grease, coffee and other food products down the kitchen sink, and only flush toilet paper down the toilet. To avoid accidents, start using removable food strainers and hair catchers in your kitchen and bathroom that can catch small objects and prevent future blockages.

Pour boiling water down your drains regularly to eliminate possible build-up from soap and oil. Furthermore, have your plumbing system inspected every few years by a professional. This ensures that your plumbing system is running properly and avoids having to determine how to unblock a sewage drain​ yourself.

When to Call a Professional?

Once none of the previous home remedies have successfully unblocked your sewage drain, the only answer to the question of how to unblock a sewage drain​ is to call a professional. They have the tools and the techniques to address more complicated problems with your plumbing system, such as issues with the pipes themselves or your septic tank.

Don’t hesitate to contact the team at Watermains & Drains UK and get your household plumbing back in order.

Can bleach unblock a drain
Blog

Can You Use Bleach to Unblock a Drain?

Few household problems are as frustrating as blocked drains. One moment, your sink is draining perfectly fine, the next water starts pooling, gurgling and every now and then it lets out an unpleasant odour that belongs in the sewage.

Blocked drains can happen to any sink. Kitchen sinks get clogged with solidified grease or food scraps. Bathroom basins get blocked by hair, soap scum, and even dental floss. Outdoor drains are at the mercy of leaves, dirt, and garden debris.

Since blocked drains are considered simple, many homeowners have a list of DIY methods they try before even thinking of calling in a professional. Near the top of this list is bleach.

It’s assumed that because bleach is strong enough to kill bacteria and whiten clothes, it must be good at unclogging pipes too. But how effective is bleach at clearing blocked drains? Can bleach unblock a drain?

Can Bleach Dissolve Drain Blockages?

Bleach is a chemical you’ll find in almost every household. Cheap, effective, and great at making white clothes white, can bleach unblock a drain as some homeowners claim?

Like most things, the answer isn’t quite as simple as yes or no.

Bleach is a powerful chemical designed for cleaning and killing bacteria, but dissolving solid clogs isn’t part of that design. If your kitchen sink is blocked by grease, you could pour an entire bottle of bleach down the drain, and it will just sit there without doing anything to the block.

What Happens When You Pour Bleach Down a Drain?

Unlike specialised drain cleaners, bleach doesn’t create a foamy, bubbling reaction when poured down the sink. It doesn’t aggressively break down tough clogs the way chemical formulas or mechanical drain-clearing tools do. Instead, it flows down quietly, almost like water.

What you can’t see is bleach working slowly to destroy bacteria, mildew, and minor organic buildup. The usual culprits behind bad smells and sluggish drainage.

But as we asked earlier, can bleach unblock a drain, the answer is more no than yes. Bleach isn’t designed to dissolve solid materials, so if blockages in your drains are due to food scraps, hair, or hardened grease, pouring bleach down your drain won’t help much.

Get Professional Help Now!

Types of Blockages Bleach Can Handle (and others it can’t)

While bleach is often seen as a quick fix, its effectiveness depends entirely on what’s causing the blockage. Bleach won’t work for:

  • Grease buildup that has solidified
  • Hair clogs or tangled dental floss deep in pipes
  • Foreign objects such as food scraps, wipes, or soap bars that accidentally end up down the drain

For these types of clogs, pouring bleach down the sink is a waste of time and money. To clear these blockages, special intervention, like plunging, rodding, or a professional drain-cleaning formula is more effective.

However, if your issue is less severe and more about maintenance, bleach can be useful to:

  • Eliminate bad odours caused by bacteria buildup
  • Break down minor soap scum deposits lining the pipes
  • Help water flow more smoothly by dissolving small organic debris, such as biofilm.

In short, you’ll find more success with bleach as a cleaning agent than a clog remover.

How to Use Bleach Safely When Unblocking a Drain

If after reading this, you still want to try, these are some rules you need to keep in mind for your own safety.

  • Check ventilation. Always use bleach in a well-ventilated area. Breathing bleach fumes can be hazardous to your health.
  • Measure carefully. Use no more than 120ml at a time, too much can corrode and damage your pipes.
  • Pour around the edges of the drain. This prevents the bleach from just flowing straight through.
  • Leave bleach in the drain for 30 minutes, then rinse thoroughly with warm water to ensure it doesn’t stay in the drain and get mixed with other cleaning materials and create toxic fumes.

What Are the Risks of Using Bleach to Unblock a Drain?

Bleach might seem like a simple fix, but it comes with risks.

  • Pipe damage. Repeated use can corrode metal and PVC piping, leading to leaks, cracks, or burst pipes over time.
  • Toxic fumes. If bleach is accidentally mixed with ammonia-based cleaners, it produces dangerous fumes that can be harmful.
  • Environmental harm. Bleach isn’t eco-friendly, and pouring large amounts into drains can disrupt natural ecosystems.

So, can bleach unblock a drain? Yes, in certain situations bleach can help improve the flow, but it was never designed or intended to help especially when blocks are solidified or caused by foreign objects.

What to Do if Bleach Doesn’t Clear a Drain Blockage?

If using bleach didn’t work, here are a few other more reliable methods you can try to fix the problem:

  • Plunging
  • Hot water & baking soda
  • Professional grade drain cleaner

Once you’ve tried everything and still find your drains clogged, call in the experts. With professional help, you’ll avoid chemical risks, messy surprises, and wasted time.

How to Prevent Drain Blockages in the Future

Alternatively, if any of the methods above have somehow cleared your drains and it is now flowing smoothly again, here are a few simple tricks to keep them that way:

  • Avoid pouring grease or food waste down the sink.
  • Use drain strainers to catch hair and food debris before they cause problems.
  • Run hot water regularly to prevent soap scum buildup.

Whenever you find yourself faced with a blocked drain, you might be tempted to reach for the bleach to find out can bleach unblock a drain but bear in mind, bleach is a cleaner not a clog remover.

Or you can save your time and let the professionals help. Reach out to our team Watermains & Drains UK today and let us find and clear out every blocked drain in your home.

How to unblock a drain outside
Blog

How to Unblock Outside Drains

Blocked outside drains are a problem every UK homeowner knows too well. Whether it’s autumn leaves creating havoc, heavy rainfall overwhelming your system, or simple everyday debris building up over time, external drain blockages can quickly turn from minor nuisances into major headaches.

This guide will walk you through everything you need to know about how to unblock a drain outside​. From how to spot early warning signs, understanding what causes blockages, knowing how to unblock drains outside yourself, and knowing when it’s time to call in the professionals.

Read on to equip yourself with handy tips that can keep your outside drains flowing smoothly all year round.

How to Tell If Your Outside Drain Is Blocked

Catching and recognising a blocked outside drain early will save you from wasting time, emergency costs, and a lot of frustration.

But how can you tell something isn’t right with your outside drains before you start searching online for how to unblock drains outside? Here are some telltale signs to look for.

Standing Water

When the blockage is particularly severe or complete, you’ll see standing water even after light rainfall. Water pools around your drain and refuses to flow. You’ll sometimes also see visible debris, and almost always smell an unpleasant odour.

Slow Drainage

In cases where the outside drain isn’t completely blocked, you’ll get slow draining water. This is particularly noticeable during heavy downpours, as outside drains are designed to handle large volumes of water. So any slow drainage is an early indicator that you may need to unblock your outside drain.

Gurgling Sounds

Strange gurgling sounds from your drain is a sign air is being displaced by a blockage somewhere causing odd noises. Any bubbling, gurgling, or sucking sounds could be an early indicator of a blocked drain.

Unpleasant Smells

It isn’t unusual for drains to sometimes have faint unpleasant odours. However, if you notice a persistent odour from your outside drain, don’t ignore it. Any odour is a clear red flag that some type of organic matter is trapped and decomposing in your drainage system.

Visible Debris

If you’re lucky, there’ll be debris clearly visible on or around your drainpipes. Leaves might be blocking the drain hole, mud flowing in from your plants or gardens, or a collection of other debris at the drain opening or just below the surface. Remove this debris and water flow should return to normal.

Get Professional Help Now!

What Causes Outside Drains to Become Blocked?

Early telltale signs above could potentially help you catch a blocked outside drain and save you hundreds of pounds or more in emergency fees. To avoid needing to find out how to unblock outside drains, take the pre-emptive step and discover the causes of blocked outside drains.

Autumn Leaves and Garden Debris

During the autumn months, falling leaves are the number one cause of homeowners reaching for outside drain unblockers across the UK. Throw in some twigs, seeds, and other organic matter, and you’ll have all the ingredients for a blockage disaster.

Soil and Sediment

During heavy rainfall, it’s not just water that flows into the drains. Other particles such as soil, sand, and sediments also wash into your drainage system. Over time, these materials build up and restrict water flow.

Grease and Fat

If your kitchen drainage system is connected to the outside drain, wastewater containing oils, fats, and grease can solidify in your outdoor drains, causing a block during colder months. Once solid, it becomes a trap that catches debris and waste flowing down.

Tree Roots

Mature trees near your drainage system can be another cause for needing to unblock a drain outside. As roots naturally seek out water sources and can eventually work their way into drainpipes, they can end up causing blockages and even structural damage over time.

Building Materials

During home improvement or DIY projects, materials like cement, paint, or plaster can accidentally find their way into the drainage system. These materials cannot be easily cleared by external drain unblockers and cause serious blockages that are tough to clear yourself.

Random Objects

It’s uncommon but random small items like children’s toys that get picked up by the wind and end up lodged in drain openings, can also cause obstructions preventing water from flowing.

Hair and Soap Residue

Like kitchen wastewater, bathroom wastewater can cause pipes to become clogged with hair, soap scum, and other personal care products.

Knowing the possible causes of blocked drains will help you decide how to unblock drains outside and which external drain unblockers you need to effectively solve the problem. In some cases, this knowledge can save you time so you can immediately get professional help and not waste time trying DIY methods that can’t solve complex problems.

Preparing to Unblock an Outside Drain

Now that you’re equipped to identify if your outside drain is blocked, we have one final step before we can answer how to unblock an outside drain. Getting prepared.

Here’s what you need to prepare before you try to unblock an outside drain.

Safety Gear

Pulling some sticks or a bunch of leaves out of a gutter can seem easy, but twigs and leaves can sometimes hide thorns or sharp edges that can cut or stab you. Gloves offer vital protection, as does non-slip footwear to reduce the risk of slipping and injuring yourself.

Gather Your Tools

Round up everything you need before starting. You’ll save time having all your equipment ready instead of making multiple trips to look for it.

Check the Weather

For your safety, don’t attempt drain clearance when rain is forecast or during heavy rainfall. Let the rain come to a stop before you even start collecting your tools.

Find the Stopcock

In the unlikely event you hit another pipe or the unblocking process causes a burst pipe, make sure you know the location of your water supply stopcock.

Take Photos

Snap a few pictures of the drain and surrounding area before you start. If the problem turns out to be more than you can handle and you need to call professionals or need proof for insurance purposes, having pictures can be very helpful.

Clear Workspace

Remove any obstacles around the drain opening. Heavy items that can fall on you and hurt you. Sharp objects. Even leaves and other debris can be a hazard. Get rid of them all to make sure you have enough space to work safely and comfortably.

What to Use When Unblocking an Outside Drain

Just as different jobs require different tools, unblocking drains needs the right equipment. What tools do you need when you’re trying to solve the question of how to unblock an outside drain?

Before you set aside time to unblock your outside drain, here’s a list of useful tools for the task ahead.

Basic Tools

Simple items such as rubber gloves, a small trowel or spade, and a bucket can be a great starting point for your outside drain unblocker toolkit.

A plunger that can properly seal the drain opening can make quick work of some blockages. In other situations, a garden hose can deliver a blast of water to clear loose debris and sediment that hasn’t quite set.

If you don’t have any tools or don’t want to spend any money on tools, try wire coat hangers. You can easily straighten one out to fish for debris from shallow drain openings.

Advanced Tools

A drain rod is a line of flexible rods that you can screw together to create a long tool to reach deep into drainage pipes. Most hardware stores sell them, and they work wonders for deeper blockages and are a must-have in your outside drain unblocker toolkit.

Finally, caustic soda and biological drain cleaners are effective options to consider for specific blockages. While they are generally safe, you should always use them with extreme caution and wear proper protective equipment to prevent harm to yourself.

A Step-by-Step Guide to Unblocking an Outside Drain

Now that you’ve collected all the necessary items, checked the weather, and taken pictures, you’re ready to unblock your outside drain. Here’s a systematic approach to tackle your blocked outside drain safely and effectively.

Step 1: Remove the Drain Cover

Carefully lift the cover to expose the drain opening. You should expect some unpleasant smells when you first open it up.

Step 2: Clear Out Visible Debris

If there is any visible debris such as twigs and leaves, use a gloved hand or a small trowel and carefully start removing it. Place it in the bucket and dispose of it appropriately away from your drains.

Step 3: Try Flushing with Water

Once that’s done, or if there is no visible debris, try using your garden hose to flush water down the drain. Start gently then increase the pressure as needed. In some cases, you will successfully solve the problem and can simply replace the drain cover.

Step 4: Use a Plunger

Do this step only if you have a plunger that can create a full seal around your drain hole. If you don’t have it, skip this step.

If water flushing didn’t do the trick, try using a plunger to create a good seal and try to dislodge whatever’s blocking the flow.

Step 5: Get a Drain Rod

For deeper or more severe blockages, you’ll need a drain rod to carefully feed into the drain and try to dislodge the block. Remember to use a clockwise twisting motion to avoid unscrewing the rods as you push them through the pipe.

Step 6: Chemicals

If you’ve tried all the mechanical methods in this How to Unblock an Outside Drain guide and none of them work, your last DIY option is a drain cleaning product. You can get them from hardware stores, but you should always follow manufacturer’s instructions make sure you never use them in closed spaces.

Step 7: Final Test

If you’re successful, do a flush test to see if the water drains. If it does, congratulations you’ve done it! Replace the drain hole cover and check it regularly to ensure it doesn’t block again.

If the water doesn’t drain properly, don’t worry. Replace the drain hole cover to avoid anyone slipping and falling into the drain. Get a professional team to assess and help you permanently clear the block.

When to Call a Professional Drain Unblocker

Thanks to this guide, a useful collection of tools and a bit of DIY elbow grease, you’ve hopefully managed to unblock your outside drain.

However, if things don’t go as planned and you’re wondering if you should try again or call for professional help, here are some situations where you can save time and let the professionals handle it:

Stubborn Blockages

If you’ve tried scooping, pushing, pressure washing, caustic soda, and the block is still there, it’s time to call in professionals. They’ll have access to specialised equipment and techniques that will get it done fast.

Signs of Structural Damage

Stop everything if you notice any cracks in the drain cover, ground subsidence, or signs that the drainpipe itself might be damaged. Immediately get a professional assessment before you accidentally make things worse.

Other Major Problems

If you’re clearing your blockage and notice bio-hazardous material like raw sewage (a very serious health hazard) or tree root problems, or you’re facing a recurrent blockage, seek immediate professional assistance.

Tackling these issues yourself could result in serious health risks or costly damage to your drainage system. Professional drain specialists like our team at Watermains & Drains have access to specialised equipment and can conduct CCTV drain surveys to uncover the real situation in the drains, to quickly and safely resolve your problems.

If you’re looking for comprehensive drain unblocking services, don’t struggle alone. Get experienced professionals to quickly diagnose and resolve even the most stubborn drainage issues.

How to Prevent Blockages in the Future

Prevention beats cure when it comes to outside drain maintenance. Instead of waiting for your drains to become blocked, use these tried-and-tested strategies to keep your external drains clear and flowing freely:

Drain Guards

Using guards or covers over your drain openings will help catch larger debris while still allowing water to flow through freely.

Regular Inspection and Maintenance

Schedule time to check your outside drains regularly, especially during autumn when leaf fall is at its worst. Remove visible debris before it has a chance to build up into a serious problem.

Landscaping

Whenever possible keep trees and shrubs trimmed back from drain areas and avoid planting trees with aggressive root systems close to drainpipes.

Consider Annual Professional Checks

If you live in an older property or have experienced problems before, having your drainage system inspected annually can catch issues before they become major problems.

Keeping your outside drains clear is an essential part of property maintenance regardless of your country. It’s especially important in the UK thanks to our tendency towards heavy rainfall and seasonal debris.

By understanding blockage warning signs and having a clear idea of which tools and techniques work, you can handle simple blockages early to keep your outside drain system working effectively throughout the year.

However, don’t hesitate to call in professional help. While DIY methods can work, it’s safer and often more economical to let professionals like Watermains & Drains solve persistent or complex issues with our decades of experience and specialised equipment.

Struggling with stubborn drain blockages?

Don’t let your drainage problems get worse while you try different solutions. Get in touch with drainage specialists at Watermains & Drains who can provide fast, effective and long-lasting solutions to get your drains flowing freely again

Can Blocked Drains Cause Subsidence?
Blog

Can Blocked Drains Cause Subsidence?

Can Blocked Drains Cause Subsidence?

You close your door but instead of the familiar click, you hear a dull thud behind you. Now if your door has always closed without a problem, this sound can be very concerning. It may mean a few things, but it could indicate your door or your home’s foundation has been damaged through subsidence.

When talking about subsidence, homeowners often think about major shifts, such as trees growing too close to their homes or major construction works in the area. But one cause that’s often overlooked and rarely asked is ‘can blocked drains cause subsidence’?

In this article, we’ll discuss what subsidence is, why you should be alert for it, and answer ‘can blocked drains cause subsidence?’.

What Is Subsidence and Why Is It a Problem?

If you’ve never heard of it, subsidence is what happens when the ground beneath your property sinks or moves downward. Think of it like a chair leg sinking into soft sand, except it’s happening to part of your house into the ground.

When this sinking occurs, it doesn’t just affect your doors. As the ground shifts, it can cause:

  • Cracks in walls
  • Doors and windows that no longer open and close smoothly
  • Rippling wallpaper even when there’s no damp
  • Floors become sloping or uneven

Not only will subsidence affect the structural integrity and safety of your property, it can also cost you financially through emergency repairs and a reduction in property value.

Can Blocked Drains Cause Subsidence?

To answer the important question ‘can blocked drains cause subsidence’?

Yes, it’s entirely possible. When working properly, drains send water flowing safely away from your home. When blocked by grime, dirt, leaves or other rubbish, the water becomes stuck and looks for somewhere else to go, usually ending up in the soil around it.

The stuck water then seeps into the surrounding soil, causing:

  • Soil particles to wash away, creating empty spaces under your foundation
  • Ground to become soft and unable to support your home’s weight
  • Clay soils to swell unevenly, making your foundation shift
  • Unstable ground conditions that get worse over time

The first symptom you might notice is a slow-draining sink or the occasional drain gurgle. You’ll be tempted to ignore it, but when left untreated or unchecked it can escalate into serious structural problems.

Prevention Is Better Than Cure

Now, for the good news. Drain-related subsidence is preventable. If you engage in professional drain unblocking services early when signs of blocked drains or water logging become obvious, the blockages can be cleared before lasting and pricey issues are created.

Here are some signs to watch for when deciding to get professional help:

  • Slow-draining sinks or toilets
  • Bad smells coming from drains
  • Gurgling noises in pipes
  • Wet patches appearing in your garden
  • Sunken or cracked paving

Once you notice any of these signs, especially alongside doors or windows that suddenly won’t close properly, don’t wait. Reach out to a professional team and get it checked. Modern drainage specialists like our team at Watermains & Drains can use portable camera equipment to survey and identify problems before they cause serious damage to your property.

Remember, while there are many causes of subsidence, drainage problems are one of the most preventable. Regular maintenance and quick action can save you from this expensive and disruptive issue. Is your home showing signs of subsidence? Contact our expert team from Watermains & Drains for help today.