Your Water Main, Drainage & Trenchless Solution Specialists

News

Water Main Installation: What to Expect
Blog

Water Main Installation: What to Expect

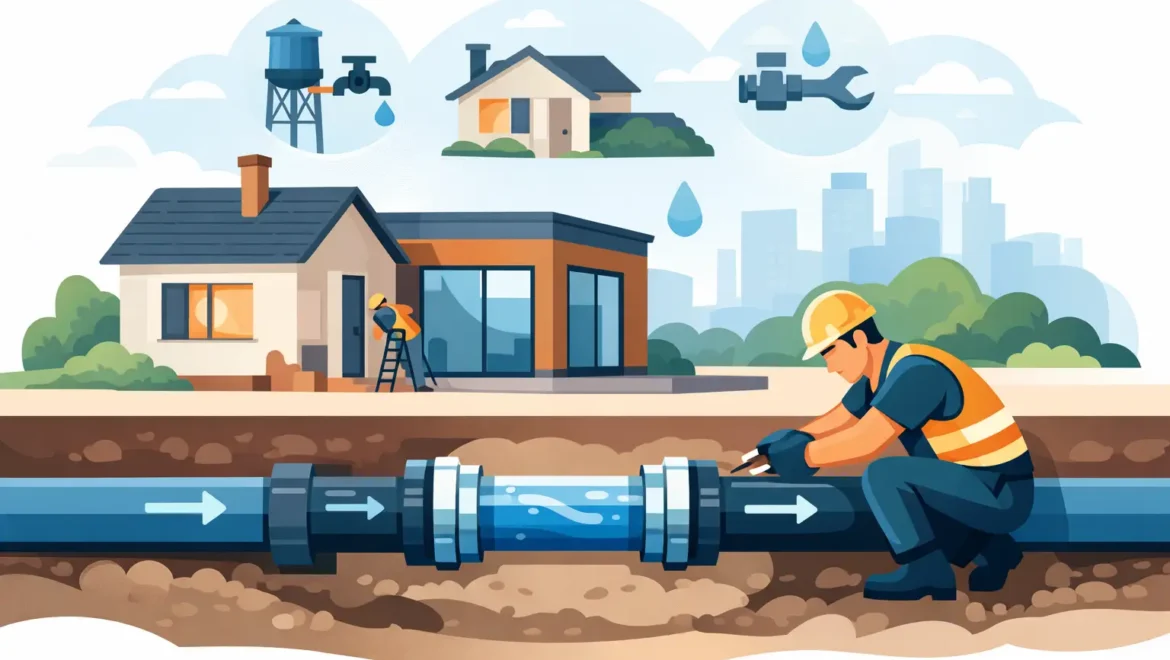
If your property needs a new supply, a larger connection, or a damaged main replacing, water main installation is usually less about the pipe itself and more about how the job is planned. The difference between a smooth project and a drawn-out one often comes down to permissions, ground conditions, traffic management, and whether the contractor can install with minimal disruption.

For homeowners, that usually means one thing – keeping driveways, gardens and paths intact where possible. For landlords and commercial sites, it means avoiding delays, protecting access, and making sure the work is compliant from the outset.

When water main installation is needed

A new water main is not only for new-build sites. It is often required when an existing pipe has reached the end of its serviceable life, when repeated leaks make repair poor value, or when the current supply is undersized for the property’s demand.

Older properties can also run into issues where legacy pipework no longer meets current expectations for reliability or water quality. In some cases, a lead supply or ageing metal pipe may be part of a wider upgrade, especially where owners want a safer, more dependable incoming supply.

Commercial properties tend to face a slightly different set of pressures. A facilities team may need a new main because of redevelopment, a changed site layout, additional welfare units, or an insurance-driven requirement to address recurring failures. In those situations, installation method and scheduling matter just as much as the pipe specification.

What happens before installation starts

A proper water main installation starts with surveying, not excavation. The route needs to be assessed, existing utility services identified, and the required pipe size confirmed against the property’s demand and network conditions.

This early stage is where experienced contractors save clients time and avoid costly changes later. A short, direct route may look best on paper, but that is not always the cheapest or least disruptive option. Tree roots, retaining walls, cellars, shared accessways, buried services, and reinstatement obligations can all change the approach.

Permissions and approvals also need to be dealt with correctly. Depending on the scope, this may involve liaison with the relevant water authority, notices for work in the highway, and method planning for excavation or trenchless installation. For homeowners, these steps can feel opaque. For commercial clients, they are often a key part of procurement because compliance failures create programme risk.

Trenching or trenchless water main installation?

This is usually the question clients ask first, and the honest answer is that it depends on the site.

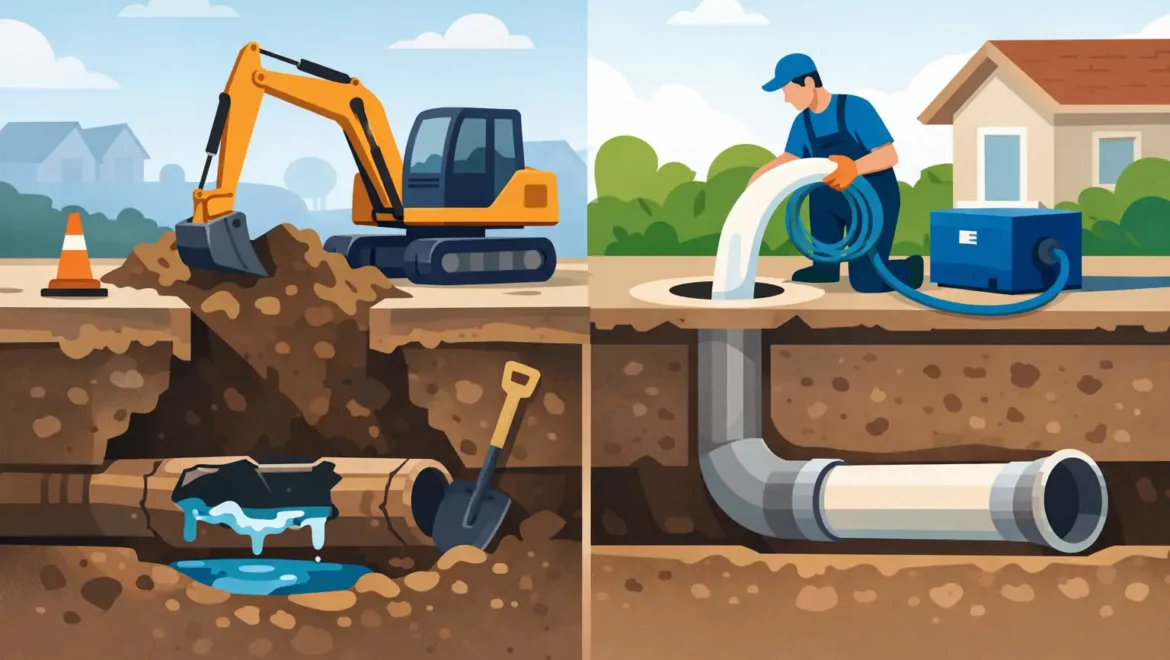
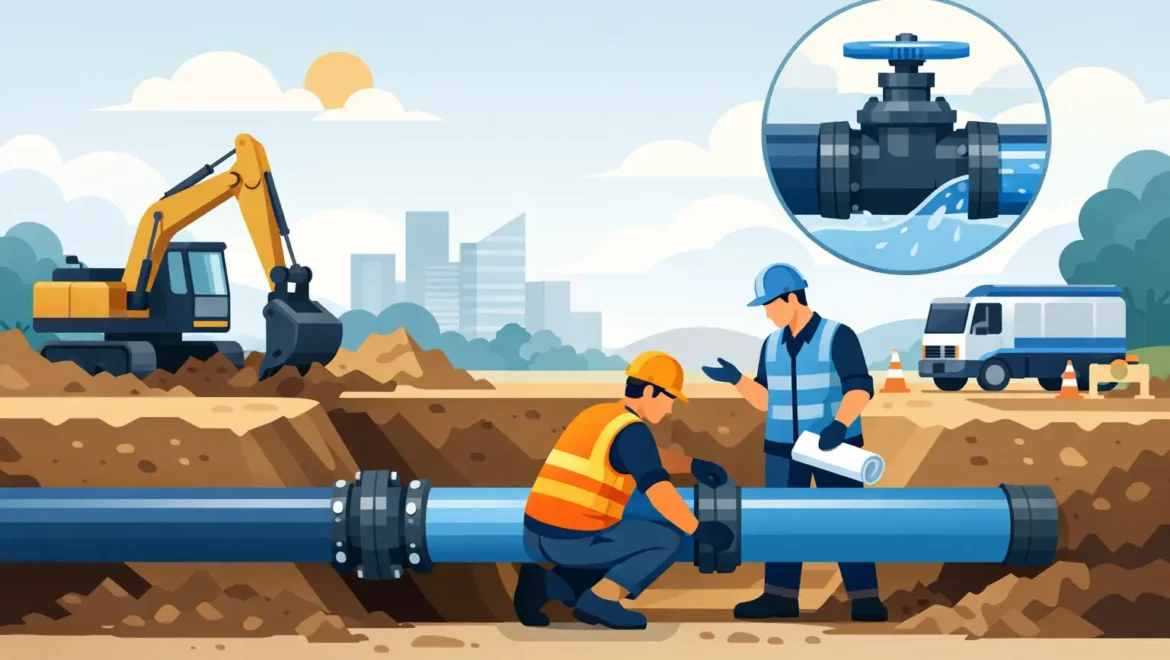
Traditional trenching is still the right choice in some situations. If the route is open, access is straightforward, and the reinstatement is simple, excavation can be the most practical and cost-effective method. It also allows full visibility of the ground and existing services as the work progresses.

But where the route passes under a driveway, garden, paved area, or other finished surface, trenchless methods are often the better option. Moling and horizontal directional drilling can install new pipework with far less surface disruption. That means fewer excavations, quicker reinstatement, and less mess around occupied properties.

That does not mean trenchless is always possible. Ground conditions, route length, changes in level, and congestion from existing services all need checking first. A responsible contractor will not push a no-dig method where it is unsuitable. The aim is not to use a fashionable technique. The aim is to get a reliable new supply installed cleanly and safely.

What affects the cost?

There is no sensible fixed price for water main installation because site conditions vary too much. A short run across soft ground is very different from a connection that crosses hardstanding, public footway and a busy access point.

The main cost factors are route length, pipe size, ground type, excavation depth, reinstatement requirements, and the complexity of the final connection. Traffic management can add significantly where work affects the highway. So can difficult access or the need to work around tenants, business hours or shared property boundaries.

For domestic customers, the biggest hidden cost is often reinstatement. Digging the trench is only part of the job. Matching paving, making good tarmac, reinstating decorative surfaces, and leaving the site tidy all matter. For landlords and facilities managers, downtime and disruption can be just as important as the quoted figure. A cheaper price is not always better value if it creates complaints, delays or return visits.

How long does water main installation take?

The installation itself can be relatively quick. What extends timescales is usually planning, approvals and coordination.

A straightforward domestic installation on private land may be completed in a short window once everything is agreed. More complex works involving highway access, larger pipework, multiple stakeholders or difficult ground conditions take longer. Connection dates can also depend on third-party attendance where the local water network is involved.

This is why realistic scheduling matters. Clients are better served by a contractor who gives a clear sequence and sticks to it than by one who promises an unrealistically fast start. Good planning reduces disruption more effectively than rushed work ever does.

Common issues that can delay a project

Underground work rarely rewards assumptions. Uncharted services, old foundations, unexpected changes in ground conditions, and restricted access are all common causes of delay.

On older properties, it is not unusual to uncover abandoned pipework or non-standard previous repairs. On commercial sites, traffic routes, delivery windows and tenant access can affect how and when the work is carried out. Poor weather can also slow excavation and reinstatement, particularly where surfaces need to be left safe and serviceable at the end of each day.

The practical answer is not to pretend these risks do not exist. It is to work with a specialist contractor who plans for them, communicates early, and keeps the site controlled and tidy throughout.

Choosing the right contractor for water main installation

This is specialist work, not general groundworks with a pipe added in. The contractor you appoint should understand water infrastructure, site safety, compliance, reinstatement standards and the practical realities of working around occupied homes or live commercial premises.

Accreditations matter because they show the contractor is working to recognised standards. Insurance cover matters because underground works carry obvious risk. Experience with trenchless methods matters because minimal disruption only happens when the team knows when and how to use them properly.

It is also worth paying attention to the basics. Do they explain the method clearly? Can they quote promptly? Will they leave the site clean? Do they understand that a homeowner may be worried about their driveway, while a facilities manager may be worried about access, documentation and programme certainty? Competence is not only technical. It shows in communication and conduct as well.

For clients in the North West, Watermains & Drains UK positions this as a specialist service rather than a generic excavation job, which is the right way to look at it. A new main should solve a problem for the long term, not create a trail of avoidable disruption around the property.

Preparing your property or site

A little preparation helps. Domestic customers should make sure access points are clear and raise any concerns about paving, planting, outbuildings or shared boundaries before work starts. If the water supply needs isolating during the connection, it is sensible to plan around that in advance.

For commercial sites, preparation is usually more formal. Access permits, welfare arrangements, traffic routes, and communication with tenants or staff may all need coordinating. If the site has restricted hours or sensitive operating periods, that should be agreed early rather than managed day by day.

The more clearly the route, method and programme are set out in advance, the easier the installation tends to be.

Why the installation method matters long after the job ends

Clients often focus on getting the new main in place, which is understandable. But long-term performance depends on more than the final connection.

Pipe material, route protection, jointing quality, testing, and reinstatement all affect how the asset performs over time. A poorly planned installation may technically deliver a new supply while leaving weak reinstatement, awkward access chambers, or future maintenance headaches. A well-executed one should be reliable, tidy and unobtrusive once complete.

That is why specialist delivery is worth it. The best outcome is not simply a connected pipe. It is a properly installed water main that supports the property for years without repeated disruption.

If you are weighing up a new connection or replacement, the right starting point is a clear site assessment and a method that suits the ground, the property and the people using it. Get that right, and the rest of the job becomes far more straightforward.
Outside stop tap leaking - what to do
Blog

Outside stop tap leaking – what to do

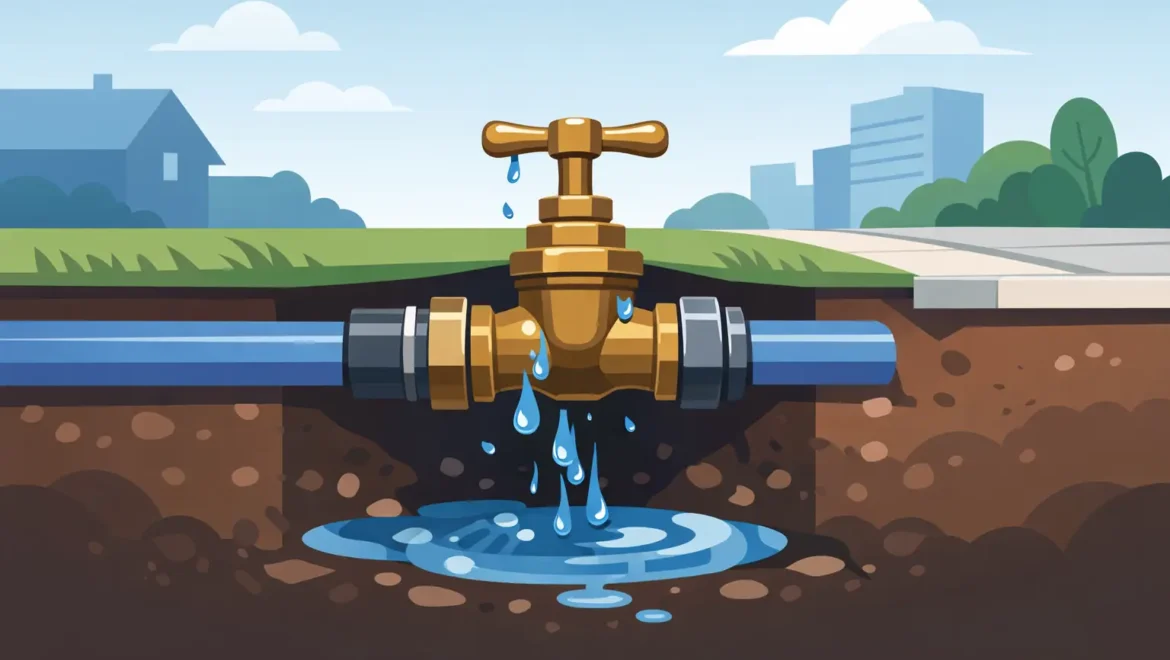
A leaking stop tap outside usually shows up at the worst moment – a wet patch that never dries, water pooling around the boundary box, or a lid that is suddenly harder to lift because the chamber is full. If you are searching for outside stop tap leaking what to do, the first priority is simple: work out whether it is a minor issue in the chamber or a leak that could affect your supply pipe, water bill, or surrounding ground.

In many properties, the outside stop tap sits in a small underground box near the pavement, driveway, or front boundary. It is there so the water supply to the property can be isolated without entering the house. When that chamber is wet, people often assume the stop tap itself has failed. Sometimes that is true. Just as often, the water is coming from a loose gland, a worn fitting, a damaged communication pipe, groundwater entering the box, or a leak further along the supply line.

Outside stop tap leaking – what to check first

Start with a careful look rather than forcing anything. Lift the stop tap cover if it is safe to do so and check whether the water is clean and flowing, or whether the chamber is simply damp. A chamber that is half full after heavy rain may not point to a mains leak at all. A chamber that refills quickly with clear moving water is more serious.

If you can see the tap body, look for water coming directly from the spindle area, around joints, or from the incoming or outgoing pipework. If the leak appears only when the tap is turned, the gland or internal seal may be worn. If water is rising from below the fitting or through the side of the chamber, the problem may sit on the pipe rather than the tap itself.

Do not use excessive force on an outside stop tap. Older fittings can seize, and turning them too hard may cause a larger failure. That is especially true on older properties with ageing metal pipework or where the chamber has been undisturbed for years.

Can you still use the water supply?

That depends on the leak and where it is coming from. A slight weep around the spindle may not stop the house from functioning in the short term, but it still needs attention. A steady flow into the chamber, a noticeable drop in pressure indoors, or ground saturation around the boundary should be treated as urgent.

If the leak is on your private supply pipe after the boundary connection, continuing to use water can make the problem worse and increase waste. If the tap chamber is overflowing towards a path, driveway, or road edge, there is also a safety issue to consider.

For landlords and commercial sites, the balance is often between keeping supply available and limiting further damage. In those cases, a proper inspection matters more than guesswork. The right contractor can determine whether the issue sits with the stop tap itself, the supply pipe, or the water authority side of the connection.

What causes an outside stop tap to leak?

The most common causes are wear, corrosion, movement in the ground, and damage from age. External fittings are exposed to cold weather, soil moisture, and years of use or non-use. If the tap has not been operated for a long time, seals can deteriorate and threads can bind.

On older properties, the chamber may also contain outdated materials, including lead or ageing metal pipe sections. In that situation, the visible leak is sometimes only part of the problem. A stop tap replacement can expose a supply pipe that is already at the end of its serviceable life.

There is also the question of ownership. Some outside stop taps serve as the boundary between the water undertaker’s pipework and the private supply to the property. That means responsibility can vary depending on exactly where the leak sits. The only safe assumption is not to dig or dismantle anything until the source has been properly identified.

Outside stop tap leaking what to do if it is urgent

If water is flowing continuously, the chamber is filling quickly, or you are losing pressure inside the building, treat it as an urgent leak. Keep people away from slippery surfaces around the chamber and avoid attempting a repair with improvised tools.

Where possible, check whether the internal stop tap can shut off water to the property. That will not stop every external leak, but it can help reduce flow in some scenarios. If the internal tap also sticks or fails to operate, leave it alone rather than risking a second fault.

Take a few clear photos of the chamber and note any changes in water pressure, noise, or visible pooling. That helps a specialist assess likely causes before attending. For homeowners, this can speed up diagnosis. For landlords and property managers, it also creates a record if the issue affects tenants, insurers, or shared access areas.

When it is a simple repair and when it is not

A straightforward repair is usually limited to the fitting itself – for example, tightening or repacking a gland, replacing a faulty stop tap, or renewing accessible joints in the chamber. If the surrounding pipework is sound and the chamber is in reasonable condition, that can be a quick job.

The job becomes more involved when the leak is linked to a damaged supply pipe, poor historic repairs, corroded metalwork, or restricted access. A tap chamber at the edge of a driveway or beneath hardstanding may need careful excavation and reinstatement. If the supply pipe is old lead or failing MDPE connections are found, it can make more sense to repair the leak and upgrade the line properly rather than return to the same issue later.

This is where specialist contractors differ from general plumbing call-outs. External water supply leaks often need excavation knowledge, utility-safe working, and a clear understanding of responsibility at the property boundary. If the repair sits close to paved areas, trenchless methods can also reduce disruption compared with traditional digging.

Why not to ignore a leaking boundary stop tap

Even a modest leak can lead to bigger costs over time. Constant water loss may affect bills if the leak is on the private side. Saturated ground can undermine paving, soften sub-bases beneath driveways, and create recurring wet patches that are difficult to trace later. In winter, standing water around a chamber also increases the chance of freezing and further damage.

There is a practical issue too. If your outside stop tap is leaking and then fails completely, isolating the property in an emergency becomes much harder. That matters during internal plumbing leaks, vacant property periods, and tenant changeovers.

For commercial premises and managed residential sites, delays can also turn a small external defect into a service disruption issue. Access routes, customer entrances, and landscaped areas are not places where you want water escaping unchecked.

Who should you call?

If the leak appears to be on the public side of the connection, your water supplier may need to be involved. If it is on the private supply side, you will usually need a specialist water main or underground supply pipe contractor rather than a general handyman.

The benefit of using a contractor experienced in external water infrastructure is that they can identify the fault properly, carry out compliant repairs, and advise if replacement is the better long-term option. That is particularly useful on older homes, rental stock, and sites where reinstatement quality matters as much as the repair itself.

For properties across the North West, Watermains & Drains UK deals with external water supply leaks, stop tap issues, supply pipe replacement, and low-disruption installation methods. That matters when the fault is not just a leaking fitting, but part of a larger underground water supply problem.

What to expect from a proper repair visit

A competent repair should begin with locating the exact source of the leak, not just replacing the most obvious component. The contractor may inspect the chamber, test the fitting, assess the incoming and outgoing pipework, and check whether there are signs of further leakage along the line.

If excavation is required, the method should match the site. In a garden, access may be simple. In a finished driveway or paved frontage, the priority is usually to keep disruption and reinstatement work to a minimum. If a full replacement is recommended, you should be told why a repair is unlikely to hold.

Clear quoting matters here. Homeowners want to know whether this is a contained repair or a wider supply issue. Landlords and facilities teams need the same clarity for approvals, tenant communication, and scheduling.

A sensible next step

When an outside stop tap starts leaking, the safest approach is not to force it, patch it, or hope it settles down on its own. Check the chamber carefully, limit risk around the area, and get the leak properly assessed so you know whether it is the fitting, the pipe, or something further upstream. A quick, tidy repair is often possible, but the right answer depends on what is happening below ground.

How to Find Hidden Water Leak Underground
Blog

How to Find Hidden Water Leak Underground

A water bill that suddenly jumps, a patch of lawn that never seems to dry out, or a drop in pressure at the kitchen tap often points to the same problem – you may need to find hidden water leak underground before it causes bigger damage. In many properties, the leak is not inside the house at all. It is somewhere on the supply pipe between the boundary and the building, which means the warning signs can be easy to miss until the ground is already saturated.

Underground leaks are rarely obvious at first. Water can travel through soil, appear several metres away from the actual fault, or disappear into drainage runs and make the problem look smaller than it is. That is why a sensible approach matters. The aim is not just to spot wet ground. It is to work out whether the leak is on your private supply, how urgent it is, and what method will locate it with the least disruption.

How to find hidden water leak underground without guesswork

The first step is to confirm whether water is escaping when no one is using the supply. If your property has an internal stop tap and an external water meter, turn off all taps, appliances, and any systems that draw water, including dishwashers and outside taps. Then check the meter. If the dial or indicator is still moving, there is a strong chance water is being lost somewhere on the line.

This test is useful, but it does not tell you exactly where the problem sits. A moving meter could point to an internal leak, a faulty toilet valve, or an underground supply pipe issue. To narrow it down, turn off the internal stop tap that isolates the property. If the meter continues to move after that, the leak is likely between the meter and the house. That usually means the underground supply pipe is at fault.

For homeowners and landlords, that distinction matters because it affects who is responsible and how the repair is planned. In many cases, the private section of pipework is the owner’s responsibility, not the water authority’s.

Signs of a hidden underground water leak

Not every underground leak creates a dramatic puddle. On some sites, especially where the ground drains freely, the signs are subtle. You may notice one area of grass growing faster than the rest, soft ground during dry weather, a driveway edge that stays damp, or a slight hollow forming where the soil has been washed away below the surface.

Inside the property, the signs can be less direct. Lower water pressure, air in the pipework, discoloured water after disturbance, or a boiler topping up more often than expected can all trigger concern, although these symptoms do not always mean the underground supply is leaking. Older properties with ageing MDPE or lead pipework can also show intermittent issues before a leak fully opens up.

Commercial sites and managed properties often present the problem differently. The first sign may be an unexplained rise in usage, water pooling near service yards, or complaints from tenants about poor pressure at peak times. In those cases, a fast diagnosis helps avoid wasted water, surface damage, and unnecessary disruption to occupants.

What can make leaks hard to pinpoint

The depth of the pipe, the type of soil, nearby drains, and surface finishes all affect detection. A leak under tarmac behaves differently from one under a front garden. Water beneath paving may run along the pipe trench and appear some distance away. On properties with drainage nearby, escaping water may disappear into a broken drain and leave little visible evidence at ground level.

That is why digging where the wet patch appears is often the wrong first move. It can increase costs, create avoidable reinstatement work, and still miss the actual fault.

Professional methods used to find hidden water leak underground

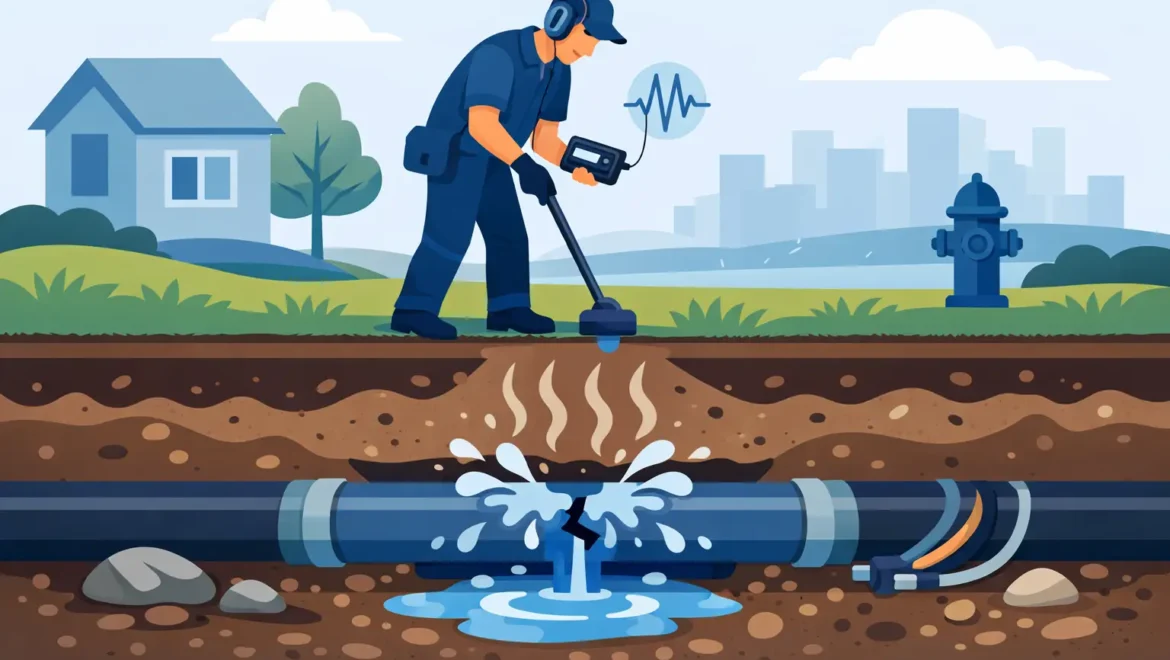
Specialist leak detection is about reducing uncertainty before excavation starts. Rather than opening up large areas, contractors use a combination of testing and listening equipment to trace the pipe route and identify the likely leak position.

Acoustic leak detection is one of the most common methods. Pressurised water escaping from a pipe creates sound and vibration. Sensitive listening devices can pick up that noise through the ground or at accessible fittings. This works well in many situations, but results depend on pipe material, depth, background noise, and how severe the leak is. Plastic pipes, for example, can be harder to trace acoustically than metal ones.

Tracer gas testing can be useful when acoustic methods are less reliable. A harmless gas is introduced into the pipe, and specialist sensors detect where it rises through the ground. This is particularly effective on deeper or non-metallic supply pipes, although access and site conditions still matter.

Ground microphones, correlators, and pressure tests may also be used depending on the layout. On more complex sites, there is no single magic tool. Good leak detection comes from choosing the right method for the pipe, the surface above it, and the level of access available.

Why the cheapest approach can cost more

It is understandable to want a quick dig-and-fix, especially when water is being lost daily. But blind excavation is often where costs start climbing. You may open the wrong area, damage nearby services, or end up disturbing a driveway or landscaped frontage unnecessarily.

A proper investigation usually saves time overall because it shortens the repair area and improves the chance of a first-time fix. It also helps when planning reinstatement, especially on block paving, patterned concrete, resin finishes, or commercial yards where tidy completion matters.

When repair is not the best option

Sometimes the leak itself is only part of the story. If the supply pipe is old, undersized, made of lead, or has failed more than once, repairing one section may not be the most cost-effective answer. In those cases, a full replacement can be the better long-term solution.

This is common on older properties across the North West where original supply pipes have reached the end of their serviceable life. Replacing the line can improve flow and pressure as well as resolve the leak. It also removes uncertainty about the rest of the run failing later.

Modern trenchless installation methods, including moling, make replacement far less disruptive than many people expect. Instead of digging a continuous trench across a driveway or garden, the new pipe can often be installed through small launch and reception pits. For the property owner, that usually means faster completion, less mess, and much simpler reinstatement.

What to do if you suspect an underground leak

Start by checking whether the issue is active and whether it affects the private supply line. Take a meter reading, stop all water use, and test again after a short interval. If you can safely isolate the internal supply, use that to help determine whether the leak is outside the building.

Once you have a strong indication that the underground pipe is leaking, avoid unnecessary digging. If the leak is severe, visible at the surface, or affecting access routes, isolate the supply if possible and arrange specialist attendance promptly. For landlords and commercial managers, acting early helps reduce tenant disruption and may limit damage to surfaces and nearby structures.

If the property has older pipework, ask not only how the leak will be repaired, but whether a replacement would be more sensible. A low-price patch repair can be false economy if the line is already deteriorating.

Choosing the right contractor

For underground leaks, general plumbing experience is not always enough. You need a contractor who deals with external water supply pipes, understands trace-and-access issues, and can manage both detection and repair. That includes safe excavation where needed, practical reinstatement, and the option of trenchless replacement when excavation would be disruptive.

Accreditations and assurances matter here. Water industry approval, suitable insurance, and a clear workmanship guarantee all reduce risk for homeowners, landlords, and facilities teams. So does a contractor’s ability to explain the likely route of the pipe, the detection method being used, and whether repair or replacement is the better outcome.

Where a supply pipe crosses driveways, landscaped areas, or commercial frontage, experience with no-dig methods is a genuine advantage. It can mean the difference between a contained job and a week of unnecessary upheaval. On urgent cases in the North West, Watermains & Drains UK is often called for exactly that reason – specialist diagnosis, tidy delivery, and practical repair options without overcomplicating the job.

A hidden underground leak is one of those problems that gets more expensive the longer it is left, but it does not need a rushed or destructive response. The right starting point is to confirm the leak, narrow down where it sits, and bring in a specialist who can locate the fault with the least disruption possible.

Water Supply Pipe Upgrade for Extensions
Blog

Water Supply Pipe Upgrade for Extensions

Adding a kitchen extension, utility room or annexe often starts with the obvious questions – layout, drainage, heating and finishes. The water supply is usually treated as a simple connection job. In practice, a water supply pipe upgrade for extensions can make the difference between a new space that works properly and one that suffers from poor pressure, slow filling appliances or repeat excavation later.

If the incoming supply is older, undersized or made from outdated materials, extending the internal plumbing without checking the main feed can store up problems. That is especially true where a new extension adds high-demand fittings such as a downstairs shower room, boiling water tap, large kitchen, utility appliances or garden supply.

When a water supply pipe upgrade for extensions is worth doing

Not every extension needs a full incoming supply replacement. It depends on what is already serving the property, how much extra demand the extension adds, and whether there are signs the existing pipe is already struggling.

Many older homes across Manchester, Stockport, Warrington, Cheshire and surrounding areas still have ageing supply pipes. Some are lead. Others are older alkathene or metal pipes with a smaller internal diameter than would now be specified for modern domestic demand. If that pipe is already limiting flow, adding more outlets will not improve matters.

A sensible assessment looks at the whole picture. A single-storey rear kitchen extension with one extra sink is very different from a project that includes a utility room, underfloor heating feed, external tap and additional bathroom. On paper, both are extensions. In terms of water demand, they are not comparable.

You should look more closely at the supply pipe if you already notice weak flow at busy times, pressure drop when more than one outlet is running, discoloured water from older pipework, or evidence of previous leaks. If the property has a lead supply, an extension project is often the right time to deal with it rather than build around an outdated service.

The common problems caused by an undersized supply

The issue is not always static pressure. Homeowners are often told they have “good pressure” because a gauge reading looks acceptable. What matters in everyday use is how the system performs under demand. Flow rate, pipe diameter, pipe condition and route length all affect the result.

An extension can expose weaknesses that were already there. A kitchen may look complete, but if the washing machine, dishwasher and tap are competing on a restricted incoming supply, performance drops quickly. The same applies where a new shower room is added and another tap or WC is used elsewhere in the house.

There is also a cost issue. If patios, driveways, landscaped gardens or new floors are completed before the incoming supply is reviewed, any later upgrade becomes more disruptive and more expensive. Planning the water supply properly at extension stage is usually the cleaner option.

What a contractor should assess before upgrading

A proper recommendation should not be guesswork. Before specifying a new supply arrangement, a specialist contractor should consider the existing pipe material, its diameter, likely route, depth, condition and connection point. They should also look at the expected demand from the completed property, not just the extension in isolation.

This matters because the right solution varies. In some cases, the incoming supply pipe from the boundary to the property is the real problem. In others, internal distribution pipework or poor historic alterations are contributing to restricted performance. There is no benefit in replacing one section while leaving a major bottleneck untouched.

For landlords and commercial property managers, compliance and record-keeping also matter. If work is being carried out as part of wider refurbishment, you need a contractor who understands water regulations, proper commissioning and clean reinstatement. That is particularly relevant where tenanted properties, managed sites or insurance-related works are involved.

Lead pipes and extension projects

Lead supply pipes deserve special mention. If a property still has lead on the private supply side, an extension is a practical point to replace it. Leaving lead in service while investing in a new kitchen or additional accommodation rarely makes sense, especially when floors, gardens or hardstanding may already be disturbed by the works.

Replacing a lead pipe can improve flow, remove a common source of concern for buyers and tenants, and bring the property closer to modern expectations. It also avoids the awkward situation where a smart new extension is fed by old infrastructure that may need replacement shortly afterwards.

Trenchless installation can reduce disruption

One reason some homeowners put off a supply upgrade is the worry about excavation. That concern is understandable if the route crosses a finished driveway, patio, lawn or planted area. Traditional open trench work can be the right method in some situations, but it is not the only option.

Modern trenchless methods, including impact moling and HDD where suitable, can often install a new water supply pipe with far less surface disruption. Instead of opening a long trench across the whole route, the work can often be completed from smaller launch and reception pits. For occupied homes and managed properties, that can mean faster completion, tidier sites and less reinstatement.

This is where specialist contractors stand apart from general groundworkers. The method needs to match the site conditions, utility congestion, access restrictions and reinstatement requirements. A cheap quote that ignores those factors often stops being cheap once delays and repairs start.

How the upgrade is usually planned

In most cases, the process starts with a site assessment. That should establish where the existing supply enters the property, whether there is an obvious issue with pipe material or size, and the most practical route for a replacement if one is needed.

From there, the contractor can advise whether the extension can be served from the current incoming main, whether the private supply should be renewed, and what installation method offers the least disruption. If the route crosses finished external surfaces, trenchless installation may be the preferred option. If access is limited or the layout is complex, a mixed method may be more sensible.

The best outcomes usually come when the water supply upgrade is coordinated with the extension build programme. That allows for cleaner entry points, fewer repeat visits and less risk of newly completed works being disturbed. For homeowners, it means fewer surprises. For builders and property managers, it means less programme drift.

Cost depends on route, method and existing conditions

There is no honest one-size-fits-all price for a water supply pipe upgrade for extensions. The main cost drivers are the length of the run, ground conditions, access, reinstatement requirements, the installation method used and whether the existing supply arrangement presents complications.

A straightforward replacement across soft ground is different from installing beneath a block-paved drive or around other buried services. Equally, a short upgrade to support a modest extension will not cost the same as a full renewal serving a larger remodel with multiple new outlets.

That said, doing the work at the right stage is often more cost effective than waiting. If excavation, drilling or entry works can be coordinated before final surfacing and finishes, the project is usually simpler to deliver.

Choosing the right contractor matters

This type of work sits between building, utilities and compliance. It is not just a matter of connecting a new pipe and hoping the performance improves. You need a contractor who deals with water infrastructure regularly, understands private supply renewals, and can install with minimal disruption where finished external areas are involved.

Approvals, insurance and workmanship guarantees should be part of that conversation, not an afterthought. So should practical conduct on site – clear communication, tidy excavation, reliable scheduling and proper reinstatement. Those details matter just as much as the pipe itself when the work is being carried out at an occupied property.

For homeowners and landlords across the North West, Watermains & Drains UK typically sees the same pattern: the extension plans are well advanced, but the incoming supply has not been checked until late in the process. Catching that early gives you more options and usually a better result.

A smarter approach before building starts

If you are planning an extension, treat the water supply as part of the project infrastructure, not an afterthought. A brief assessment now can show whether the existing pipe is adequate, whether a lead or undersized supply should be replaced, and whether trenchless installation could avoid unnecessary disruption.

That way, the new space is supported by a supply that matches how the property will actually be used – not how it worked twenty or thirty years ago. A well-planned upgrade is rarely the most visible part of an extension, but it is often one of the jobs that keeps everything else working properly.

Water Pressure Low After New Stop Tap?
Blog

Water Pressure Low After New Stop Tap?

You have had a new stop tap fitted, turned everything back on, and now the flow at the kitchen tap or shower is noticeably weaker. If your water pressure is low after a new stop tap, the good news is that the stop tap itself is not always the real problem. In many cases, the issue comes down to the valve not being fully open, trapped debris, air in the pipework, or an older supply pipe that was already struggling.

That matters because a poor diagnosis wastes time and can lead to the wrong repair. A simple adjustment may sort it, but sometimes the new fitting has exposed a bigger issue on the incoming main or the property’s supply pipe.

Why water pressure can be low after a new stop tap

A stop tap controls the flow of water into the property. When one is replaced, the supply is isolated, the old valve is removed, and the pipework is disturbed. That process can affect pressure and flow in a few different ways.

The first and most straightforward possibility is that the new stop tap is not fully open. It sounds obvious, but it is common. Some valves need several turns before they are fully open, and if they are left partially shut, the restriction can be enough to reduce flow around the house.

Another frequent cause is debris. On older pipework, especially galvanised or ageing metal pipe, scale and sediment can break loose when the water is turned off and back on. That debris often ends up caught in tap aerators, shower heads, appliance filters, or even inside the new valve itself. The result is a sudden drop in flow that seems to start with the stop tap replacement, even though the real issue is material from the existing system.

Airlocks can also play a part. If air has entered sections of the plumbing while the system was drained or partly isolated, some outlets may splutter, spit, or run unevenly before settling down. That usually improves once the system has been run through properly, but not always.

Then there is the issue many property owners do not realise until work starts: the internal stop tap may be new, but the incoming supply pipe may still be old, undersized, partially collapsed, leaking, or heavily restricted. Replacing one component does not improve the condition of the rest of the line.

What to check first

Before assuming there is a major fault, start with the simple checks. Look at the new stop tap and make sure it has been turned fully open. If you are unsure, do not force it aggressively, but check whether it has more travel available.

Next, test more than one outlet. If the kitchen cold tap is weak but the bathroom basin is normal, the problem is likely local to that outlet rather than the whole incoming supply. If every cold tap is affected, the restriction is more likely to be at the stop tap, meter, external stop valve, or incoming supply pipe.

It is also worth unscrewing the aerator from a tap, if fitted, and checking for grit or scale. The same applies to shower heads. After a stop tap change, these small filters often catch the debris first.

If the water splutters and then runs, give it a little time. Run the cold taps for several minutes, one at a time. In some cases, trapped air clears with no further action.

When the problem is flow, not pressure

Many people use pressure and flow interchangeably, but on site they are not quite the same. Pressure is the force behind the water. Flow is the volume coming through. A stop tap problem usually shows up as poor flow, although to the customer it feels like low pressure.

This distinction matters because a property can still have acceptable network pressure but poor flow due to a restriction in the pipe. A partially blocked valve, a kinked supply pipe, or a failing section of old pipe can all reduce the amount of water getting through. That is why the shower may run weakly when another tap is opened, or why outside taps and downstairs outlets seem especially poor.

Could the new stop tap be faulty?

It is possible, but it is not the first assumption to make. A faulty valve, incorrect installation, or a stop tap with an internal restriction can cause reduced flow. Equally, if the wrong size valve has been fitted on a larger pipe, that can create a bottleneck.

However, in practice, a newly fitted stop tap often gets blamed for an existing weakness in the system. Once water is isolated and reintroduced, old problems become more noticeable. For example, a lead supply pipe or ageing shared supply may have been delivering marginal performance for years. The disturbance caused by the work simply brings it to the surface.

Older supply pipes often tell a bigger story

In many North West properties, especially older homes, poor flow after plumbing work can point to the condition of the incoming water supply pipe. Lead pipes, ageing iron, and old MDPE connections with poor joints can all limit performance.

If your stop tap has been changed but pressure is still low across the property, it may be time to look beyond the valve. Warning signs include discoloured water after disturbance, recurring poor flow, noticeable difference between upstairs and downstairs outlets, or a history of leaks and patch repairs.

Where the supply pipe is undersized or deteriorated, replacement is often the proper fix. For many homeowners and landlords, that sounds disruptive, but modern trenchless methods can reduce excavation significantly. In the right ground conditions, moling allows a new pipe to be installed with far less disturbance to driveways, gardens, and paved areas than traditional open-cut digging.

What about the outside stop tap or water meter?

The issue is not always inside the property. If there is an external stop tap in the pavement or meter chamber, that valve may not be fully reopened after works, or there may be a fault there affecting supply.

On metered properties, a blockage or issue around the meter assembly can also affect flow. Equally, if works were carried out near the boundary and something has disturbed the communication pipe, pressure problems may appear afterwards.

This is where proper fault finding matters. Guesswork can lead to repeated visits and unnecessary plumbing changes indoors when the actual restriction is outside.

When to call a specialist contractor

If the problem affects the whole property, has not cleared after basic checks, or seems worse than before the stop tap was replaced, it is sensible to get it assessed properly. A specialist contractor will look at the system as a whole rather than focusing on one fitting.

That usually means checking where the restriction is likely to be, whether the issue is on the internal plumbing or incoming supply, and whether the existing service pipe is suitable for the property’s demand. For landlords and commercial sites, it also means making sure any remedial works are compliant, properly reinstated, and carried out with minimal disruption to occupants or operations.

At that stage, experience matters. A contractor used to lead pipe replacement, new water supply installations, leak detection, and trenchless methods can usually identify whether you need a minor correction, a repair, or a full supply upgrade.

The right fix depends on the cause

If the new stop tap is partially closed or obstructed with debris, the solution may be quick. If the issue is isolated to one outlet, cleaning filters or replacing a local valve might be enough.

If the incoming supply pipe is restricted, leaking, or simply too old, the longer-term answer is often renewal rather than repeated small repairs. That tends to be more cost effective over time, especially where low flow has become a recurring problem or where future leakage is likely.

For property owners worried about disruption, that is where a specialist approach makes a difference. Firms such as Watermains & Drains UK carry out supply pipe replacements using modern methods designed to keep sites tidy, reduce excavation, and get water services restored quickly, with the assurances customers expect around accreditations, insurance, and workmanship guarantees.

Don’t ignore a sudden change in performance

A sudden drop in water flow after a stop tap change should not be brushed off as one of those things. Sometimes it is minor. Sometimes it is the first clear sign that the supply arrangement to the property needs attention.

The key is to avoid assumptions. Check the simple causes first, but if the whole property is affected or the problem continues, have it investigated properly. A clear diagnosis saves time, avoids repeat call-outs, and gets you to the right repair faster.

If the water has gone weak after a new stop tap, the best next step is not to keep guessing – it is to find out exactly where the restriction starts and deal with the real cause.

Top Signs of Failing Water Supply at Home
Blog

Top Signs of Failing Water Supply at Home

If your shower suddenly weakens, the kitchen tap starts spluttering, or you notice damp patches near the front path, those are not minor quirks. They are often the top signs of failing water supply, and they usually point to a problem with the incoming pipe rather than your boiler or internal plumbing.

For homeowners, landlords and property managers, the main risk is delay. A damaged or ageing supply pipe can waste water, affect pressure across the property, stain fittings, and in some cases lead to more disruptive repairs if left too long. The earlier the issue is identified, the more options you usually have for a fast, tidy fix.

Top signs of failing water supply you should not ignore

A failing water supply rarely announces itself with one obvious fault. More often, it shows up as a pattern of small changes that gradually become harder to ignore.

Low water pressure across the property

If pressure has dropped at more than one tap, the problem may be on the incoming supply rather than at a single fitting. This is especially common where older supply pipes have narrowed internally, suffered a partial collapse, or developed a hidden leak.

There is an important distinction here. If one tap performs badly, you may be dealing with a local plumbing issue. If the whole property feels sluggish, including cold taps and outside taps, the supply pipe becomes a more likely suspect.

Taps spluttering or air in the line

A tap that spits and coughs before running normally can indicate air entering the system. That can happen after works in the street, but it can also point to a compromised supply pipe drawing in air through a defect.

Occasional spluttering is not always a serious fault. Repeated air in the line, particularly alongside pressure loss, is worth investigating promptly.

Discoloured water

Brown, orange or cloudy water is another warning sign. In some cases, this is temporary and linked to disturbance in the wider network. In others, it may reflect corrosion, sediment movement, or deterioration in older pipework serving the property.

If the water clears after running for a short time once and does not return, the cause may be short term. If discolouration keeps coming back, particularly after the water has been sitting in the pipe, the supply should be checked.

Unexplained wet patches outside

A leaking supply pipe often shows itself outdoors before it causes trouble indoors. You might notice a soft patch in the lawn, an area of driveway that stays damp, or water surfacing near the boundary.

This can be easy to miss in wet weather. In dry conditions, though, a patch that never seems to dry out is a strong clue that water is escaping below ground.

Higher water bills without higher usage

If your usage habits have not changed but your bill has climbed, a hidden leak should be considered. Not every bill increase points to a supply issue, but unexplained consumption is one of the top signs of failing water supply, especially where no internal leak is visible.

For landlords and facilities teams, this matters beyond cost. Ongoing leakage can undermine surfaces, create avoidable tenant complaints, and lead to bigger reinstatement work later.

Noise from pipework

Buzzing, hissing or a persistent rushing-water sound when no taps are running can indicate movement or escape of water somewhere on the supply line. Some noises relate to internal plumbing, but if the sound seems constant and pressure is poor, the incoming pipe may be under strain or leaking.

Recurring leaks or repeated patch repairs

If a water supply pipe has already been repaired once or twice, another leak is often a sign that the pipe has reached the end of its serviceable life. Spot repairs can be sensible for isolated defects, but repeated failures usually mean the material itself is deteriorating.

That is often the point where replacement becomes more cost effective than continuing to patch the same line.

What causes a water supply to fail?

In many properties across the North West and elsewhere in the UK, age is the biggest factor. Older metal pipework can corrode internally and externally over time. Lead supply pipes present their own issues, not only in terms of age and condition but also water quality concerns.

Ground movement is another common cause. Changes in soil condition, nearby building works, traffic loading, tree root activity and seasonal movement can all place stress on buried pipes. Even a small shift can create a crack, joint failure or restricted flow.

Material matters as well. Some older pipes simply do not perform to modern expectations, particularly where household demand has increased over time. A pipe that once coped well may now struggle to serve multiple bathrooms, appliances and outside use.

When it is an inconvenience and when it is urgent

Not every symptom means emergency excavation is needed. A brief period of cloudy water after utility works may resolve on its own. Slightly reduced flow at one outlet may be a local plumbing issue. The difficulty is that supply pipe faults often begin with symptoms that seem manageable.

Urgency increases when you have pressure loss throughout the property, visible external water, repeated discolouration, or signs of leakage near the building. If water is affecting access routes, internal finishes or neighbouring land, the sensible approach is to arrange a professional assessment quickly.

For commercial sites and managed properties, response time matters even more. Poor supply can disrupt tenants, affect washrooms and kitchens, and create avoidable complaints if the issue is left to drift.

How a specialist contractor approaches the problem

The first job is not to guess. A proper assessment should establish whether the issue sits with the utility network, the private supply pipe, or internal plumbing. That may involve pressure checks, leak investigation and tracing the route and condition of the existing pipe.

Where repair is possible, a targeted fix may be enough. Where the pipe is old, undersized or repeatedly failing, replacement is often the cleaner long-term solution. This is particularly true for lead pipe replacement or where multiple previous repairs suggest the line is no longer reliable.

Modern methods make a major difference here. Trenchless installation techniques such as moling can often install a new water supply with far less disruption to gardens, driveways and paths than traditional open-cut excavation. That means quicker progress, less mess and simpler reinstatement in many domestic settings.

For landlords and facilities managers, that reduced disruption is not just convenient. It helps keep properties usable, protects finished surfaces, and shortens the period of inconvenience for occupants.

Why early action usually saves money

Waiting can feel sensible if the water still runs, but supply problems rarely improve on their own. A small underground leak can become a larger break. A restricted pipe can continue to lose performance. An ageing line that has already failed once is more likely to fail again.

Early action gives you more control over timing, method and cost. It is generally easier to plan a survey and quoted replacement than to deal with a full loss of supply or emergency excavation after a collapse. It also gives more scope to choose lower-disruption methods rather than reacting under pressure.

This is one reason many property owners choose specialist contractors rather than treating the issue as a general plumbing job. Water supply pipework, leak detection and external installations need the right approvals, the right methods and a clear understanding of reinstatement.

What to do if you have noticed the top signs of failing water supply

Start by paying attention to the pattern. Is the issue affecting one outlet or the whole property? Is there visible water outside? Has pressure changed gradually or suddenly? Are neighbours affected, or only your building?

Then act before the symptoms become harder to manage. A specialist contractor can determine whether repair or replacement is the better option and advise on the least disruptive route. For properties with older or lead pipework, that visit can also clarify whether an upgrade would provide a better long-term result than another temporary fix.

At Watermains & Drains UK, this is exactly the kind of work we handle – from leak investigation and new supply pipe installation to lead pipe replacement using trenchless methods where suitable. For homeowners, landlords and commercial sites alike, the aim is the same: restore a reliable supply quickly, keep disruption down, and leave the site tidy.

A weak tap or damp patch might look manageable for now, but water supply problems tend to get more expensive the longer they are left. If something has changed, it is usually worth checking while the solution is still simple.

How Much Does Lead Pipe Replacement Cost?
Blog

How Much Does Lead Pipe Replacement Cost?

A lead water pipe often stays out of sight until a house purchase, failed water test, low pressure issue or leak forces the question: how much does lead pipe replacement cost? The honest answer is that it varies by property, access and installation method, but most homeowners want more than a vague range. They want to know what actually drives the quote, what can be avoided, and whether the job will leave the drive, garden or footpath in pieces.

For most domestic properties in the UK, lead pipe replacement costs are commonly shaped less by the pipe itself and more by excavation, access, reinstatement and whether trenchless methods can be used. That is why two homes on the same street can receive very different quotations.

How much does lead pipe replacement cost in the UK?

As a practical guide, many straightforward domestic lead pipe replacement jobs fall somewhere between £1,500 and £3,500. More complex installations can go beyond that, particularly where long pipe runs, difficult access, deep excavations or significant reinstatement are involved.

At the lower end, you are usually looking at a shorter run with good access and limited reinstatement. A typical example might be a terraced or semi-detached property where the old supply can be replaced with minimal excavation and a clean route to the boundary.

At the higher end, costs tend to rise when the existing supply crosses paved driveways, mature gardens, retaining walls or other buried services. Commercial sites, shared access areas and properties needing traffic management can also push the price up.

If you are comparing quotes, it helps to check whether they include the full job. Some prices cover excavation and pipe installation only, while others include tracing the line, moling, testing, backfilling, reinstatement and liaison with the relevant water authority where required.

What affects how much lead pipe replacement costs?

Length of pipe run

The longer the supply pipe from the property to the connection point, the more labour, materials and time are involved. A short front garden is one thing. A long run beneath a driveway, path and landscaped frontage is another.

Length matters, but it is not the only factor. A short but awkward route can cost more than a longer, straightforward one.

Ground conditions and access

Soft ground is generally easier and quicker to work with than reinforced concrete, thick tarmac or heavily paved areas. If the route passes beneath walls, steps, trees or fixed structures, the work becomes more involved.

Restricted access can also affect the method used. If machinery cannot be brought close to the work area, labour time may increase.

Excavation versus no-dig installation

Traditional open-cut excavation can be the right choice in some situations, especially where the route is obstructed or existing services need exposing. But it usually creates more disruption and more reinstatement.

Trenchless methods such as moling often reduce the number of excavations needed. That can mean less mess, quicker completion and lower reinstatement costs. It does not make every job cheap, but it can make a major difference where a driveway, patio or garden would otherwise need opening up across its full length.

Reinstatement requirements

Reinstatement is one of the biggest variables in any quote. Replacing a section of basic soil or grass is usually straightforward. Matching block paving, decorative stone, patterned concrete or specialist surfaces takes more time and care.

This is why a price that looks higher at first glance may still represent better value if it includes proper reinstatement and tidy completion rather than leaving follow-on repair work for the property owner.

Internal and external works

Some projects involve only the external supply pipe. Others need internal alterations as well, particularly where the incoming main enters at an awkward point or the stop tap arrangement needs updating.

If new pipework has to be brought into the building at a different entry point, that can add drilling, making good and extra labour.

Water authority requirements

Lead pipe replacement often involves compliance steps, inspections or connection arrangements depending on the scope of works. An accredited contractor will understand what is needed and price accordingly.

That matters for homeowners, landlords and facilities teams alike. A cheaper price is not much use if the work is delayed by avoidable compliance problems.

Why some lead pipe replacement quotes are much cheaper than others

If one contractor is dramatically below the others, there is usually a reason. Sometimes key elements have simply been left out. Common omissions include reinstatement, spoil removal, tracing the supply, pressure testing or dealing with unforeseen obstructions.

Another issue is method. A quote based on extensive excavation may appear cheaper upfront, but once driveways, paths and landscaping are made good, the overall cost can look very different. Equally, a no-dig method may cost more in specialist equipment and expertise but save money and disruption elsewhere.

For that reason, the best comparison is not just price. It is scope, method, timescale, accreditations, insurance cover and guarantee.

Can no-dig methods reduce lead pipe replacement cost?

In many cases, yes. Not always, but often enough that it is worth asking the question early.

Trenchless moling allows a new water supply pipe to be installed underground with limited excavation points rather than a continuous trench. For properties with finished surfaces, planted areas or narrow access, that can significantly cut disruption. It may also reduce the amount of reinstatement needed afterwards.

The saving is not universal. If the ground is unsuitable, the route is congested with existing services or the alignment is poor, open excavation may still be the better option. But where moling is viable, it often gives the cleanest and most cost-effective result overall.

For homeowners, the practical benefit is simple: fewer broken surfaces, less mess and a faster return to normal use of the property.

What should be included in a proper quote?

A professional lead pipe replacement quotation should be clear about what is and is not included. At minimum, you want to understand the proposed route, installation method, pipe material, excavation points, reinstatement scope and whether testing and commissioning are included.

It should also state any assumptions. If the contractor has priced on the basis of standard ground conditions or unobstructed access, that needs to be visible from the outset.

For higher-value or more sensitive sites, it is sensible to ask about insurance, accreditations and workmanship guarantees. That is particularly relevant for landlords, commercial property managers and anyone responsible for tenant safety or reinstatement standards.

Contractors with recognised approvals and experience in water infrastructure are generally better placed to manage the job properly than firms treating it as occasional plumbing work.

Is replacing a lead pipe worth the cost?

For most properties, yes. Lead supply pipes are not just an outdated material issue. They can affect water quality, mortgage-related decisions, saleability and peace of mind.

Older lead pipes may also be more vulnerable to disturbance, reduced flow or leakage over time. Replacing them with a modern supply usually gives a cleaner, more dependable system and removes the uncertainty of leaving old infrastructure in place.

There is also a practical value in doing the work properly once. A planned replacement is typically less stressful than dealing with an emergency leak beneath a drive or path later on.

Choosing the right contractor for the job

Lead pipe replacement is best handled by specialist contractors who understand external water supply installations, trenchless options and reinstatement-sensitive work. This is not simply about swapping one pipe for another. It is about planning the route, selecting the right method, complying with standards and leaving the site in good order.

That is where experience matters. A contractor who carries out this type of work regularly is more likely to quote accurately, identify risks early and complete the installation with minimal disruption. For property owners in the North West, Watermains & Drains UK provides lead pipe replacement and new water supply installations with no-dig capability, industry approvals and a focus on tidy, dependable delivery.

If you are trying to budget, the most useful next step is a site-specific quote rather than relying on broad online figures. The real cost comes down to what sits between the boundary and your stop tap, how easy it is to reach, and whether the job can be done with minimal excavation. A good contractor will explain that clearly, price it properly and give you a straightforward route to getting the old lead pipe out without turning the property upside down.

How to Install a New Water Supply Pipe
Blog

How to Install a New Water Supply Pipe

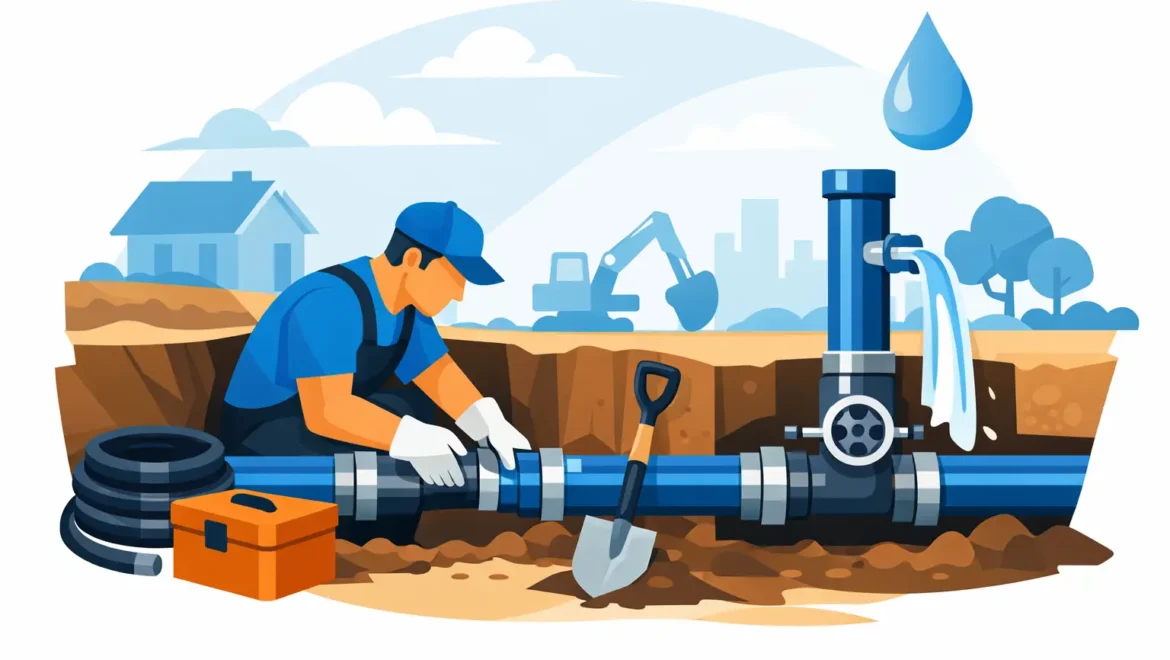
If your incoming water pipe is old, undersized, leaking or made from lead, the right fix is often to install new water supply pipe rather than keep paying for repairs. For homeowners, that usually means better flow, improved water quality and fewer surprise leaks. For landlords and commercial sites, it also means less risk, cleaner compliance and a more dependable service into the building.

This is one of those jobs where the method matters as much as the pipe itself. A poor installation can leave you with low pressure, repeat leaks or unnecessary disruption across driveways, paths and gardens. A properly planned job gives you a clean connection from the boundary to the property, with the least disruption possible and a clear standard of workmanship from start to finish.

When you need to install new water supply pipe

In most properties, the first signs are practical rather than dramatic. Water pressure drops when more than one tap is in use, the pipe leaks intermittently, or discoloured water appears after long periods of standing. Older homes across Manchester, Stockport, Warrington, Cheshire and surrounding areas often still have ageing supply arrangements, including lead pipework or sections that have been patched over the years.

Sometimes the reason is straightforward. A leak has been traced on the private supply pipe and repair is no longer cost effective. In other cases, a renovation, extension or change of use means the existing incoming main is no longer adequate. Commercial premises may also need a new supply route to meet operational demand or site layout changes.

Where lead is involved, replacement is usually the sensible long-term decision. Lead pipework is outdated, and many property owners now want it removed for health, resale and insurance reasons. If the pipe is buried, difficult to access or runs beneath finished surfaces, replacing the full length often makes more sense than repeatedly opening the ground for localised repairs.

What the installation process usually involves

To install a new water supply pipe properly, the work starts with a site assessment, not a digger. The contractor needs to confirm the incoming route, locate existing underground services, review access restrictions and decide whether open-cut excavation or a trenchless method is the better fit.

The next step is choosing the route from the property to the connection point. That sounds simple, but it affects cost, reinstatement and programme. A route straight across a lawn is different from one passing under a block-paved drive, retaining wall or recently landscaped front garden. The shortest route is not always the best route if it creates more disruption than necessary.

Once the route is agreed, the old pipe may be isolated or abandoned depending on its condition and the layout on site. The new supply pipe is then installed at the correct depth, typically in accordance with local water authority requirements and current standards. Internal connection work is completed where the new pipe enters the building, and the final connection to the mains side is arranged through the proper approval process where required.

Pressure testing, chlorination requirements where applicable, and careful reinstatement complete the job. For the customer, the key point is that this is not just about getting water back on. It is about leaving a compliant, durable supply in place with tidy finishing above ground.

Open trench or trenchless installation?

This is where experienced contractors add real value. Traditional excavation still has its place. If the ground is already open, the route is short, or there are multiple other repairs happening at the same time, digging a trench may be the most practical option.

But in many domestic and commercial settings, trenchless installation is the better answer. Moling allows a new pipe to be installed underground with only small launch and reception pits, rather than a continuous trench. Horizontal directional drilling can also be used on more complex routes and larger-scale work. The main benefit is obvious – far less disruption to finished surfaces.

For homeowners, that can mean keeping most of a driveway, patio or garden intact. For landlords and facilities teams, it means less mess, faster completion and fewer complaints from tenants, staff or visitors. It also reduces reinstatement work, which often becomes a major part of the total cost on traditional excavation-led jobs.

That said, trenchless methods are not automatic. Ground conditions, buried obstructions, route length and connection positions all need checking first. A good contractor will not force a no-dig method where it is unsuitable. The right answer is the one that gives a reliable result with the least disruption overall.

What affects the cost?

Customers often ask for a price before anyone has seen the site, but new supply pipe work is difficult to price accurately from a description alone. The distance from boundary to building is one factor, but not the only one. Surface type, access, depth, traffic management needs, internal connection complexity and whether the existing supply is live all affect the final figure.

Reinstatement can make a bigger difference than many expect. Digging through tarmac, concrete or decorative paving is not the same as crossing soft ground. The same applies where routes pass close to walls, drainage runs or other utilities. On commercial sites, programme restrictions and permit requirements may also shape the cost.

This is why a proper site survey is worth having. It allows the contractor to set out the method clearly, explain the likely timescale and quote against the actual conditions rather than broad assumptions. Clear quoting matters because it reduces surprises once the work starts.

Approvals, compliance and why they matter

Water supply work is not a general building job. It needs to be carried out to the required standard, with the right materials, methods and approvals. If the connection or installation is not compliant, problems can surface later through failed inspections, poor performance or disputes over responsibility.

For homeowners, that can feel like unnecessary paperwork until something goes wrong. For landlords, managing agents and commercial property teams, it is a risk issue from day one. Using contractors with recognised water industry approvals helps protect the job and gives confidence that the work will stand up to scrutiny.

That is also where guarantees and insurance cover matter. They are not just sales points. They are part of reducing risk on a buried asset that you do not want to revisit once the ground has been reinstated. Watermains & Drains UK positions this work as specialist infrastructure contracting for exactly that reason – the standard of installation matters long after the site has been tidied and reopened.

Choosing the right contractor for a new supply pipe

Price matters, but it should not be the only filter. If two quotations look very different, the reason is often in the method, reinstatement allowance or level of site management included. One contractor may be pricing for a full professional installation with proper testing and making good, while another is allowing for a bare minimum approach.

Look for a contractor that can explain the route, the installation method and what happens at the point of connection. Ask how disruption will be kept down, what reinstatement is included and whether trenchless installation is an option on your site. If the property has lead pipework, ask whether the whole run can be replaced rather than leaving old sections in place.

For commercial customers, programme reliability is just as important. You need a contractor who can work safely, provide documentation when required and complete the job without unnecessary impact on tenants, staff or operations. Domestic customers usually want the same thing in simpler terms – turn up when promised, do the job properly, leave the site tidy.

Install new water supply pipe with the least disruption

The best installations are usually the least noticeable once finished. Water pressure improves, leaks stop, and the property is put back into order without days of avoidable upheaval. That is why planning, route choice and installation method deserve more attention than the pipe specification alone.

If you need to install new water supply pipe at a house, rental property or commercial site, the goal is not simply to replace what is there. It is to put in a dependable new service with the least disruption, a clear standard of compliance and a finish that does not create another problem above ground. A good contractor will make that feel straightforward, which is exactly how this type of work should be.

Does Drain Lining Require Excavation?
Blog

Does Drain Lining Require Excavation?

If you have a cracked or leaking drain under a drive, lawn or extension, the first question is usually the right one: does drain lining require excavation? In many cases, no. Drain lining is designed as a no-dig repair method, which means the existing pipe can often be repaired from within using existing access points such as manholes, rather than digging a trench across the property.

That said, there is no honest one-size-fits-all answer. Some drains are excellent candidates for lining and can be repaired with very little disruption. Others are too badly damaged, collapsed or displaced, and those sections may still need excavation. The key is proper diagnosis before any repair method is recommended.

Does drain lining require excavation in most cases?

In straightforward terms, drain lining usually does not require excavation. The purpose of the method is to avoid unnecessary digging by creating a new internal lining inside the host pipe. Once installed and cured, that liner forms a durable new pipe wall within the old one, sealing cracks, minor fractures, open joints and small areas of root ingress.

For homeowners and landlords, that often means avoiding the mess and cost that come with breaking out paving, lifting landscaped areas or disturbing finished surfaces. For commercial sites, it can also mean less disruption to tenants, staff access and day-to-day operations.

A contractor will normally access the drain through an inspection chamber, clean the pipe thoroughly, carry out a CCTV survey and then decide whether full lining or a localised patch repair is suitable. If the drain is structurally stable enough to hold a liner, excavation can often be avoided altogether.

When drain lining works well

Drain lining is best suited to pipes that are damaged but still broadly intact. If the drain has cracks, slight deformation, leaking joints or isolated defects, lining can restore serviceability without opening the ground above.

This is why it is commonly used beneath driveways, patios, internal floors, roads and landscaped gardens where excavation would be more disruptive and more expensive to reinstate properly. It is also useful where access is restricted and traditional digging would be difficult.

There is also more than one lining option. A full-length liner can rehabilitate a longer run of pipe, while patch lining can target a specific defect over a shorter section. That makes the repair more proportionate to the problem, which is often the most cost-effective route.

When excavation may still be needed

The no-dig label is useful, but it should never be used to oversell what lining can do. Some drainage problems cannot be solved properly from inside the pipe.

If a drain has fully collapsed, has severe displacement at joints, has large voids around it, or has lost its shape to the point where a liner cannot be installed correctly, excavation may be necessary. The same applies if there is no workable access for cleaning, surveying and installation, or if the pipe material and condition make lining unsuitable.

There are also cases where lining could technically be installed, but excavation remains the better long-term repair. For example, if a short section has failed badly in one accessible area, digging out and replacing that section may be more sensible than lining a longer run. Good drainage contractors will explain that trade-off clearly rather than pushing one method for every job.

How contractors decide whether to dig or not

The decision starts with condition, not assumption. A proper CCTV survey shows whether the pipe is cracked, displaced, deformed, blocked by roots or partially collapsed. It also confirms the pipe diameter, length of defect and any bends or junctions that could affect installation.

Before lining, the drain usually needs high-pressure water jetting or mechanical cleaning to remove silt, scale, grease and roots. Once the pipe is clean, the survey footage gives a much more accurate picture of whether a liner will bond and cure properly.

At that point, the contractor can advise whether the repair is suitable for patch lining, full lining or excavation. For domestic customers, that means a clearer quote and less guesswork. For landlords and facilities teams, it means a repair recommendation that can be justified on condition and lifespan, not just speed.

What the drain lining process actually involves

Where lining is suitable, the process is relatively controlled. After cleaning and surveying, a resin-impregnated liner is inserted into the affected section of drain. This is positioned in place and expanded against the inner pipe wall, often using air or water pressure depending on the system being used.

The liner is then left to cure, forming a hard-wearing new internal surface. Once cured, the contractor will usually carry out a further CCTV inspection to confirm that the liner is correctly installed, the flow path is restored and any connections are reopened if required.

From the customer side, the main benefit is simple: the repair happens within the pipe, so the surface above often stays untouched. That is why trenchless methods are so popular for properties where reinstatement would otherwise be a major part of the cost.

The trade-off with no-dig drain lining

Avoiding excavation is a major advantage, but it helps to understand the trade-off. Because lining creates a new pipe within the old one, there is a small reduction in internal diameter. In most properly specified domestic drainage repairs, that reduction is not a practical issue, but it still needs to be considered.

Lining also relies on the existing pipe retaining enough integrity to act as a host. If the old drain is too badly damaged, lining will not correct the underlying structural failure. In those cases, excavation is not a setback. It is simply the correct repair method.

This is where experience matters. The cheapest initial option is not always the best value if it stores up future problems. A sound contractor will look at the defect, the location, access, reinstatement costs and expected lifespan before recommending the method.

Why homeowners often prefer lining

For many domestic properties, the appeal is obvious. If the drain runs under a block-paved drive, mature garden, conservatory edge or recently finished patio, nobody wants unnecessary excavation. A no-dig repair can reduce mess, shorten the programme and limit the reinstatement work afterwards.

It can also make the overall process feel more manageable. Instead of arranging excavation, spoil removal, replacement pipework and surface repairs, the issue may be dealt with through inspection chambers and specialist equipment. That is often faster and less stressful, especially where drainage issues are already causing disruption inside the property.

Why landlords and commercial clients ask the same question

Landlords, managing agents and facilities teams usually frame the question slightly differently. They still want to know whether drain lining requires excavation, but they are also thinking about access, tenant impact, business continuity and defensible repair choices.

On occupied sites, avoiding excavation can reduce health and safety complications, access restrictions and complaints from residents or users of the building. It can also simplify scheduling where the repair needs to be completed quickly and with minimal disturbance.

That said, commercial decision-makers also need confidence that the repair is appropriate and durable. CCTV evidence, a clear scope of works, and work carried out by specialist drainage contractors with suitable insurance and trenchless capability all matter here.

Choosing the right contractor for a no-dig repair

If you are considering drain lining, the important question is not just whether digging can be avoided. It is whether the contractor has the equipment and experience to assess the pipe properly first.

Look for a specialist contractor that can carry out CCTV surveying, drain cleaning, patch lining and excavated repairs where needed, rather than forcing every job into one method. That gives you a more balanced recommendation. It also means that if part of the line can be repaired without digging and one section cannot, the solution can be tailored accordingly.

For property owners in the North West, Watermains & Drains UK handles both trenchless and traditional drainage repairs, which is often the practical advantage customers need. The aim should always be the least disruptive suitable repair, not disruption for its own sake and not no-dig for the sake of it either.

So, does drain lining require excavation? Usually no, but the honest answer depends on the condition of the drain. A proper survey will tell you quickly whether lining is the clean, cost-effective option or whether a dug repair is the better long-term fix. If you are facing a drainage problem beneath finished surfaces, the best next step is simple: get the line inspected before anyone starts breaking ground.

How to Unblock a Drain Without Damaging Pipes
Blog

How to Unblock a Drain Without Damaging Pipes

A blocked sink or slow-draining gully can turn into a much bigger job when the first reaction is to pour in harsh chemicals or force a tool down the pipe. If you need to unblock drain without damaging pipes, the safest approach is usually the simplest one – start gently, work methodically, and know when to stop before a minor blockage becomes a repair.

For homeowners, landlords and property managers, that matters for one reason above all: pipework is rarely the expensive part until it breaks. Once a trap cracks, a joint is disturbed, or an old drain line is damaged, the job can move quickly from routine unblocking to leak investigation, excavation or internal reinstatement. A careful approach protects the system and often gets the drain moving again without unnecessary disruption.

Why drains get blocked in the first place

Most domestic blockages are not caused by one dramatic event. They build up over time. In kitchens, fats, oils, grease and food debris gradually narrow the pipe. In bathrooms, hair, soap residue and scale are the usual problem. Outside, leaves, silt, wipes and tree root ingress can all restrict flow.

The location of the blockage changes what is safe to try. A basin waste blocked with hair near the plughole is very different from a foul drain backing up externally. The first may respond to a simple clean-out. The second may need professional jetting or a CCTV survey to check for a collapsed section, displaced joint or root entry.

That is why guessing can be costly. The right method depends on pipe material, pipe age, where the blockage sits, and whether the issue is a soft build-up or a structural defect.

How to unblock a drain without damaging pipes safely

The best starting point is always the least aggressive option. Before doing anything, check whether the blockage affects one fixture or several. If only one sink is slow, the issue is likely local to that waste pipe. If multiple appliances are backing up, or an outside chamber is full, the blockage may be further down the line.

Hot water is often a sensible first step for kitchen wastes, especially where grease is suspected. It should be hot, not boiling, particularly if you have plastic pipework or older fittings. Boiling water can soften some plastics and may stress old joints. A few controlled pours with a pause in between is safer than flooding the pipe all at once.

If that does not shift it, a plunger is usually the next low-risk option. Used properly, it creates pressure and suction to move a soft blockage without scraping the inside of the pipe. The seal matters more than force. Too much aggression can dislodge weak trap seals or disturb poorly fitted waste connections, so firm and steady is better than frantic.

For basin and shower blockages, removing and cleaning the trap is often more effective than trying to ram the blockage through. Place a bowl or towel underneath, unscrew the trap carefully, and clear out hair, soap residue or kitchen waste by hand. This approach is slower than pouring in chemicals, but it is far kinder to the pipework and lets you see exactly what is causing the restriction.

A basic hand auger or drain snake can help when the blockage is slightly further in, but this is where caution matters. Metal tools can scratch, puncture or snag fragile pipework if used carelessly, especially on older plastic wastes or badly aligned joints. Feed the tool in gently. If you meet resistance, do not force it. Resistance may mean a bend, a fitting, or a defect rather than a removable blockage.

Methods to avoid if you want to protect the pipework

If your priority is to unblock drain without damaging pipes, harsh chemical drain cleaners are usually the first thing to avoid. They promise a quick fix, but they are often the wrong answer for anything beyond a light build-up. They can sit in the pipe if the blockage is complete, generate heat, and make later manual work more hazardous. On older pipework, repeated use is especially unhelpful.

Improvised tools can also create problems. Coat hangers, rigid rods not designed for internal wastes, and pressure washers used without the right hose or control can crack traps, puncture flexible waste pipes, or push a blockage into a more difficult position. It is common to see a simple blockage become a hidden leak after a DIY attempt has damaged a joint behind a kitchen unit or under a floor.

There is also a point where repeated attempts stop being sensible. If water levels rise quickly, foul water backs up, or a toilet is involved, the job needs a different level of care. The longer wastewater sits, the greater the hygiene risk and the more likely it is that the blockage lies in the main run rather than the fixture.

When a blocked drain may be more than a blockage

Not every drainage problem is just debris in the line. Recurring blockages often point to an underlying fault. A drain may be partially collapsed, holding standing water that catches waste. Tree roots may have entered through a defective joint. Scale, displaced pipework or poor installation falls can all produce the same symptom – slow drainage that keeps returning despite repeated clearing.

That is where professional drainage equipment earns its place. High-pressure jetting, used correctly, clears heavy build-up far more effectively than household methods. More importantly, a CCTV drain survey shows whether the line is sound once the blockage is removed. Without that visibility, you may clear the symptom and miss the reason it happened.

For landlords and commercial property managers, this is often the difference between a one-off reactive cost and a recurring maintenance issue. If tenants report repeated backing up, bad odours, or external gullies overflowing, evidence-based diagnosis matters. It supports the right repair decision and helps avoid unnecessary repeat call-outs.

Signs you should stop DIY attempts and call a specialist

A careful DIY approach has its place, but it should have limits. If several drains are affected, if there is sewage backing up, or if an external inspection chamber is surcharging, the problem is unlikely to be at the plughole end. The same applies if the blockage returns quickly after clearing, or if you hear gurgling from multiple fixtures.

Older properties deserve extra caution. Ageing clay drains, legacy pipework and previous patch repairs can be less forgiving than modern installations. Forcing rods or relying on chemicals in that setting can create a repair that did not exist before.

A specialist contractor will usually combine the right clearing method with diagnosis. That may mean jetting, mechanical cleaning, or CCTV inspection, followed by a repair only if one is actually needed. The benefit for the customer is straightforward – faster resolution, less mess, and less chance of turning a blockage into an excavation.

Professional drain unblocking with minimal disruption

For many properties across the North West, the right outcome is not just getting water moving again. It is getting it sorted quickly, cleanly and without unnecessary damage to kitchens, bathrooms, driveways or landscaped areas. That is why modern drainage contractors put as much emphasis on method as they do on speed.

At Watermains & Drains UK, blocked drain work is approached as a specialist service rather than a guess-and-go call-out. That means using suitable equipment, identifying whether the issue is a simple obstruction or something more serious, and recommending the least disruptive fix. Where a defect is found, repair options such as patch lining may resolve the issue without full excavation.

For homeowners, that keeps the problem contained. For landlords and facilities teams, it also provides a clearer basis for maintenance planning, insurance discussions and tenant communication. Accreditation, insurance cover and reliable workmanship matter most when a drainage issue affects more than one person or one area of the property.

A practical approach that saves pipes and money

If you are dealing with a slow waste or minor local blockage, start with safe methods – hot water, a plunger, and trap cleaning before anything more aggressive. Treat chemicals as a last resort rather than a standard fix, and be wary of forcing tools into pipework you cannot see.

The general rule is simple: if the blockage is stubborn, widespread or keeps coming back, the cheapest option is often to stop early and get it assessed properly. Preserving the pipework is usually what saves the money.

A drain does not need brute force. It needs the right method, applied at the right point in the system. When you approach it that way, you are far more likely to clear the blockage and keep the pipe intact.