Your Water Main, Drainage & Trenchless Solution Specialists

Blog

How to Repair Cracked Drainpipe Properly
Blog

How to Repair Cracked Drainpipe Properly

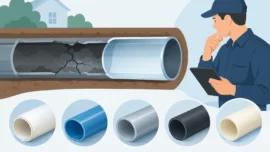
A cracked drainpipe rarely stays a small problem for long. What starts as a damp patch, a bad smell outside, or a slow-draining gully can turn into repeated blockages, leaking wastewater, ground movement, or damage to paving and foundations. If you are looking up how to repair cracked drainpipe issues, the first thing to know is that the right fix depends on where the crack is, what the pipe is made from, and whether the damage is isolated or part of a wider defect.

For some minor above-ground waste pipes, a temporary repair may hold. For buried drainage runs, shared drains, or anything affecting foul water, a proper diagnosis matters more than a quick patch. A repair that looks cheaper on day one can cost more if it fails underground and the area needs reopening.

How to repair cracked drainpipe without making it worse

The biggest mistake property owners make is treating every crack the same way. A hairline split on an exposed plastic waste pipe under a sink is very different from a cracked underground drain serving toilets, kitchens, or rainwater gullies. One may be manageable as a short-term repair. The other may need CCTV inspection, patch lining, or local excavation.

Before touching the pipe, identify whether it is above ground or below ground, and whether it carries foul water or surface water. If sewage is involved, if the area smells strongly, or if wastewater is escaping into the ground, stop using that run as much as possible until it is assessed. That reduces further contamination and gives a clearer view of the damage.

It also helps to understand the likely cause. Cracks often happen because of ground movement, root ingress, poor bedding, ageing pitch fibre or clay pipes, impact damage, or a blockage that has placed the line under pressure. If you only repair the visible split and ignore the cause, the problem often returns nearby.

Start by checking the signs around the property

A cracked drainpipe does not always announce itself with visible water. In many cases, the clues are indirect. You may notice recurring blockages in the same fixtures, sinking ground over the drain line, damp soil in dry weather, bad odours near inspection chambers, or staining around an external stack.

For landlords and commercial sites, complaints about smells, slow drainage, or repeated call-outs are often the first warning. If the same line keeps blocking after it has been cleared, there is a fair chance the pipe has cracked, displaced, or partially collapsed.

Where the damage is underground, a CCTV drain survey is normally the quickest way to confirm the location and extent of the crack. That matters because a crack of 100mm in one section is a different job from a line that has several fractures, open joints, and root ingress along several metres.

When a temporary repair is realistic

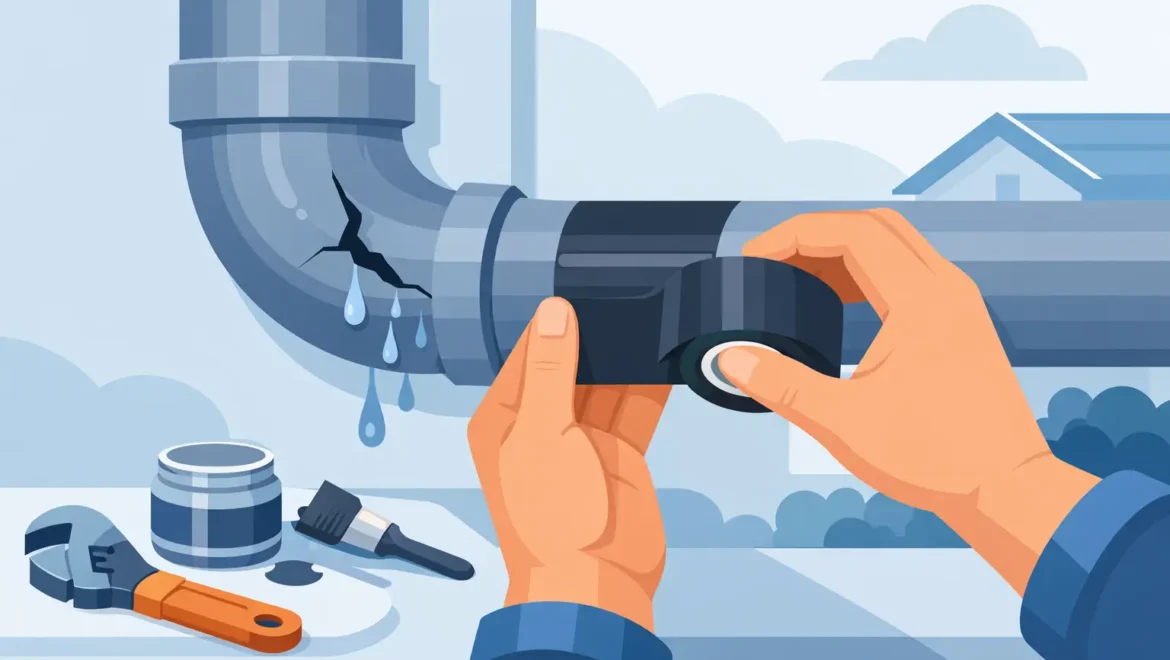
A temporary repair is only suitable in limited situations. If the pipe is exposed, accessible, and structurally sound apart from a small localised crack, you may be able to use a repair bandage, rubber coupling, or specialist seal product to hold the line until a permanent repair is carried out.

This tends to apply to small diameter plastic waste pipes rather than buried drains. The pipe must be clean and dry enough for the repair material to bond or clamp correctly. Even then, it is better viewed as a stop-gap. Temperature changes, movement, and vibration can all shorten the life of a temporary fix.

If the crack is on a cast iron stack or older clay section, patching can be less reliable unless the surrounding material is in good condition. Older pipes often fail because the pipe body itself has deteriorated, not just because one area has split.

How to repair cracked drainpipe permanently

A permanent repair should match the condition of the pipe and the access available. In practice, there are three common routes: local replacement, no-dig patch repair, or full lining or renewal.

Local excavation and replacement

If the crack is confined to a short section and the pipe is easy to reach, excavation and replacement can be the most straightforward option. The damaged length is removed and replaced with new pipework, with joints and bedding installed correctly.

This works well when there is a displaced joint, a broken section, or visible collapse. It also makes sense if the pipe material is obsolete or too degraded to repair reliably. The downside is disruption. If the drain runs under a driveway, patio, extension slab, or landscaped area, digging can add time and reinstatement cost.

No-dig patch lining

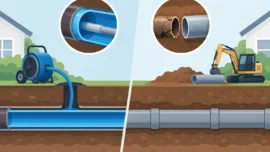
For many underground cracks, patch lining is the least disruptive solution. A resin-impregnated patch is positioned over the damaged area inside the pipe and cured in place, creating a new internal seal.

This method is especially useful for isolated cracks, leaking joints, or minor root ingress where the host pipe is otherwise serviceable. It avoids unnecessary excavation and usually shortens the programme. For homeowners, that often means less mess in gardens and paved areas. For landlords and facilities teams, it means reduced disruption to occupants or site operations.

Patch lining is not suitable for every defect. If the pipe has collapsed, has severe deformation, or has multiple failures over a long run, a patch may not be enough.

Full lining or renewal

Where cracking is widespread, a more comprehensive repair is often the better investment. Full lining creates a continuous new pipe within the old one. In other cases, the right answer is full replacement, especially where levels are wrong, capacity is inadequate, or sections have already failed repeatedly.

This is where a proper survey pays for itself. It prevents spending money on repeated local repairs when the line has reached the end of its service life.

Above-ground versus below-ground repairs

Above-ground cracked drainpipes are generally easier and cheaper to deal with. If the damage is on an external soil stack or branch connection, the section can often be cut out and replaced with matching fittings. Access equipment may be needed for higher levels, and joints must be installed carefully to avoid future leaks.

Below ground, the approach changes. You are dealing with buried infrastructure, possible contamination, and the risk of hidden defects nearby. What looks like one crack from the surface can actually be a symptom of a larger issue in the run. That is why professional repair methods are normally the safer route for underground drainage.

When not to attempt a DIY repair

There are times when attempting your own repair is likely to waste time and increase cost. If sewage is backing up, if the pipe is under a driveway or building, if the drain is shared, or if you suspect subsidence or root damage, specialist attendance is the right call.

The same applies where compliance, insurance, or tenant safety is involved. Commercial properties, rented homes, and managed sites need repairs that are documented properly and carried out by a contractor who can diagnose the fault, complete the work cleanly, and provide confidence that the defect has actually been resolved.

A professional contractor can also advise whether excavation is necessary or whether a no-dig method will achieve the same result with less disruption. That decision alone can make a significant difference to total project cost.

The real cost of delaying a cracked drainpipe repair

Pipe cracks tend to deteriorate, not stabilise. Water escaping into the surrounding ground can wash away support and create voids. Roots are attracted to moisture and can widen even a small defect. Repeated leakage also increases the chance of odours, vermin activity, and localised surface damage.

For landlords, delay can mean tenant complaints and repeat maintenance costs. For homeowners, it can mean a repair that would have been a simple patch line becoming an excavation under hardstanding. For commercial sites, it can lead to disruption that affects access, hygiene, or day-to-day operations.

That is why the best repair is not always the cheapest immediate fix. It is the method that resolves the defect properly, with the least overall disruption and the lowest chance of the issue returning.

Choosing the right contractor for the job

If you need more than a temporary patch, look for a drainage specialist rather than a general tradesperson. Drainage repairs often require CCTV diagnostics, no-dig capability, safe excavation practices, and proper reinstatement. Those skills matter when the pipe serves critical parts of the property or runs beneath finished surfaces.

For customers across the North West, Watermains & Drains UK approaches cracked drainpipe repairs with that practical focus – diagnose the fault properly, recommend the least disruptive solution that will last, and complete the job with clear communication and tidy reinstatement. That is particularly important when time, access, or surface finishes are a concern.

If you are weighing up whether to patch, line, or replace a cracked drainpipe, the right starting point is not guesswork. It is a clear view of the defect, the condition of the surrounding run, and the method most likely to solve it first time. A clean, durable repair is always easier to live with than a cheap fix that fails under the ground a few weeks later.

If a drain has cracked, the most helpful step is usually the simplest one – get it assessed early, before a manageable repair turns into a larger excavation.
Water Pipe Repair vs Replacement: Which Wins?
Blog

Water Pipe Repair vs Replacement: Which Wins?

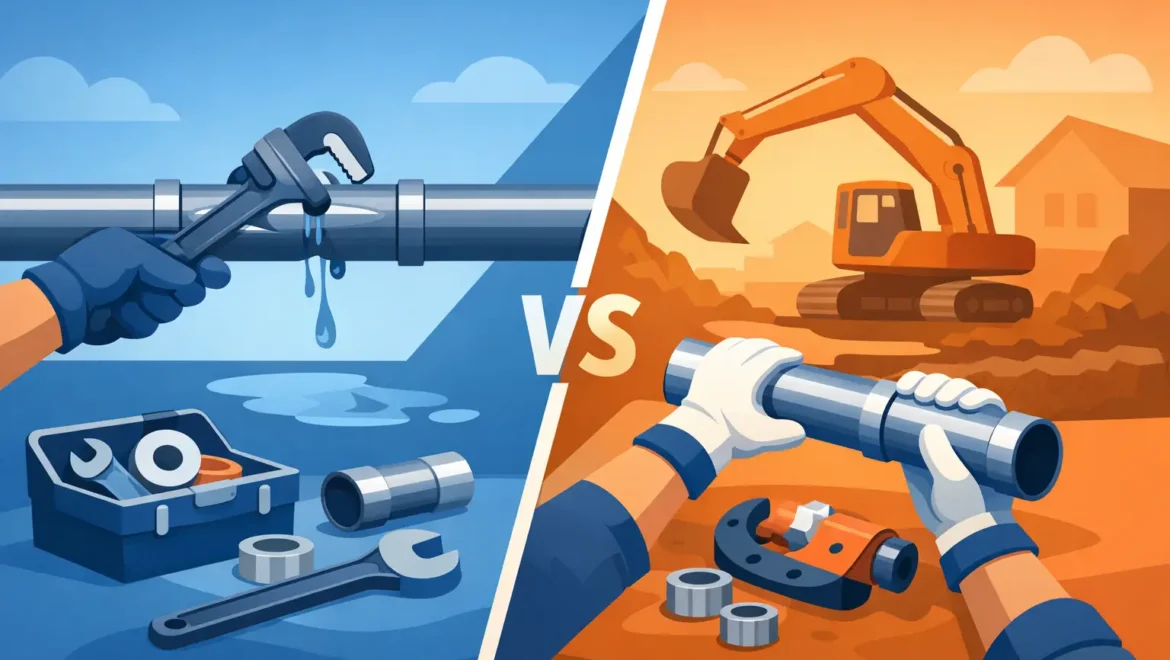
A damp patch on the drive, a drop in water pressure, or a higher-than-usual bill usually leads to the same question: water pipe repair vs replacement – which is the better decision? For most property owners, the real concern is not just cost. It is how quickly the problem can be sorted, how much disruption it will cause, and whether the same fault will return six months later.

That is where a practical assessment matters. A small, localised defect can often be repaired successfully. But if the pipe is old, made from poor or outdated materials, or showing signs of wider deterioration, replacement is often the more cost-effective answer over time.

Water pipe repair vs replacement: what changes the decision?

There is no single rule that fits every property. The right option depends on the condition of the existing pipe, where the damage sits, how accessible it is, and whether the fault looks isolated or part of a bigger problem.

If a pipe has suffered one clean break caused by ground movement or accidental damage, a repair can make sense. The damaged section is identified, exposed and replaced or patched, and the rest of the line remains in service. This is often suitable where the pipe material is still in decent condition and there is no evidence of repeated leaks.

Replacement becomes more likely when the issue is not one fault but a pattern. Older supply pipes can corrode internally, crack along weak points, or suffer from poor flow because the bore has narrowed over time. In those cases, fixing one point may only delay the next call-out.

For landlords and commercial property managers, reliability is usually the deciding factor. A lower upfront repair bill can look attractive, but repeated failures create tenant disruption, access problems and added administration. A planned replacement can remove that cycle.

When a repair is usually the sensible choice

A repair is often the right route when the problem is clearly localised and the pipe still has useful life left in it. That tends to apply where the leak has been caught early and the surrounding pipework is structurally sound.

For example, if leak detection shows a single damaged section under a garden area with straightforward access, repair work can be fast and cost effective. The same applies where a relatively modern plastic supply pipe has been damaged by external pressure rather than age-related wear.

Repairs can also be suitable where budgets are tight and the pipe is otherwise performing well. That said, any short-term fix should still be honest about the risk. If the contractor suspects broader weakness, that should be made clear from the start.

A proper repair should not mean guesswork. It should start with accurate fault finding, followed by a method that restores the pipe properly rather than simply masking the issue.

Signs a repair may be enough

A repair is more likely to be worthwhile if the leak is in one identifiable spot, the pipe material is still serviceable, water pressure has generally been good, and there is no history of repeat failures. Accessibility matters too. If the defect can be reached without major excavation or reinstatement, repair becomes more attractive.

When replacement is the better long-term option

Replacement is often the stronger choice when the existing water supply pipe is at or near the end of its service life. This is common with ageing metal pipework, lead supply pipes, and older installations that no longer meet modern expectations for performance or water quality.

Lead pipework is a good example. Even if only one section is leaking, replacement is typically the better answer because the wider pipe still presents an ongoing issue. Homeowners are not only dealing with reliability, but also health concerns and the limitations of an outdated supply line.

Replacement also makes sense where pressure problems have become part of daily life. If a pipe is heavily restricted, undersized, or deteriorated along its length, patching one section will not improve the overall supply. A new pipe can solve the leak issue and improve flow at the same time.

There is also the matter of repeated excavation. If a driveway, patio or landscaped area has already been opened up once, it is worth asking whether repairing part of an old line is really the best use of money. In many cases, installing a new pipe using trenchless methods causes less disruption than people expect and avoids more digging later.

Signs replacement is likely to pay off

Replacement is usually the better investment where there are repeated leaks, the pipe is lead or badly corroded, pressure is poor across the property, or the cost of repair is high relative to the age and condition of the line. It is also worth serious consideration if access for future repairs would be difficult or expensive.

Cost is important, but so is repeat disruption

Most customers start with cost, and that is understandable. A repair is often cheaper at the point of instruction because the work area is smaller and the material cost is lower. But the cheapest first step is not always the lowest overall spend.

If the pipe fails again, you are paying twice – once for the initial repair and again for another investigation, excavation and reinstatement. That can become especially frustrating where the supply pipe runs under finished surfaces such as block paving, resin, tarmac or decorative landscaping.

Replacement has a higher upfront cost, but it often gives better value when it removes recurring faults and reduces future risk. For property managers, that predictability can be more valuable than the difference in initial price.

The right contractor should explain both sides clearly. If a repair is sensible, that should be said. If replacement is more economical over a realistic timeframe, that should be set out plainly as well.

How trenchless methods change water pipe repair vs replacement

One reason some property owners delay replacement is fear of disruption. They picture long trenches across the front garden or a drive being broken out from end to end. In some cases, traditional excavation is still needed. But modern trenchless installation has changed what is possible.

Using no-dig methods such as moling, a new water supply pipe can often be installed with minimal surface disturbance. Instead of opening a full trench, the contractor creates small launch and receive pits and installs the pipe underground. For many homes, that means less mess, quicker completion and simpler reinstatement.

This matters because the disruption gap between repair and replacement is not always as wide as people think. If a replacement can be completed cleanly and efficiently, the long-term benefits become easier to justify.

For sites with paving, gardens, access routes or busy occupied buildings, the installation method is often just as important as the repair-or-replace decision itself.

What a proper assessment should include

A decision of this kind should not be based on guesswork or a rough look at the surface. A sound assessment should consider the age and material of the pipe, the exact location of the leak, the depth and route of the line, the condition of surrounding ground, and the likely cost of reinstatement.

It should also consider performance, not just damage. If the property has poor pressure, unreliable supply or known lead pipework, those points matter even if the immediate problem appears to be one leak.

For commercial sites and managed property, the assessment should go further and account for access arrangements, tenant or operational disruption, and any compliance or documentation requirements. A specialist contractor should be able to set out a clear recommendation, a method of work and realistic timescales.

This is where using a contractor with water industry approvals and practical installation experience makes a difference. Watermains & Drains UK carries out both repair-led and full replacement work, including trenchless installations, so the recommendation can be based on what suits the site rather than a one-size-fits-all approach.

The better question is not cheapest today – it is what solves the problem properly

If the pipe is relatively modern and the damage is isolated, repair can be the right call. If the line is old, unreliable, lead, or failing in more than one way, replacement is usually the smarter choice. The best outcome is the one that restores a dependable water supply without leaving you facing the same issue again after more expense and disruption.

If you are weighing up the options, the most useful next step is a proper site-specific assessment. A clear recommendation, backed by experience and a low-disruption method, will usually tell you very quickly whether a targeted repair is enough or whether it is time to replace the pipe and move on with confidence.

How to Unblock Outside Drain Safely
Blog

How to Unblock Outside Drain Safely

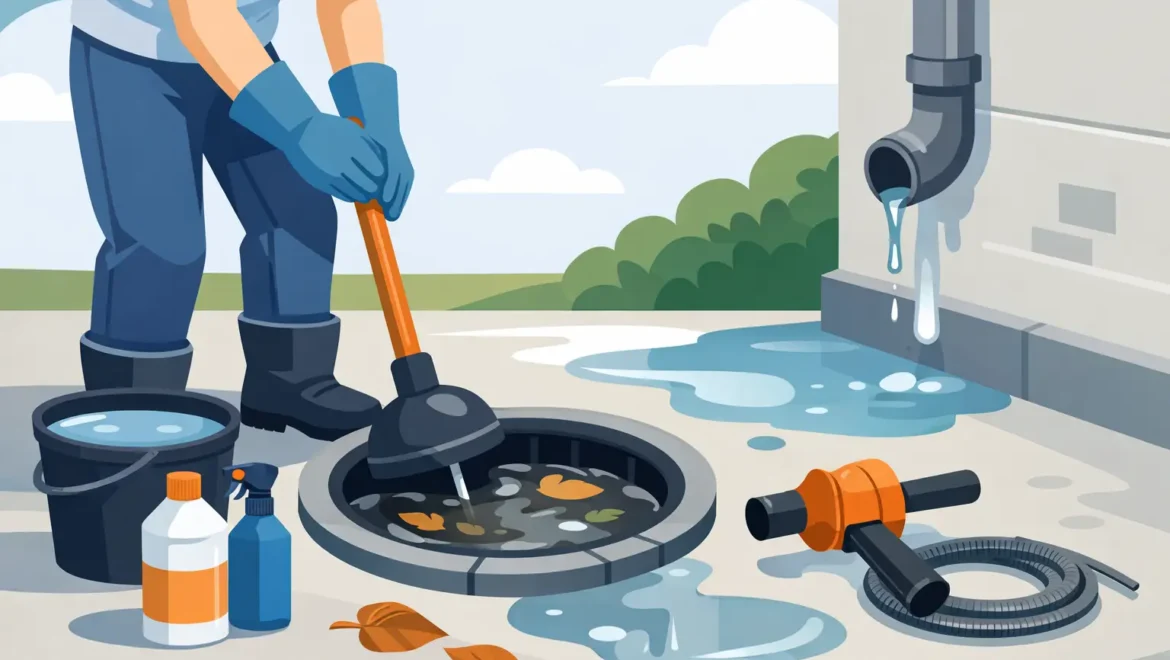
A blocked gully or inspection chamber usually makes itself known at the worst possible time – after heavy rain, during a busy morning, or just before tenants call to report foul smells. If you are wondering how to unblock outside drain problems safely, the first job is not force. It is working out where the blockage is, how severe it is, and whether you can clear it without making the situation worse.

Outside drains can block for simple reasons such as leaves, silt and food waste, but they can also be affected by grease build-up, collapsed pipework or tree root ingress. That matters because the right response for a surface blockage is very different from the right response for a damaged drain line. A careful approach can save time, avoid mess, and reduce the risk of flooding around the property.

Before you unblock an outside drain

Start by checking whether the problem is isolated to one outside drain or affecting several points. If your kitchen sink is slow, the downstairs loo is backing up, and the external chamber is full of standing water, the blockage is likely further along the drainage run. If only one gully outside is overflowing, debris near the top may be the main issue.

Put on waterproof gloves, sturdy footwear and eye protection. If there is foul water present, avoid direct skin contact and keep children and pets away from the area. Drain covers can be heavy, and some inspection chambers are deeper than they look, so lift covers carefully with suitable tools rather than improvising with screwdrivers or your hands.

If sewage is entering the property, toilets are overflowing, or a chamber is surcharging rapidly, this has moved beyond a simple DIY job. In those cases, a professional drainage contractor is usually the fastest and cleanest option.

How to unblock outside drain step by step

Begin with the most accessible point. Remove leaves, mud, paper and other visible debris from the drain grate or gully. In many domestic properties, the blockage sits just below the cover where waste has collected over time. Use a small shovel or scoop and place waste straight into a heavy-duty bag for disposal.

Next, run water into the drain slowly. A bucket of hot water, not boiling, can help shift soap residue and light grease in gullies connected to kitchen waste. If the water level drops away normally, you may have cleared the problem. If it rises and sits there, the obstruction is probably deeper in the line.

A drain rod is the next sensible step. Feed the rods into the drain gently, turning them clockwise as you go so the joints do not loosen inside the pipe. Do not ram them forward aggressively. If you meet resistance, work the rods back and forth with steady pressure until the blockage starts to break up. Once the water begins to move, keep rodding a little further to make sure you have cleared the full obstruction rather than just punching a small hole through it.

After that, flush the system with plenty of water. This is the part people often skip, and it is why some drains block again a few days later. A proper flush helps carry loosened debris down the line and shows whether the water is now flowing at a normal rate.

Tools that help – and mistakes to avoid

For most homeowners, a pair of gloves, a bucket, a scoop and a basic set of drain rods are enough for first checks. A hose can help with flushing, although high-pressure home washers should be used carefully. Too much pressure in the wrong place can push waste back towards the property or disturb weak joints in older pipework.

Chemical drain cleaners are rarely the best answer outside. They often do very little against silt, wipes, roots or compacted debris, and they can create a hazard for anyone handling the drain afterwards. They also do not tell you why the blockage happened in the first place.

Another common mistake is assuming every outside drain belongs to your property drainage only. Some chambers serve multiple waste lines, and in some layouts surface water and foul drainage run separately. If you are unsure what you are opening or where the run leads, caution is sensible.

Signs the blockage is deeper than it looks

Sometimes the drain clears briefly and then backs up again after a shower, washing machine cycle or spell of rain. That usually points to a restriction further down the pipe. Repeated blockages can also suggest a structural issue rather than a simple build-up of waste.

Watch for bad odours that persist even after clearing the chamber, gullies that empty slowly, or water levels rising in the nearest inspection chamber when appliances discharge. Damp ground, sunken paving or unexplained soft spots near the drainage run can indicate a cracked or collapsed pipe. In older properties across the North West, root ingress and ageing clay drainage are common enough that a recurring blockage should not be dismissed as bad luck.

When not to attempt DIY drain unblocking

There is a point where practical home maintenance becomes false economy. If the rods will not pass, if the chamber is full of sewage, or if you suspect a collapsed drain, forcing the issue can make clean-up harder and repair costs higher. The same applies where the blockage affects a tenanted property, commercial premises, or shared access areas where hygiene and duty of care matter.

Professional drainage contractors can usually identify the cause far more quickly with the right equipment. High-pressure water jetting clears stubborn grease, scale and debris more thoroughly than basic rodding, while a CCTV drain survey shows whether the pipe itself is sound. That matters because clearing the symptom without addressing a displaced joint, root ingress or fracture simply delays the next call-out.

For landlords and facilities teams, there is also the issue of documentation. Where repeated blockages, tenant complaints or insurance queries are involved, a clear record of inspection and remedial work is useful. A specialist contractor is better placed to provide that level of assurance.

Preventing the outside drain from blocking again

Good drainage maintenance is mostly about keeping the wrong materials out of the system. Leaves and moss should be cleared from external gullies regularly, especially in autumn and after storms. In kitchens, fat, oil and grease should never be washed into the drainage line, as they cool and harden surprisingly quickly.

It also helps to keep an eye on how the drain behaves during heavy rain. If surface water consistently ponds around a gully, the issue may be capacity, poor falls, or a partially restricted line rather than a one-off blockage. That is worth addressing early before water starts affecting brickwork, paving or internal floors.

For properties with older drains or a history of recurring issues, periodic inspection can be more cost effective than repeated emergency attendance. A CCTV survey is often the quickest way to confirm whether the system is basically sound or whether patch lining, repair or localised replacement would be the better long-term fix.

Choosing the right contractor if DIY is not enough

If you need help, look for a drainage specialist rather than a general handyman. The difference shows when a simple blockage turns out to be a deeper defect. You want a contractor who can clear the line, inspect it properly, explain the findings in plain English, and if needed carry out repair work with minimal disruption.

For homeowners, that means fast attendance, clear pricing and tidy completion. For landlords and commercial clients, it also means public liability cover, recognised accreditations where relevant, and a method of working that does not leave gardens, driveways or access routes unnecessarily disturbed. Where excavation is needed, modern no-dig repair methods can often reduce mess and shorten the job.

Watermains & Drains UK deals with both emergency drain unblocking and the follow-on work that sometimes sits behind it, from CCTV surveys to repairs, so customers are not left starting again with a second contractor if the problem proves more than a simple blockage.

Outside drains rarely block without a reason. If you clear the immediate issue and the water flows away cleanly, that is a good result. If the same problem keeps coming back, the smartest next step is not more force – it is getting the drain properly checked so the fix lasts.

How to Separate Shared Water Connection Legally
Blog

How to Separate Shared Water Connection Legally

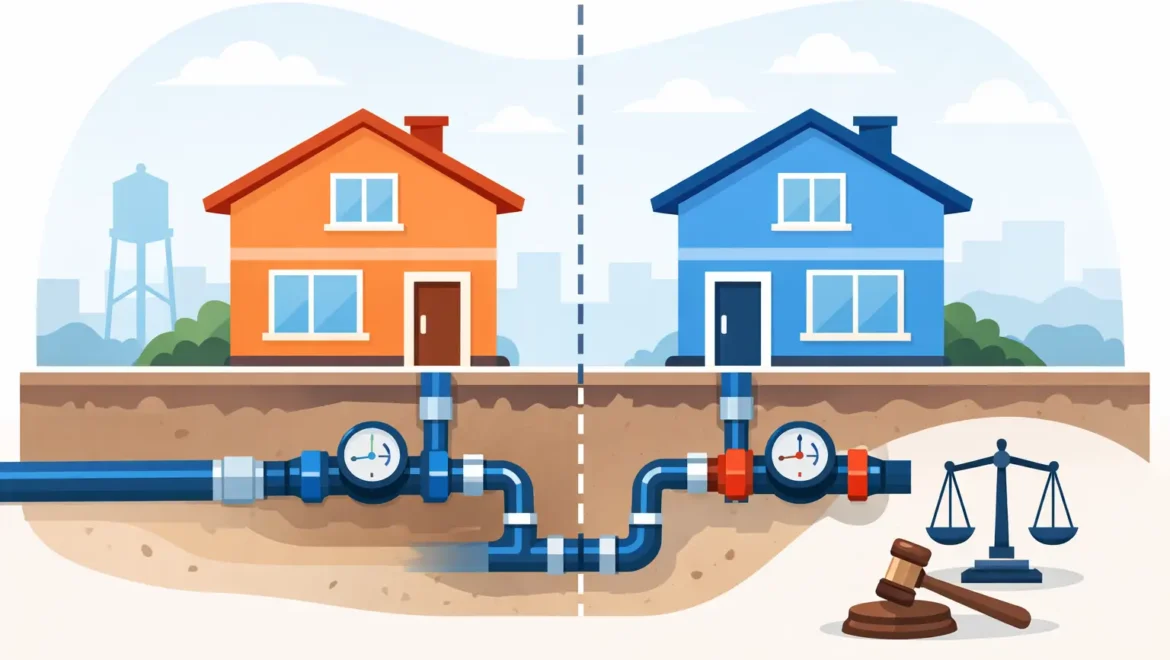
A shared water pipe often works fine until it does not. One leak, one disputed bill, or one renovation can quickly expose how awkward a shared supply really is. If you need to separate shared water connection legally, the right route is not just digging a new pipe – it is making sure ownership, approvals, design and installation all line up with water regulations.

For homeowners, landlords and property managers, the legal side matters because an informal fix can cause bigger problems later. You may struggle when selling, face delays with your water company, or end up paying twice for work that should have been designed properly first time. The good news is that in many cases, separating a shared supply is straightforward when handled by the right specialist.

When a shared water connection becomes a problem

Shared supplies are common in older terraces, converted properties and some commercial premises. In many cases, one communication pipe feeds more than one building, or a single supply arrangement has been altered over time without a full upgrade.

That setup can lead to practical issues. If there is a leak on the shared section, it is not always clear who is responsible. If one property needs a new stop tap, internal alterations or a meter, the shared arrangement can complicate matters. Landlords may also want separate supplies so each tenancy is clearly billed and responsibility is easier to manage.

There is also the question of water quality and pipe condition. Older shared arrangements sometimes involve ageing pipework, including lead supply pipes. Where that is the case, separation is often a good point to upgrade the incoming supply completely rather than patching an outdated system.

What it means to separate shared water connection legally

In simple terms, legal separation means each property has its own compliant water supply arrangement, installed and approved in line with the water company’s requirements and the relevant regulations. It is not just a private agreement between neighbours.

Usually, this involves creating an independent supply pipe from the property to a new or approved point of connection. Depending on the site, that could mean a new connection to the water main, a revised metering arrangement, or changes to the boundary box and internal pipe layout.

The exact process depends on where responsibility starts and ends. In broad terms, the water company is responsible for the public main and certain external assets, while the property owner is responsible for the private supply pipe serving their building. On shared systems, that line can become less obvious, which is why a proper site assessment matters.

Who approves the work?

This is where many property owners get caught out. You cannot usually decide to alter the supply arrangement without involving the local water undertaker. If a new connection is needed, an application will normally be required. If existing pipework is being altered, the work must still comply with the Water Supply (Water Fittings) Regulations and the water company’s standards.

That is why accredited contractors matter. Using a contractor familiar with WIAPS and Watersafe requirements helps avoid common delays such as incorrect pipe sizing, poor routing, non-compliant fittings or failed inspections. For commercial sites and managed properties, this is even more important because there may be method statements, access controls and reinstatement standards to satisfy as well.

If the supply serves more than one legal title, or there are disputes over access and ownership, you may also need legal advice alongside the physical works. A contractor can install the pipe correctly, but neighbour consent, boundary rights and title issues may need a solicitor if they are not already clear.

Before any work starts

The first step is to confirm how the existing supply is arranged. That sounds obvious, but many owners do not know where the shared section runs, whether there is more than one feed, or whether past alterations have created a confusing layout.

A proper survey should establish where the current incoming main enters, where the external stop tap and meter sit, the pipe material, the likely route for a replacement supply and any obstacles such as driveways, trees, extensions or other buried services. If there are signs of leakage or poor pressure, those issues should be factored into the design as well.

It is also worth checking whether the water company offers any support where lead pipe replacement is involved. In some areas, there may be schemes or conditions that affect the project scope. That will not apply in every case, but it is worth exploring before final costs are agreed.

The usual process for legal separation

The process is rarely identical from one property to the next, but the broad sequence is usually similar. First, the site is assessed and the existing supply arrangement is identified. Then the proposed route and connection method are designed around the property layout, the water company’s requirements and the least disruptive installation method.

If a new connection application is needed, that is submitted before works are programmed. Once approved, the private supply pipe can be installed to specification. In many cases, trenchless moling is the cleanest option because it allows a new pipe to be installed beneath gardens, paths and driveways with much less excavation.

After installation, the water company may inspect or make the final connection depending on the type of application and local process. Once completed, each property should have a clear, independent supply arrangement.

Costs and what affects them

There is no single fixed price because the cost depends on the connection type, the distance to the main, ground conditions and surface reinstatement. A straightforward domestic separation with a suitable route can be far more cost effective than owners expect. A more complex site with long pipe runs, difficult access or heavy reinstatement requirements will naturally cost more.

The biggest cost variables are usually excavation or reinstatement, application fees, and whether the work can be completed with no-dig methods rather than open trenching. This is one reason specialist contractors are often the better option. The cheapest quote on paper is not always the cheapest once disruption, delays and remedial work are taken into account.

For landlords and commercial clients, there is also the cost of delay to consider. If tenants are affected, or if business operations depend on the water supply remaining live, planning the work properly is often more valuable than chasing the lowest headline figure.

Can you separate a shared water connection without major digging?

Often, yes. That depends on the route, the depth required and what sits between the property and the connection point. Where conditions allow, trenchless moling can install a new supply pipe with minimal disturbance to paving, lawns and driveways.

That does not remove the need for approvals, but it can make the project much cleaner and faster. For occupied homes, that usually means less mess and less time with access areas blocked off. For commercial and managed sites, it can reduce disruption to car parks, footpaths and day-to-day operations.

Open excavation is still necessary in some cases, particularly where service congestion is high or access is restricted. A good contractor will advise on the most practical method rather than forcing one approach onto every site.

Common issues that delay separation

The most common delay is uncertainty over who owns what. If neighbours share part of the supply and no one can confirm the route or responsibility, the project can stall before any physical work begins. Old plans are not always accurate, and previous repairs may not have been recorded properly.

Another issue is assuming the job only involves private pipework when the water company actually requires a new connection application. That can add time if it is discovered late. Properties with lead pipes, poor pressure, boundary complications or limited access also need more careful planning.

In practice, the smoothest jobs are the ones where the technical survey, paperwork and installation are treated as one coordinated process.

Why specialist installation matters

Water supply separation is not a general groundworks job. It needs the right materials, the correct depth and routing, compliant fittings, pressure awareness and proper liaison with the water authority. It also needs clean reinstatement, because most owners care just as much about the finished surface as the pipe beneath it.

That is why many customers choose a specialist contractor rather than piecing the job together between different trades. A contractor experienced in new water supply pipes, lead replacements and trenchless installation can usually identify the simplest legal route from the start. That reduces risk, shortens timescales and makes quoting clearer.

For homeowners and landlords across the North West, Watermains & Drains UK is typically called in when the issue needs sorting properly rather than patched again. That usually means clear advice, compliant installation and the least disruptive method the site allows.

If you are looking to separate shared water connection legally, the best first step is not to guess – it is to get the supply layout checked properly, confirm what the water company requires, and build the job around a solution that will still make sense years from now.

A Practical Guide to Emergency Drain Callouts
Blog

A Practical Guide to Emergency Drain Callouts

A kitchen sink that will not empty is frustrating. A toilet backing up, foul smells rising from outside drains, or wastewater coming back into the property is a different matter entirely. This guide to emergency drain callouts is for homeowners, landlords and property managers who need to act quickly, protect the property, and understand what happens next.

Drain problems rarely arrive at a convenient time. They interrupt households, affect tenants, create hygiene risks and, in commercial settings, can stop normal operations altogether. The right response is not just about getting the blockage cleared. It is about making the area safe, identifying the cause, and choosing a repair that avoids unnecessary digging, repeat visits and further disruption.

When an emergency drain callout is actually an emergency

Not every slow drain needs an immediate visit, but some situations do. If wastewater is backing up into sinks, showers, gullies or toilets, that usually needs urgent attention. The same applies where there is a risk to health, damage to flooring or walls, or loss of access to essential facilities such as the only toilet in the property.

For landlords and commercial sites, the threshold is often lower because tenant welfare, business continuity and compliance come into play. A partially blocked drain at a tenanted property can quickly turn into an out-of-hours issue if ignored. At retail, hospitality or managed sites, even a localised blockage can affect staff, customers and trading.

There is also a difference between a nuisance and a developing structural problem. Repeated blockages, standing water around inspection chambers, and persistent odours can point to cracked pipework, displaced joints or root ingress rather than a one-off obstruction. In those cases, clearing the line is only part of the answer.

What to do before the engineer arrives

The first priority is limiting damage and keeping people safe. Stop using the affected sinks, toilets or appliances connected to the drainage system if wastewater is not clearing properly. If the problem is isolated to one fixture, avoid using nearby fittings until the source is confirmed, because shared branch lines can cause water to reappear elsewhere.

If there is internal flooding, protect nearby belongings and keep children or pets away from contaminated areas. Where safe to do so, note what is happening. Is the issue affecting one appliance or several? Is water rising in the inspection chamber outside? Did the problem begin after heavy rain, or has it built up over several days? These details help the attending engineer decide whether the likely cause is a local blockage, a downstream obstruction or a defect in the drain itself.

It is usually best not to keep trying chemical drain products, especially if several attempts have already failed. They rarely resolve a serious obstruction and can make conditions unpleasant or unsafe for the operative attending site. DIY rods can help in simple cases, but they also carry a risk of worsening pipe damage if the line has collapsed or joints have opened.

What a guide to emergency drain callouts should tell you about the visit

A proper emergency response should be practical and methodical. The aim is to restore function quickly, but also to find out why the drain failed in the first place. That matters because many repeat callouts happen when the immediate blockage is removed but the underlying defect is left untouched.

On arrival, the engineer will usually ask where the issue started, what facilities are affected, and whether there is any history of previous blockages or repairs. From there, the first checks are often simple but important – inspection chambers, flow levels, signs of surcharging, and whether the obstruction appears local or further along the line.

If the problem is a straightforward blockage caused by wipes, grease, scale build-up or debris, mechanical clearing or high-pressure water jetting may be enough. Jetting is effective because it does more than punch a hole through the blockage. It cleans the pipe wall and helps remove residue that would otherwise allow material to build up again quickly.

Where the symptoms suggest damage to the drain, a CCTV survey may be the next step. This is especially useful after the line has been opened up, because it shows whether roots, fractures, displaced joints or deformed sections are contributing to the issue. For landlords, facilities teams and insurance-related claims, CCTV evidence can also support the repair recommendation with something more concrete than guesswork.

Common causes behind urgent drain callouts

In domestic properties, the usual causes are grease in kitchen lines, wipes and sanitary products in toilets, and general build-up in older pipework. Outside, leaves, silt and root ingress are common, particularly where drains run through established gardens or older boundaries.

In rented and commercial buildings, misuse plays a part, but so does volume. A drain serving several flats, washrooms or food preparation areas is under more strain and tends to reveal weaknesses faster. Heavy use does not always mean the system is badly designed, but it does mean maintenance and early intervention matter more.

Weather can be a factor too. Heavy rainfall can expose defects that have been manageable in dry conditions. A partially collapsed section, for example, may cope with ordinary flow but fail when the system is under additional pressure. That is why some “sudden” emergencies have actually been developing for months.

Clearing the blockage is one job. Preventing the next one is another.

This is where experience matters. A contractor focused only on the fastest fix may get water moving again and leave. Sometimes that is all that is required. Often it is not.

If the drain has been blocked before, if the property is older, or if there are signs of structural failure, a more complete assessment is sensible. The trade-off is straightforward. A basic callout can be the lowest immediate cost, but it may not be the most cost-effective route if the same issue returns in weeks rather than years.

For damaged drains, modern repair methods can make a major difference to cost and disruption. Patch lining and other no-dig approaches can often repair localised defects without excavating driveways, paths or landscaped areas. That is particularly valuable where access is tight or reinstatement would otherwise become the expensive part of the job. Where excavation is genuinely needed, it should be because it is the right method, not the only method the contractor offers.

Choosing the right contractor for emergency drain callouts

In an urgent situation, people understandably want the first available help. Speed matters, but so does competence. Drainage work can move from simple unblocking to investigation, repair and reinstatement very quickly, so it helps to use a specialist contractor with the equipment and approvals to take the job further if needed.

Look for clear communication about response times, likely process and what happens if a blockage turns out to be a damaged pipe. For homeowners, that means straightforward advice and a tidy finish. For landlords and commercial clients, it also means documentation, reliable attendance, and a contractor who understands that disruption to tenants or operations has a cost of its own.

Insurance cover, recognised accreditations and workmanship guarantees are not small details. They are part of risk management. If a repair is needed, you want confidence that the method used is appropriate, compliant and built to last. This is one reason many customers prefer specialist civil and drainage contractors over general plumbing callout services for anything beyond the most basic internal blockage.

How to reduce the chances of another emergency

There is no way to remove all risk, particularly in ageing drainage systems, but prevention is usually cheaper than repeat emergency attendance. Households should avoid flushing wipes, fats and food waste that solidifies in pipework. Landlords and facilities teams should take recurring reports seriously, even if they seem minor. A pattern of slow drainage, smells or intermittent gurgling often means the system is warning you before it fails properly.

Properties with a known history of drainage issues may benefit from planned CCTV inspection or maintenance jetting, especially before high-demand periods or where there are trees close to the line. That is not necessary for every building. It depends on age, usage, previous repairs and how disruptive a failure would be if it happened tomorrow rather than next month.

For customers across the North West, that practical, problem-first approach is what matters most. Watermains & Drains UK works as a specialist contractor, not a general trades service, which means the emergency visit can lead directly into survey, no-dig repair or full reinstatement where required, with minimal disruption to the property.

An emergency drain callout is always easier to handle when the response is calm, informed and geared towards a lasting fix. If you know what to expect, ask the right questions and act early when warning signs appear, you give yourself the best chance of turning a messy problem into a straightforward repair.

How to Test for Lead Pipes at Home
Blog

How to Test for Lead Pipes at Home

If your property was built before the 1970s and the incoming water pipe has never been upgraded, there is a fair chance you have already wondered how to test for lead pipes without tearing up the drive or guessing wrong. That is a sensible question. Lead supply pipes are still found in many older homes across the North West, and while not every old pipe is lead, it is worth checking properly rather than relying on age alone.

The good news is that a first check is usually straightforward. The less helpful news is that no single sign gives a complete answer. In practice, you are looking for a combination of visual clues, a simple scratch test, property history, and in some cases a water test or professional inspection.

How to test for lead pipes without guesswork

The first place to check is the incoming water supply pipe where it enters the property. In many houses, that will be under the kitchen sink, near the internal stop tap, in a utility room, cellar, or where the main rises through the floor. If you live in a flat, access can be less obvious, and the supply arrangement may be shared, so the answer can take a little more tracing.

A lead pipe usually looks dull grey rather than bright copper or modern blue plastic. It often feels softer than expected. If you gently scratch the surface with a coin, key, or screwdriver, lead will reveal a shiny silver-coloured metal underneath. Copper will not do that, and plastic obviously will not either. Lead pipes also tend to have swollen-looking joints rather than neat modern fittings.

That said, painted pipework can be misleading. So can pipe sections that have been partly replaced over time. It is quite common to find a newer internal section connected to an older external lead supply outside the property line. That is why a quick look indoors is useful, but not always the full story.

Simple signs your water supply pipe may be lead

Age is one clue. Homes built before 1970 are more likely to have lead supply pipes, especially Victorian and early to mid-20th century properties. If your house has had little infrastructure work done, the chances increase.

The next clue is the pipe material itself. A dull grey pipe that scratches shiny is the classic sign. If it bends slightly when pressed or feels softer than copper, that is another indicator. Some owners also notice old repairs that look wiped or bulged rather than mechanically jointed.

Water appearance and taste are less reliable. Lead in drinking water usually cannot be seen, smelt, or tasted. Clear water does not prove the pipe is safe, and poor-tasting water does not automatically mean lead. If you are only judging by what comes out of the tap, you can easily miss the real issue.

The at-home checks that are worth doing

Start indoors and trace the pipe from the internal stop tap backwards as far as you can. Look for a change in material. You may find copper inside but an older pipe entering through the wall or floor. If there is boxing-in or kitchen units in the way, do not force access or start opening floors unless you know what you are looking at.

If the pipe is exposed, inspect the colour and surface. Lead is typically matte grey and can look slightly uneven. Gently scratch a small hidden area. If it becomes bright and silvery, that strongly suggests lead.

Then check any external meter box, if you have one. In some cases, you can see the customer-side pipework there, though not always clearly enough to confirm material. If the route from the boundary to the house is old and there is no record of replacement, that adds weight to your findings.

It also helps to ask your water supplier whether there is any record of lead pipe replacement in the street or at your property. Their records may not tell the whole story, but they can provide useful context.

When a water test makes sense

If you suspect lead but cannot confirm the pipe material, a laboratory water test can help. This is particularly useful where pipes are hidden, shared, or partly replaced. A water sample can show whether lead is present in the drinking water above recommended levels.

The result needs a bit of interpretation. A low reading does not always mean there is no lead pipe, because water chemistry, flow patterns, and how long water has stood in the pipe can affect the sample. A high reading is more clear-cut and usually points to the need for action.

For landlords and commercial property managers, a formal test may also support risk assessment and compliance decisions. If the building houses tenants, staff, children, or vulnerable occupants, relying on assumptions is not a sensible approach.

Why pipe identification and water testing are not the same thing

This is where many people get caught out. Testing the water tells you what is in the water sample taken that day under those conditions. Testing for lead pipes means identifying whether the supply infrastructure itself contains lead.

Those are related, but not identical, questions. You can have a lead pipe and a sample that comes back low. You can also have internal fittings or historical contamination that affects water quality even where most of the pipework has been updated. If your aim is to remove long-term uncertainty, identifying and replacing the lead supply pipe is usually the clearer solution.

How professionals test for lead pipes

A proper inspection goes beyond the visible section under the sink. A specialist contractor will assess the incoming water service, entry point, meter position, likely route to the boundary, and whether there are signs of previous replacement. In some cases, small trial holes may be used to confirm the pipe material outside, especially where the internal section has already been changed.

This is also the point where method matters. If lead replacement is needed, many homeowners worry about trenches across drives, paths, or gardens. Modern trenchless installation often avoids that. Moling allows a new water supply pipe to be installed with minimal excavation, which is usually faster, tidier, and less disruptive than open-cut digging.

For older occupied homes, that practical difference matters as much as the pipe material itself. The right contractor should be able to confirm what is there, explain the replacement route clearly, and quote for reinstatement properly rather than leaving you with a vague allowance and a damaged driveway.

What to do if you find lead pipes

If your checks strongly suggest lead, the sensible next step is to arrange confirmation and a replacement quote. Temporary measures such as flushing taps can reduce exposure in some situations, particularly first thing in the morning or after water has been standing in the pipe. But that is not a long-term fix.

Full replacement of the private supply pipe is usually the best answer. It removes the uncertainty, improves water quality confidence, and often upgrades flow and reliability at the same time. If the pipe is old enough to be lead, it may also be more prone to leaks or poor condition generally.

For some properties, only part of the supply has been renewed. That can still leave a lead section outside or near the boundary. Partial replacement is better than none, but it does not always solve the whole problem. A proper site assessment is the only way to know.

When to get help straight away

If you are buying an older property, planning renovation work, managing rented accommodation, or responsible for a commercial building, it is worth dealing with this early. The same applies if there are children in the property or if you have already identified a grey metallic incoming pipe and want certainty.

This is not a job for guesswork or broad assumptions based on postcode and property age alone. A qualified water supply specialist can confirm the material, advise on the route of the existing service, and explain the least disruptive replacement method if needed. That is the approach taken by Watermains & Drains UK, where the focus is on fast quoting, compliant installation, and tidy reinstatement rather than unnecessary excavation.

If you are working out how to test for lead pipes, the key point is simple. Start with the visible checks, treat mixed evidence cautiously, and do not confuse a quick look with a proper answer. A small amount of investigation now can prevent a much bigger question hanging over the property later.

If there is any doubt, it is better to confirm the pipe and know where you stand than to keep wondering every time you fill a glass from the tap.

Who Owns the Outside Stopcock?
Blog

Who Owns the Outside Stopcock?

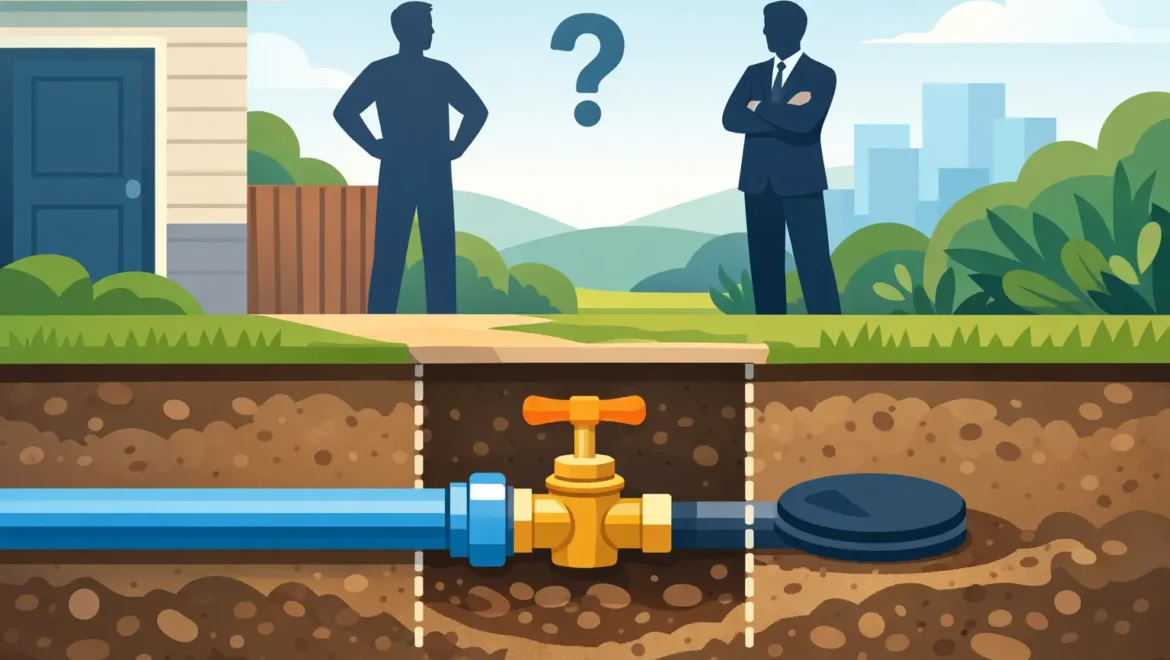
When a leak appears near the boundary or you need to turn the water off in a hurry, one question tends to come up fast – who owns the outside stopcock? It sounds simple, but in practice the answer depends on where the stopcock sits, what type of property you have, and whether it controls only your supply or several properties.

For homeowners and landlords, getting this right matters. It affects who pays for repairs, who is allowed to carry out work, and how quickly the issue can be resolved without unnecessary digging or delay. If the wrong party is called out, the job can stall while responsibility is argued over.

Who owns the outside stopcock in most cases?

In most UK domestic situations, the outside stopcock, often called the external stop tap or boundary stop tap, is part of the water company’s apparatus if it is located in the pavement, footpath or highway and controls the connection from the public water main. That usually means the water company owns and maintains the stopcock itself.

However, that does not automatically mean the water company is responsible for every leak or defect nearby. Ownership of the stopcock and responsibility for the supply pipe are not always the same thing. In many cases, the pipe running from that boundary stopcock into your property is the private supply pipe, and the property owner is responsible for that section.

This is where confusion starts. People often assume that if the chamber lid is outside the house, everything in it belongs to the water company. Sometimes that is true. Sometimes only the valve belongs to them, while the pipework beyond it is privately owned.

The key line is usually the property boundary

As a working rule, the water company is generally responsible for the public water main in the road and often the communication pipe up to the boundary stopcock. The homeowner or landlord is usually responsible for the supply pipe from the boundary into the building.

That said, the exact split can vary depending on the age of the connection, local water company standards and whether the property shares a supply with neighbours. Older properties in particular can have arrangements that do not fit neatly into modern expectations.

If you own a house with a single, dedicated water supply, the outside stopcock may still be owned by the water company, but any repair needed on your private pipe after that point is likely to be your cost. If the issue is a seized lid, damaged chamber or faulty valve body within the water company’s equipment, they may need to attend.

Shared supplies make outside stopcock ownership less clear

Shared water supplies are common on older terraces, converted buildings and some blocks. In these cases, one outside stopcock may control water to more than one property. That changes both the practical and legal position.

If several homes rely on the same valve, no single resident can safely assume full ownership or control. The stopcock may still be the water company’s asset, while the downstream shared pipework may be jointly private. If a repair affects multiple properties, the water company may need to confirm the layout before anyone starts work.

This is also why shared supply problems can take longer to sort out. Before excavation or replacement begins, the contractor needs to establish which section is public, which is private and who must authorise the isolation. On site, that usually means tracing the supply properly rather than guessing from the position of a lid in the pavement.

What if the outside stopcock is inside your boundary?

Not every external stop tap sits in the footpath. Some are located in a driveway, garden, parking area or private access road. If that outside stopcock is within your boundary, ownership can be less straightforward.

In some cases, the valve still belongs to the water company because it serves as the formal point of control between the public network and the private supply. In others, especially where pipework has been altered over time or installed as part of a private development, the chamber and fittings may be privately owned.

This is why location alone does not always settle the matter. A stopcock in your drive is not automatically yours, just as one in the pavement is not automatically your problem if it fails. The best approach is to confirm the asset record with the water company before arranging repairs to the valve itself.

Who pays for repairs?

If the outside stopcock itself is defective and it is the water company’s asset, they would usually be responsible for repairing or replacing it. If the leak is on the private supply pipe after that point, the property owner will usually pay.

For landlords, this normally falls within property maintenance responsibilities because it affects the water supply to the let property. For commercial premises, responsibility depends on the supply arrangement and site ownership, but private pipework on the customer side is generally the owner’s issue.

There are grey areas. A leak near the chamber could be coming from a fitting, the valve, the communication pipe or the private supply pipe. Until the leak is located properly, nobody can say with certainty who should pay. That is one reason proper investigation matters. It avoids unnecessary excavation and reduces the chance of carrying out work in the wrong place.

Can you operate the outside stopcock yourself?

In an emergency, many people try to turn the outside stopcock off themselves. Sometimes that is fine. Sometimes it causes a bigger problem.

Older stop taps can seize, snap or fail to shut off fully. Chambers may also be buried, damaged or flooded. If too much force is used and the spindle breaks, what began as a leak investigation can turn into a more complicated repair involving the water company.

If the stopcock clearly serves your property and can be operated safely, shutting it off may help limit water damage. But if there is any doubt, especially where the valve may control more than one property, it is better to get advice first. Turning off a shared supply can leave neighbours or tenants without water and create avoidable complaints.

How to find out who owns the outside stopcock

The quickest route is usually a combination of records and site knowledge. Your water company may confirm whether the external stop tap is part of its apparatus, particularly if the chamber is in the highway. They may also advise where their responsibility ends.

On older or altered sites, records do not always tell the full story. Pipe routes may have changed, and some shared supplies were never mapped clearly. In those cases, practical investigation is often needed. A specialist contractor can trace the supply, identify the likely responsibility split and advise whether the issue sits with the valve, the chamber or the private pipework.

For customers dealing with a leak, low pressure or a failed shut-off, speed matters. Waiting days while responsibility is disputed rarely helps. A clear diagnosis on the front end usually saves money and disruption later.

Why this matters before any excavation starts

If someone digs without confirming ownership, there is a real risk of wasted cost or compliance issues. Work on the public side of the network may require the water company’s involvement, and repairs to private pipework need to be carried out to the right standard.

This is particularly relevant where reinstatement is sensitive, such as block paving, tarmac drives, landscaped gardens or commercial forecourts. The cheapest-looking option is not always the most cost-effective once making good is included. In many cases, trenchless methods can reduce disruption significantly when a private supply pipe needs replacement beyond the outside stopcock.

That is often the practical issue behind the ownership question. People are not just asking who owns the outside stopcock out of curiosity. They want to know who to call, who pays and how to get the water back on with the least disruption to the property.

When to call a specialist contractor

If the stopcock will not turn, the chamber is damaged, there is visible leakage near the boundary, or you suspect your property has an old or shared supply, it is worth getting specialist input early. The right contractor should be able to distinguish between a water company asset issue and a private supply pipe problem, and recommend the most practical repair method.

For private-side leaks or replacement works, using an accredited contractor matters. Compliance, correct materials and tidy reinstatement all count, particularly if the pipe is being renewed through a drive, footpath or landscaped area. Companies such as Watermains & Drains UK deal with this type of work regularly, including no-dig solutions that avoid unnecessary damage where a full excavation is not the best route.

If you are unsure who owns the outside stopcock, treat it as a diagnosis issue first and a repair issue second. Once the ownership and pipe route are clear, the next step is usually much simpler, faster and cheaper than most property owners expect.

HDD Utility Crossing Project Example Explained
Blog

HDD Utility Crossing Project Example Explained

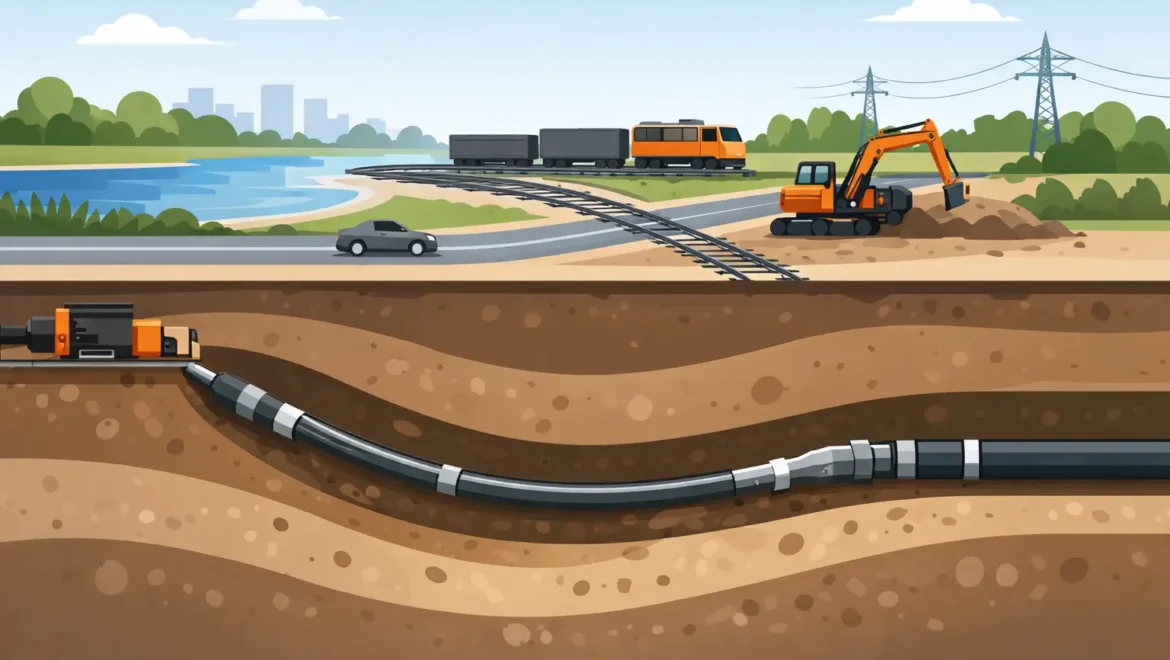
When a new water supply or drainage run needs to pass beneath a road, car park, access route or landscaped area, open-cut excavation is often the option people picture first. In practice, a well-planned HDD utility crossing project example usually shows why trenchless installation is the better fit – less surface damage, fewer traffic issues and a cleaner handover for the property owner or site manager.

For homeowners, landlords and facilities teams, the value is simple. You still need the pipe or duct installed safely and correctly, but you do not want a front drive dug up, a business entrance shut for days, or a freshly finished surface reinstated at extra cost. Horizontal directional drilling, often shortened to HDD, is designed for exactly that sort of crossing.

What an HDD utility crossing project example looks like

A typical project starts with a property or site that needs a new service connection on the far side of an obstacle. That obstacle might be a highway, a private road, a yard, a hardstanding area, a watercourse buffer, or an area where excavation would create unnecessary disruption.

Imagine a commercial unit that needs a new water main from the public supply side of the carriageway into its service yard. Digging across the road would mean permits, traffic management, reinstatement and a longer programme. An HDD crossing allows the contractor to launch from one side, drill beneath the obstruction at the required depth, and install the new pipe with minimal disturbance above ground.

That same approach also suits residential work. If a homeowner needs a replacement supply pipe beneath a driveway, mature garden or access path, trenchless drilling can avoid the cost and mess of opening the entire route.

Why HDD is chosen over open excavation

The main reason is disruption. Excavation-led work can be perfectly suitable on some jobs, but it becomes less attractive when surfaces are expensive to reinstate or when access must be kept open. Block paving, tarmac drives, business forecourts and adopted highways all add cost and complexity once you start breaking ground.

An HDD crossing reduces the footprint of the work to launch and exit pits, along with any connection excavations. That often means a tidier site, a shorter programme and less inconvenience for residents, customers or tenants. It can also reduce exposure to complaints where pedestrian or vehicle access is sensitive.

That said, HDD is not the answer to every crossing. Ground conditions, depth requirements, existing buried services and the size of the product pipe all affect suitability. On some sites, a short open-cut trench may still be the more practical choice. A competent contractor will assess both methods rather than force a trenchless solution where it does not fit.

The planning stage matters most

In most successful HDD projects, the real work starts before the drill rig arrives. A proper site review is what separates a controlled installation from a difficult one.

First, the contractor establishes the route, entry point and exit point. This sounds straightforward, but the line of the drill must account for existing services, required cover levels, connection positions and the bend radius of the drill path. A route that looks direct on paper may not be practical once all constraints are considered.

Service information is then checked. Utility drawings, site records and, where needed, on-site detection all help reduce risk. This is especially important on older properties and developed commercial sites where records are incomplete or services have been altered over time.

Ground conditions also need attention. Clay, mixed ground and made ground all behave differently during drilling. Some soils are favourable; others increase the chance of deviation, collapse or fluid loss. This affects tooling choice, drilling fluid use and the overall method statement.

For a water pipe crossing, product selection matters as well. The installed pipe must suit the application, pressure rating and connection detail. There is no value in a neat trenchless crossing if the pipe material or connection arrangement is wrong for the utility being installed.

A step-by-step HDD utility crossing project example

Take a site where a landlord needs a new 63mm water supply to a building across a busy entrance road. The goal is to avoid closing access and to protect recently laid tarmac.

The job begins with a site survey, route marking and a review of utility records. Trial holes may be used at key points to confirm the position of known services before drilling starts. Once the line is agreed, the team prepares a launch pit on one side and an exit pit on the other.

The pilot bore is then drilled first. This is the guidance stage, where the operative follows the planned alignment beneath the road at the target depth. Accuracy matters here because the pilot path controls everything that follows.

Once the pilot bore breaks through at the exit pit, the route is checked and prepared for enlargement. Depending on the pipe size and ground, the bore may be reamed to create enough space for the product pipe. On smaller jobs, this can be relatively straightforward. On larger crossings or more difficult ground, the process may need more than one pass.

The new pipe is then attached and pulled back through the bore. Pullback must be controlled to avoid damage to the pipe and to maintain the integrity of the installation. After that, the contractor completes the final connections, pressure tests where required, and reinstates the limited excavation areas.

From the client’s point of view, the visible difference is obvious. Instead of a full-width trench through the road or yard, there are only localised work areas and a much cleaner finish.

Risks and trade-offs in HDD crossing work

A realistic HDD utility crossing project example should include the risks, because trenchless work is highly effective but not magic.

The first risk is striking existing services. Good records help, but records alone are never enough. Verification on site is often needed, especially around properties with a long service history.

The second is ground uncertainty. If the material changes unexpectedly, progress can slow and the bore may become harder to control. In some cases, the contractor may need to revise the method or, rarely, stop and reassess the route altogether.

The third is space. HDD rigs, pits and pipe stringing need room. On tight urban plots, the drilling method may still be possible, but logistics become a bigger part of the job. A no-dig solution is not automatically a no-space solution.

There is also a cost trade-off. HDD can save money when reinstatement and disruption costs are high, but for a very short, simple crossing in easy ground, open excavation may come out cheaper. The right method depends on the full picture, not one headline figure.

What property owners and site managers should ask

If you are reviewing a proposed crossing, ask how the route has been checked for existing utilities, what ground conditions are expected, what pipe material is being installed and what reinstatement is included. Those points tell you a lot about whether the quote reflects proper planning or just a headline price.

It is also sensible to ask about approvals, insurance and workmanship cover. For water infrastructure in particular, accreditation-backed contractors offer a clearer level of assurance on compliance and handover standards. That matters whether the work is at a house in Greater Manchester or on a managed commercial site where records and accountability are essential.

A specialist contractor should also be able to explain the practical outcome in plain language. How long will the crossing take? Will access be maintained? What will be visible once the job is complete? Those are the questions most clients really care about.

Why specialist delivery makes the difference

HDD works best when it is treated as a specialist utility installation method, not as an add-on to general groundworks. The equipment is only part of it. Route design, service avoidance, pit positioning, pipe handling and final connections all need to be managed properly for the project to go smoothly.

That is why many clients prefer a contractor that can handle the full scope – survey, trenchless installation, connection and reinstatement – rather than splitting responsibility across several parties. It shortens communication lines and tends to produce a cleaner result on site.

For companies such as Watermains & Drains UK, that approach fits the jobs clients ask for most often: new water supplies, lead pipe replacements, drainage runs and utility crossings where speed and minimal disruption matter just as much as technical compliance.

If you are considering a crossing beneath a road, driveway or hardstanding, the best starting point is not the machine. It is a clear site assessment and an honest view of whether HDD is the right method for that ground, that route and that property.

Water Leak Correlator Review for UK Sites
Blog

Water Leak Correlator Review for UK Sites

A leak under a driveway or access road rarely announces itself clearly. You might see a damp patch, a drop in pressure, or a rising bill, but the pipe itself could be metres away from where the symptoms appear. That is why a proper water leak correlator review matters – not as a gadget test, but as a practical look at whether the equipment can help find the leak quickly, cleanly and with less disruption.

For homeowners, landlords and site managers, the real question is simple. Will a correlator reduce guesswork enough to avoid unnecessary excavation? Sometimes yes, and very effectively. Sometimes no, especially where site conditions are working against it. The value of the tool depends less on marketing claims and more on pipe material, background noise, access points and the experience of the operator.

Water leak correlator review: what the tool actually does

A water leak correlator is an acoustic leak detection instrument. In straightforward terms, sensors are attached to fittings on the same pipe run, often hydrants, valves or stop taps, and they listen for leak noise travelling through the pipe. The unit then compares the time taken for that sound to reach each sensor and estimates the leak position between the two points.

That sounds neat on paper, and on suitable pipework it can be very effective. Long, fairly direct pipe runs with good access at both ends are where correlators tend to show their strength. Metal pipes usually carry leak noise well, which gives the equipment a clearer signal to work with. On external water mains and supply pipes, that can make the difference between a targeted excavation and a trial-and-error dig.

Where people get disappointed is when they expect the correlator to behave like a scanner that simply points to the problem regardless of site conditions. It does not work like that. It is one specialist method within a wider leak detection process.

Where correlators perform well

In a fair water leak correlator review, it is worth saying that the technology has a clear place on the right job. If there is a continuous pressurised leak on a service pipe, and there are usable contact points at each end of a known section, correlation can narrow the search area significantly.

This is especially useful on properties where disruption matters. A buried supply pipe beneath paving, tarmac, landscaped areas or a shared access route is exactly the sort of scenario where you want to avoid broad excavation. If the correlator gives a reliable position, the repair can often be planned with a much smaller opening and a tidier reinstatement.

For commercial sites, schools, retail units and managed properties, the benefit is not just cost. It is operational control. Better pinpointing usually means less downtime, less disturbance to occupants and a cleaner route to repair.

The limitations most reviews gloss over

The weak point in many product-led articles is that they treat all leaks and all pipe systems as though they behave the same way. They do not.

Plastic pipe can be much harder for a correlator to read accurately because leak noise does not always travel as well as it does through metal. Depth also matters. A deeper pipe can reduce signal quality. So can loose ground conditions, low operating pressure and intermittent leaks.

Then there is background noise. Busy roads, plant, pumps and general site activity can interfere with readings. Even in domestic settings, internal stop taps, shared supply arrangements or poor pipe records can complicate what should be a straightforward survey.

None of that means correlators are ineffective. It means they need to be used in the right context, by someone who knows when the reading is trustworthy and when it needs checking against other evidence.

Why operator skill matters as much as the equipment

A correlator in untrained hands can create false confidence. The unit may produce a location, but that does not automatically make it correct. Good leak detection is part equipment, part interpretation.

An experienced specialist will first look at the basics. Is the pipe route confirmed or assumed? Are the contact points definitely on the same pipe section? Is the leak likely to be continuous enough for acoustic correlation? Are there other fittings, branches or changes in material that could affect the result?

That groundwork matters because leak detection is not just about owning modern kit. It is about choosing the right method and building a sensible picture from the site conditions. On some jobs, the correlator gives the lead answer. On others, it is a supporting tool rather than the deciding one.

Correlator versus other leak detection methods

A water leak correlator review is incomplete without comparing it to the alternatives. Acoustic ground listening is often used alongside correlation. Instead of comparing noise between two fixed points, the engineer listens directly above the pipe route to identify where the leak sounds strongest. This can help confirm or refine a correlator result.

Tracer gas can be useful where acoustic methods are less reliable, particularly on some non-metallic pipes or difficult ground conditions. Thermal imaging has a place in certain internal or surface-related situations, though it is not a universal answer for buried external water pipes. Pressure testing also remains important, especially when confirming whether a suspected section is actually losing water.

The best approach is usually combined, not single-method. If one method supports another, confidence in the excavation point increases. That is what clients should be paying for – not a single machine being turned on, but a sensible process that leads to a defensible repair location.

What to look for in a practical water leak correlator review

If you are reading reviews because you need a contractor, not because you plan to buy the equipment, focus less on brand names and more on outcomes. The useful questions are practical ones.

Ask whether the contractor can explain when a correlator is suitable and when it is not. Ask whether they use more than one leak detection method. Ask how they verify the pipe route before recommending excavation. If the leak is under hardstanding, ask what repair options are available afterwards, including trenchless methods where appropriate.

For homeowners, clarity matters more than technical jargon. You should be told what has been found, how reliable the location is, and what level of disruption is likely. For landlords and facilities teams, the expectation is slightly different. You may also want method statements, a clear scope, timescales and assurance that reinstatement will be handled properly.

The real-world benefit: less disruption, not just better tech

The reason correlators matter is not that they are clever. It is that better pinpointing can reduce damage to finished surfaces, shorten repair time and lower overall disruption. That is the outcome most customers care about.

If a leak under a drive can be located within a tight working area, the repair becomes easier to manage. If a commercial forecourt only needs one controlled excavation rather than several exploratory digs, business impact is reduced. If a buried supply pipe can then be repaired or replaced with a modern no-dig approach, the value of accurate detection becomes even clearer.

That practical link between detection and reinstatement is often overlooked. Finding the leak is only one part of the job. The full solution includes access, repair, hygiene, compliance and leaving the site in good order.

When a correlator is the wrong starting point

There are situations where going straight to correlation is not the best use of time. If the pipe route is unknown, access points are poor, or the leak is suspected within internal plumbing rather than the buried incoming supply, a different diagnostic method may be more sensible first.

The same applies where there is obvious surface evidence in a very localised area. A competent engineer may decide that direct confirmation by listening, isolation or exposure is more efficient than setting up a correlation run. Good contractors do not force every problem into the same method. They use the one most likely to give a reliable answer quickly.

A contractor view on the verdict

From a field point of view, the verdict in this water leak correlator review is straightforward. It is a valuable piece of specialist equipment when used on the right pipe, in the right conditions, by the right operator. It can save time, reduce unnecessary digging and improve repair planning. But it is not magic, and it should never be treated as a substitute for experience.

For UK properties, especially where external water supply pipes run beneath gardens, drives, paved areas or commercial yards, correlation remains a strong option within a proper leak detection strategy. The key is choosing a contractor who understands the trade-offs and can move from detection to repair without turning a leak investigation into a larger disruption than the leak itself.

That is the standard we work to at Watermains & Drains UK. If a correlator is the right tool, it should lead to a cleaner, faster job. If it is not, you should be told that plainly and given a practical alternative. The best leak detection work is not about impressive kit. It is about finding the fault, fixing it properly and letting you get on with normal life as quickly as possible.

If you are dealing with a suspected buried leak, the most useful next step is not to chase the newest device. It is to get a clear assessment from a specialist who can match the method to the site.

Drainage Repair Trends UK Property Owners Should Know
Blog

Drainage Repair Trends UK Property Owners Should Know

A blocked drain used to mean one likely outcome – digging, mess and a garden or driveway left needing as much attention as the pipework. That is changing. The latest drainage repair trends UK property owners are seeing are all about finding faults faster, repairing them with less excavation and keeping homes, tenanted properties and commercial sites operational while the work is carried out.

For homeowners, that means less upheaval. For landlords and facilities teams, it means fewer complaints, shorter downtime and a cleaner route to compliance. The common thread is straightforward enough: better diagnostics, more precise repairs and methods that reduce disruption without cutting corners.

Drainage repair trends UK clients are asking for

The biggest shift is away from assumption-led repairs. In the past, drainage faults were often chased by process of elimination. A contractor might clear the line, wait to see if the problem returned, then dig if it did. Today, clients increasingly expect evidence first.

That is why CCTV drain surveys now sit at the centre of many repair decisions. A proper survey shows whether the issue is root ingress, a displaced joint, cracking, scale build-up, collapse or a localised defect. That matters because the right repair for one problem can be the wrong one for another. A recurring blockage caused by wipes and fat needs a different response from a fractured pipe under a driveway.

This move towards diagnosis-led work is especially useful for landlords and commercial sites where repeat call-outs quickly become more expensive than a clear first assessment. It also gives property owners a firmer basis for insurance discussions, maintenance planning and quote comparison.

No-dig methods are becoming the preferred option

One of the clearest drainage repair trends in the UK is the rise of trenchless repair. In practical terms, this means contractors can often repair sections of damaged drain without opening up the full run.

Patch lining is a good example. Where a defect is isolated to a specific section, a resin-impregnated liner can be positioned and cured in place to create a new internal pipe wall. It is quick, cost effective and particularly useful where the drain runs beneath paving, landscaping, extensions or other finished surfaces. If the pipe has failed in several places, full lining may be the better route, but it depends on the pipe condition, diameter and layout.

The appeal is obvious. Less excavation usually means less reinstatement, faster completion and lower disruption to the people using the property. That does not mean no-dig is always the answer. If there is a major collapse, severe deformation or poor access, excavation may still be necessary. A good contractor should say so plainly rather than force a trenchless method where it will not last.

Localised repairs are replacing full-scale replacement where possible

Another important trend is precision. Rather than replacing long sections of drainage as a precaution, many repairs are now targeted far more accurately.

That saves time and money, but it also reduces unnecessary disturbance. If a survey shows one cracked junction or one failed section, there is little value in excavating ten metres of otherwise serviceable pipe. Localised patch repairs, junction sealing and sectional lining can all address specific defects while preserving the rest of the system.

This is particularly relevant on occupied properties. Homeowners do not want their drive excavated for a fault that sits in one short section, and landlords do not want major works if a contained repair will restore performance properly. For facilities teams, targeted repair also helps with budgeting because remedial works can be matched more closely to the actual condition of the asset.

Speed matters more than ever

The technical side of drainage is improving, but customer expectations are changing too. One of the strongest drainage repair trends UK contractors are responding to is the demand for quicker diagnosis, quicker quoting and quicker scheduling.

Urgent drainage issues affect daily life immediately. Toilets backing up, foul smells, overflowing inspection chambers or repeated blockages are not problems people can leave for next month. For commercial premises, the cost of delay can include business interruption, tenant complaints and health concerns.

That is why responsive contractors are increasingly combining reactive attendance with a clear route into repair work. Instead of treating the blockage as one job and the fix as another problem for another week, the better approach is to clear the immediate issue, inspect the line, explain the defect and move straight to a repair recommendation. It is a practical model because it shortens the gap between problem and solution.

Clean reinstatement is now part of the job, not an afterthought

Property owners are also paying closer attention to what happens after the pipe is fixed. A technically sound repair is not enough if the driveway is badly patched or the site is left untidy.

That is one reason trenchless and minimal-dig methods have gained ground, but even where excavation is required, standards around reinstatement are higher. Customers expect paving, tarmac, concrete and landscaped areas to be made good properly. Commercial clients often need work areas left safe, clean and presentable with minimal interruption to staff or visitors.

This might sound like a soft issue, but it affects contractor choice. People remember whether a team turned up when promised, kept the area tidy and finished the site professionally. In drainage work, trust is built just as much by conduct and communication as by the pipe repair itself.

Better evidence is supporting insurance and compliance needs

Drainage repairs used to be seen mainly as reactive maintenance. Increasingly, they are part of a broader documentation and risk-management process.

CCTV footage, condition reports and repair records are useful for homeowners making an insurance case, but they are even more important for landlords, managing agents and facilities teams. If there is a dispute over liability, an ongoing ingress issue or concern about repeated tenant reports, proper evidence makes decision-making much easier.

There is also a compliance benefit. Commercial property stakeholders often need contractors who can provide method statements, sensible scheduling and proof that repairs have been carried out to a professional standard. That is why accreditations, insurance cover and workmanship guarantees are carrying more weight. They reduce risk for the client and give reassurance that the repair will not simply fail again in short order.

Preventative planning is gaining ground

Not every trend is about repair methods. Some of the most useful change is happening earlier, before a drain fully fails.

More landlords and commercial clients are using planned CCTV surveys and maintenance to catch defects before they become emergencies. Homeowners tend to be more reactive, which is understandable, but even they are becoming more aware that repeated slow drainage, gurgling pipework or persistent odours usually point to an underlying defect rather than bad luck.

Preventative work is not always necessary for every domestic property. A house with no history of drainage problems may not need routine surveys. But where there are older drains, tree-heavy surroundings, extensions built over existing runs or recurring blockages, early investigation often saves money. It also helps avoid the worst timing – the bank holiday emergency, the tenant complaint on a Friday night or the drainage failure just before a property sale completes.

What this means when choosing a contractor

These drainage repair trends UK property owners are seeing all point in the same direction: the best outcomes usually come from specialist assessment and the least disruptive effective method, not the most aggressive one.

In practice, that means looking for a contractor who can do more than unblock a drain. They should be able to identify the cause, explain the available repair methods and recommend the one that suits the condition of the pipe and the constraints of the site. Sometimes that will be a no-dig patch repair. Sometimes it will be excavation. The important part is that the recommendation fits the problem.

It also makes sense to check the basics that reduce risk – recognised approvals where relevant, strong insurance cover, clear quoting and a workmanship guarantee. For many clients, especially where access routes, driveways or commercial premises are involved, tidy completion and minimal disruption are just as important as the repair itself.

At Watermains & Drains UK, that practical approach is exactly why modern diagnostics and no-dig methods matter. They help solve drainage faults properly while keeping damage, delay and disruption to a minimum.

If your drains are showing early signs of trouble, the smart move is not to wait for a full failure. A fast inspection and the right repair method can be the difference between a contained job and a much bigger one.